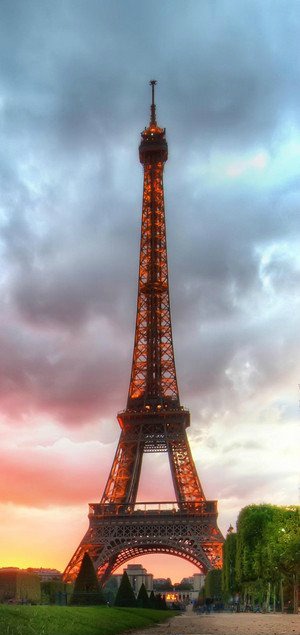
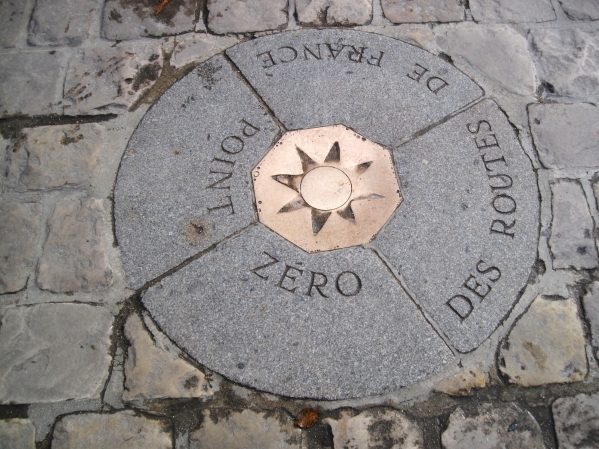
I have never been to Europe and Paris, France is definitely on my travel wish list. I want to explore everything the city has to offer – both touristy and local gems.
Picture from here |
Picture from here |
Picture from here |
I received a copy of Jackie Garvin’s cookbook, Biscuits: Sweet and Savory Southern Recipes for the All-American Kitchen, from Skyhorse Publishing to review. Jackie’s book has me salivating. I absolutely love all kinds of biscuits and she has everything in this book – from traditional Southern Biscuits to Biscuit Doughnuts, Scones, Sandwiches and even Gravy Recipes.
Sausage Gravy is my BFF, but hold the phone, she has a Bacon Tomato Gravy that I cannot wait to try. I am hoping to share a couple recipes with you during this month for NaBloPoMo, but if you can’t wait to see them here, go and grab yourself a copy (or one to gift) – perfect any time of the year, and especially now for Thanksgiving and Christmas celebrations!
Until next time,
LOVE & CONFECTIONS!
Disclaimer: I received a copy of this cookbook for review from Skyhorse Publishing. All opinions are my own. This post contains affiliate links.
Lemon and Blueberry is one of my favorite flavor combinations! I love starting my morning with a Lemon Blueberry Parfait, enjoying a cold glass of Lemon Blueberry Iced Tea for an afternoon treat, or indulging with Lemon Blueberry Crepes for dessert.
I still have a good amount of frozen blueberries from when we went picking earlier in the year. I use them in everything like muffins and pancakes, smoothies, and to flavor water. The weather here is still a bit warm and I cannot wait for the cooler Fall weather to arrive. Until then, I am enjoying some refreshing glasses of infused water on warm days. I also created a Cucumber Mint Water that you should have a look at too!
Lemon Blueberry Water
A Love and Confections original recipe
Lemon Blueberry Water Ingredients:
– 1/2 cup frozen Blueberries
– 1/2 Lemon, sliced plus more for garnish
– Ice
– Water
Lemon Blueberry Water Directions:
1. In 2 tall glasses, divide the Blueberries and Lemon Slices and place them in each glass. Top with Ice and Water. You can drink right away, or store in the refrigerator for a few hours so the flavors meld. enjoy!
Until next time,
LOVE & CONFECTIONS!
I love breakfast parfaits and eat them a lot during Spring and Summer. Some favorites are my Berry Parfait, Cinnamon Apple and Sea Salt Caramel Granola Parfait, and Meyer Lemon & Strawberry Parfait. I received some Nature’s Path Organic Pumpkin Flax Granola and Qi’a Superfood Cereal to try. These two items are definitely great for topping oatmeal and mixing in parfaits, like what I am sharing today.
Farro Breakfast Parfait
A Love and Confection original recipe
Farro Breakfast Parfait Ingredients:
– 1/2 cup Farro
– 1 & 1/2 cup Water
– pinch of Salt
– 2 teaspoons Brown Sugar
– 2 teaspoons Maple Syrup
– 2 tablespoons Qi’a Superfood Cereal, plus more for garnish
– 1/4 cup Pumpkin Flax Granola, plus more for garnish
– Stonyfield Vanilla Green Yogurt
Farro Breakfast Parfait Directions:
1. Place Farro and Water in a medium saucepan. Bring it to a boil, cover and simmer for 20-30 minutes, until cooked through. Drain any extra water, then place in a medium mixing bowl to cool.
2. Into the mixing bowl with Farro, add in the Brown Sugar, Maple Syrup, Qi’a and Pumpkin Flax Granola. Combine, cover with plastic wrap and refrigerate overnight.
3. The next morning, assemble by alternating layers of the Yogurt and the Farro mixture. Top with a garnish of Granola and Qi’a. Enjoy.
* The Farro mixture is enough for a few days of parfaits. You can use it immediately, but I find it easier to make ahead and refrigerate.
Until next time,
LOVE & CONFECTIONS!
Disclaimer: I have an ongoing relationship with Stonyfield as a member of the Clean Plate Club. I receive product, coupons and/or compensation for posts featuring their products. As always, all opinions are my own. #stonyfieldblogger #sponsored.
Tickets for the event can be purchased HERE. Please be sure to get them as soon as possible, if you’d like to attend, because they sell out every year.
Sponsored by Park Square Homes and Dr. Phillips Hospital, the event is Sunday, November 8th from 1:00 pm-4:00 pm at the Dellagio Town Center. Tickets include food, wine, and beer, as well as entry into the silent auction with amazing items to bid on, including gift certificates, hotel stays and theme park admissions. This year’s wine sponsor is Cooper’s Hawk and Orlando Brewing is sponsoring the beer at this year’s event.
The list of 20 local restaurants is amazing. Bravo Cucina Italiana, Rocco’s Tacos, Morton’s The Steakhouse, Maggiano’s, Roy’s Hawaiian Fusion, Vines Grill and Wine Bar, Dragonfly Sushi, Ocean Prime, Anthony’s Coal Fired Pizza, Pammie’s Sammies, Fleming’s Prime Steakhouse, Stefano’s Grill, Whole Foods, Bone Fish, The Whiskey, Dexter’s, Peperoncino Cucina, Big Fin Seafood Kitchen, Fusion 360 Grill & Bar, and The Melting Pot will all be showcasing their delicious creations.
100% of all funds raised from the Taste of Dr. Phillips goes back to the community for the following charities or organizations: A Gift for Teaching, Adopt a Precinct, Arnold Palmer Gold Invitational Tournament, Josh the Otter, Christmas for the Kids, Dr. Phillips High School Projects & Programs, Four Way Test Essay Contest, Give Kids the World, Dr. Phillips Library Author Series, Salvation Army Bell Ringing, YMCA of Dr. Phillips, Wine and Dine on the 9 (API), Birdies BBQ & U (API), and Dr. Phillips Little League.
Until next time,
LOVE & CONFECTIONS!
Disclaimer: I am being provided 2 media tickets in exchange for covering and promoting the event. Photographs from ATasteofDrPhillips.com. This event is for guests 21 years of age or older. Please remember to bring a government issued ID with you to enter this event.
I am patiently waiting for the cool weather to come to Florida. I see pictures from family and friends of changing leaves and apple picking. To get in the Fall mood, my family took #ToddlerLnC to a pumpkin patch at a local sweet corn farm about 30 minutes from our house.
We took her last year and she loved sitting next to the pumpkins. This year, however, she wanted nothing to do with them and wanted to run around and play like a big girl. What a difference a year makes!
My family and I also did the corn maze. Even though it’s mid-October, it is still warm outside, and we were sweating buckets. Good thing Mr. L&C is a great navigator, because we did the maze in just about 45 minutes. The attendant said that it usually takes people 45 minutes – 2 hours to do the maze.
We had a lot of fun and I cannot wait for the weather to cool down. Until then, I’m going to enjoy some cold Homemade Pumpkin Pie Pudding!
Until next time,
LOVE & CONFECTIONS!
I love everything about Halloween; it is my favorite holiday in the Fall. Cooler weather, dressing up, decorating my house, and most importantly, all the delicious baked goods. Every year I center around a theme, whether it be a movie, a book, or a general Halloween color scheme.
This year my decorations have gone a little more glam. I decided to do purple and black as my main colors and focused on spiders and spiderwebs as my overall theme. A while ago, my mom bought me a black metal bowl and some candelabras that are decorated with spiders and look like spiderwebs. In the middle of September, I found some more matching pieces that I fell in love with and decided that spiders and spiderwebs has to be this year’s theme.
I am making a dessert table for Halloween this year filled with all sorts of goodies, and my Dixie Crystals Black Velvet Spider Cake is the centerpiece. I love working around a theme and this year’s might be my favorite so far! Black and purple are great Halloween colors.
While I do you work with fondant occasionally, I tend to use buttercream more often. Black velvet is the perfect cake for Halloween – dark and spooky – and paired with vanilla bean buttercream is incredible.
The icing decorations are my favorite part of the cake. They match my decor perfectly and add a touch of whimsy to the cake. I used a chocolate buttercream and tinted it black, but you could also use royal icing. Working with royal icing is a lot of fun and you can do so many different techniques with it. Intricate string work on cakes, piping and flooding on cookies, glazing or painting designs, and even “glue” for gingerbread houses, are just a few ways to use royal icing – depending on the consistency of the icing.
Black Velvet Cake Ingredients*:
– 2 & 1/2 cups sifted Cake Flour
– 1/2 teaspoon Salt
– 3 tablespoons Dutch-Processed Cocoa Powder
– 1/2 cup Unsalted Butter, room temperature
– 1 & 1/2 cups Dixie Crystals Extra Fine Granulated Sugar
– 2 large Eggs
– 1 teaspoon Vanilla Extract
– 1 cup Buttermilk
– 1 tablespoon Black Gel Food Coloring
– 1 teaspoon Baking Soda
– 1 teaspoon White Distilled Vinegar
Black Velvet Cake Directions:
1. Heat oven to 350F. Butter cake pans and line the bottom with parchment circles. I used 2 8-inch cake pans for the bottom layer as well as 2 6-inch cake pans for the top layer. I also use a cupcake tin for the excess batter.
2. In a medium bowl, sift together the Cake Flour, Salt and Cocoa Powder, then set aside.
3. In the bowl of your stand mixer with the paddle attachment, beat the Butter until soft. Add in the Sugar and beat until the mixture is light and fluffy, about 2 minutes. Add the eggs, one at a time, and incorporate. Scrape down the sides of the bowl. Add in the Vanilla and beat to combine.
4. In a small bowl, whisk together the Buttermilk and Food Coloring. While the mixer is on low, alternate the flour and buttermilk, in 3 additions, starting and ending with the flour mixture. Scrape down the sides of the bowl to insure that everything is incorporated.
5. In a small bowl quickly stir together the Baking Soda and Vinegar. After it starts to fizz, gently fold into the batter.
6. Divide the batter evenly between the baking pans and smooth it out. Bake for 25-30 minutes, depending on your oven, or until a cake tester inserted in the middle comes out clean. Cool the cakes for 10 minutes in their pans, then remove from pans and cool completely on a cooling rack. Once cool, wrap in plastic wrap and store in the refrigerator overnight. Repeat for more layers.
Vanilla Bean Buttercream Ingredients:
– 6 Egg Whites, room temperature
– 2 cups Dixie Crystals Extra Fine Granulated Sugar
– 1 pound Unsalted Butter, slightly cooler than room temperature, cut into slices
– 12 ounces Vegetable Shortening, cut into slices
– 1 teaspoon Vanilla Bean Paste
– 1 pound Dixie Crystals Powdered Sugar
Vanilla Bean Buttercream Directions:
1. Prepare a piece of foil large enough to encompass the bowl of your stand mixer while it is whipping. In the bowl of your stand mixer, combine the Egg Whites and Granulated Sugar and whisk together. Place the bowl over a small pot of simmering water, making sure the bottom of the bowl does not touch the top of the water. Whisk constantly to prevent eggs from curdling.
2. Once the sugar has completely dissolved and the eggs are hot, place on your stand mixer, with the whip attachment, wrap the opening in foil, and turn the mixer on high. Whip until the mixture creates a meringue with stiff peaks. Remove foil and continue whipping until the mixture has cooled to room temperature.
3. Add in the Butter and Shortening, a few pieces at a time. Add in the Vanilla Bean Paste and combine. Scrape down the sides of the bowl to insure that it is completely mixed and whip more if necessary. Place in the refrigerator, covered, until needed. If using immediately, make sure it is pliable but not runny. If necessary, let it refrigerate until a good consistency. If making ahead, let it warm at room temperature and re-whip to make sure it is light and fluffy for frosting.
Assembly and Decorating:
1. If necessary, keep Buttercream in the refrigerator while you cut the cakes into layers. A cake decorating turntable is recommended but not necessary. Start by using a large serrated knife and level off the top of the 8-inch cakes. Cut each cake layer in half, horizontally, to create 4 cake layers. Repeat with 6-inch cakes.
2. Place one of the cake layers on a cake board and spread with a thin layer of frosting. Place another layer on top and continue to frost and stack. Create a thin, even crumb-coating** on the top and sides of the cake and place in the freezer for a minimum 4 hours. Repeat with the 6-inch cakes.
3. Once the crumb-coating is completely dry, apply buttercream on top and sides, making sure your frosting is level and even. Place back in the freezer until hard. Use wooden dowels, cut to size, to support the top layer of cake. Place the top layer over the dowels and freeze until ready to decorate.
4. For spiderwebs, place desired amount of buttercream in the bowl of your stand mixer. Sift in 2-3 tablespoons cocoa powder and 1/2 cup Dixie Crystals Powdered Sugar, and up to 1 teaspoon of black gel food coloring. Use more cocoa powder or gel food coloring, if necessary, to get desired consistency and color.
5. Place buttercream in piping bag, fitted with a #2 round tip. You can use a #3 or #4, but the lines will be larger and not as detailed. Pipe buttercream in a web pattern all over the cake. Affix black spiders onto the cakes with a small amount of buttercream. Alternatively, you can create your own spiders and webs from royal icing or chocolate and attach before serving. Store the cake in the refrigerator until needed. Enjoy!
*The 8-inch layer used 1 Black Velvet Cake recipe. The 6-inch layer used 2/3rd of another Black Velvet Cake recipe. With the extra batter, I made 5 cupcakes.
**Crumb-Coating helps especially when you have dark cakes and lighter frosting, and it helps prevent cake crumbs in your frosting. The thin layer of frosting dries, like a primer, and creates a clean area to frost the buttercream.
Until next time,
With the holidays approaching fast, sometimes a simple and delicious recipe is great to have on hand. Candied Walnuts is just that. It is so easy to make and is a great addition to a lot of dishes. If you use them at your family gathering, everyone is sure to notice the special touch.
I love having fun toppings on salads or desserts and Candied Walnuts are a great choice this time of year. The crunch of the walnut and sweetness of the coating meld perfectly with crisp salad, fresh mix-ins and a zesty dressing. They are also perfect on just about any dessert. From ice cream sundaes to pies and cheesecakes, you really can’t go wrong with Candied Walnuts. You should definitely come back next Tuesday to see what I topped with these Candied Walnuts – so delicious and perfect for the season!
Today I am celebrating a Virtual Surprise Baby Shower for Lauren from Sew You Think You Can Cook. I have worked with Lauren on various events over the past couple years. We both participate in #SundaySupper and #BundtBakers. She has also worked with me on some of my events, like #PiDay and #BrunchWeek. Lauren is a sweetheart and I hope to one day meet her in real life, and not just call her a virtual blogging friend. Congratulations on your new little bundle of joy and best wishes for a speedy and easy delivery!
Candied Walnuts
A Love and Confections original recipe
Click here for a printable recipe
Candied Walnut Ingredients:
– 1 tablespoon salted Butter
– 3/4 cup extra fine Granulated Sugar
– 2 cups Walnut halves and pieces
Candied Walnut Directions:
1. Place a large piece of parchment paper on your counter and have 2 forks ready.
2. In a large, non-stick saucepan, place the Butter and Sugar in the pan, on medium-high heat, and stir together with a heat-proof spatula. Once the butter starts melting, add in the Walnuts. Stir, almost constantly for 5-10 minutes, until the sugar slightly caramelizes and coats all of the walnut pieces.
3. Carefully pour the candied nuts onto the parchment and with the two forks, separate them into individual pieces before they dry completely. You will want individual pieces of nuts and not have them stuck together. Store in an airtight container for up to a week. Enjoy!
Congratulations Lauren!
I would love to visit Asheville, North Carolina. Family and friends have spent time there and it just makes me want to go there even more. Touring the Biltmore Estate and exploring downtown Asheville are at the top of my list. Area wineries, craft breweries, amazing restaurants, and shops are enticing and I cannot wait to be able to travel there!
Photo from Explore Asheville |
Until next time,
LOVE & CONFECTIONS!
Place foil or newspaper on your work surface. Add Mod Podge into your small bowl. Using the paintbrush, paint a thin layer of Mod Podge according to whatever design you would like, and over a paper plate, sprinkle the glitter so it covers the glue completely. Gently shake it off and place the glass upside down to dry. Repeat with the other glasses and let them dry for 1-2 hours. While they are drying, rinse off the paintbrush and replace the excess glitter back into its container.