• Skip to primary navigation
  • Skip to main content
  • Skip to primary sidebar
  • Home
  • About
  • Work With Me
  • Media
  • Recipes

Archives for July 2014

Key Lime Pie Cheesecake

July 30, 2014

Key Lime Pie Cheesecake is the perfect treat for National Cheesecake Day!

Truth-be-told, sometimes I don’t like cheesecake. Some cheesecakes are too sweet or too heavy and just not that flavorful. I am partial to Italian Cheesecake, though, because may Dad and I make it every year for Christmas.

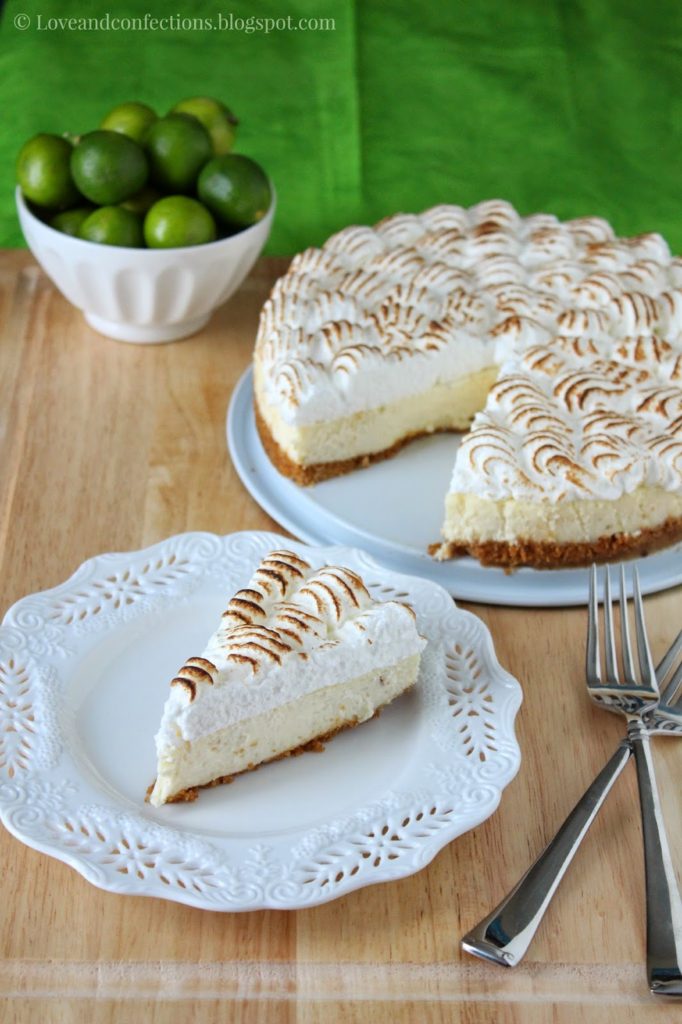
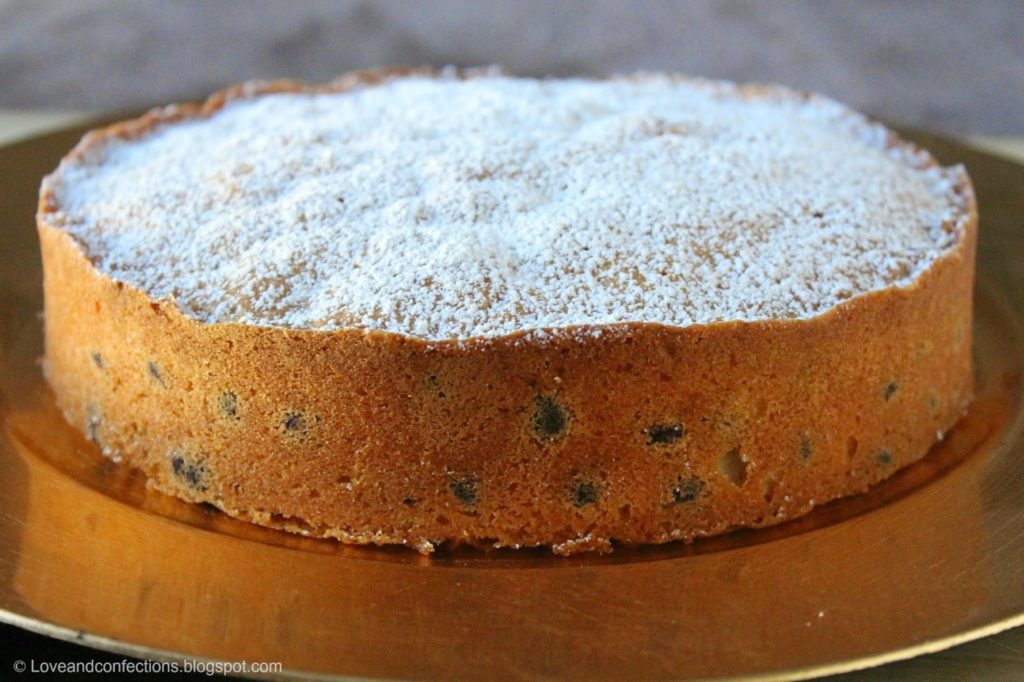
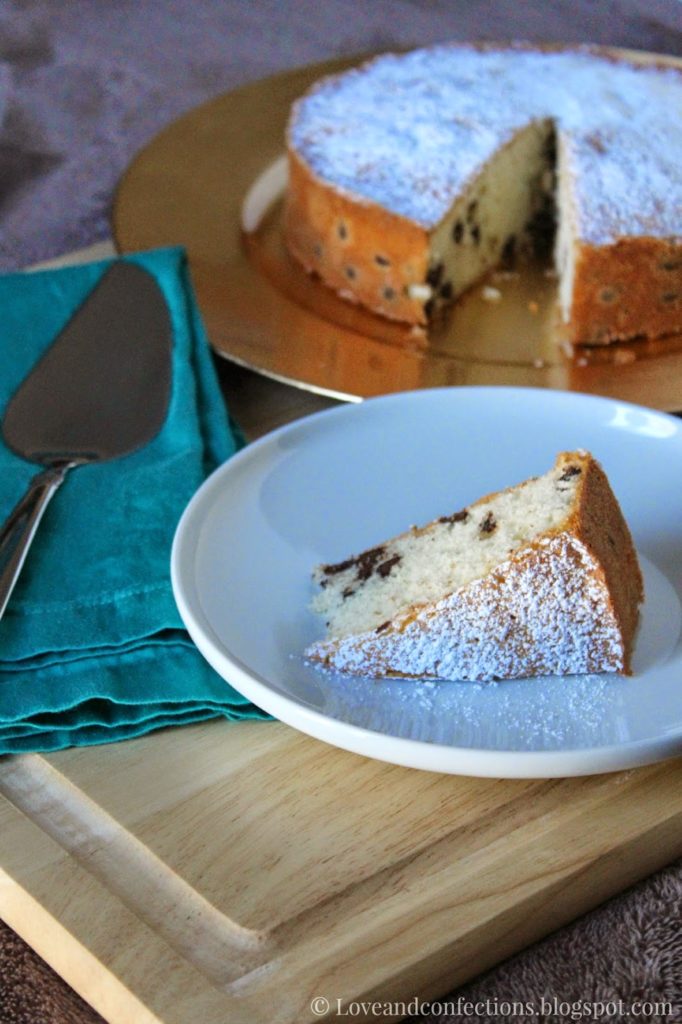
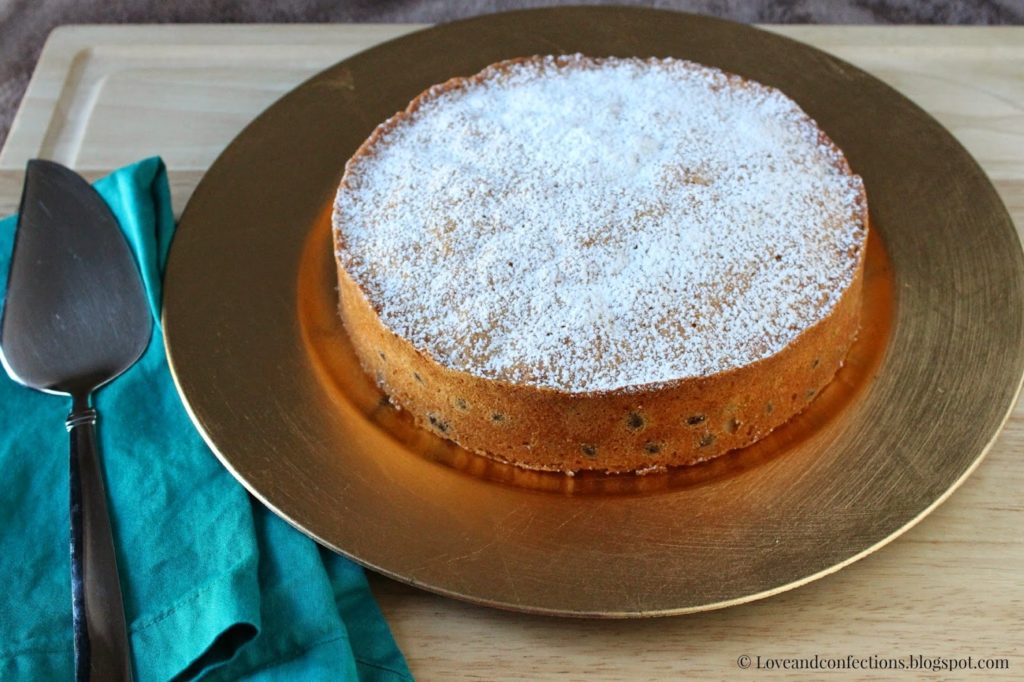
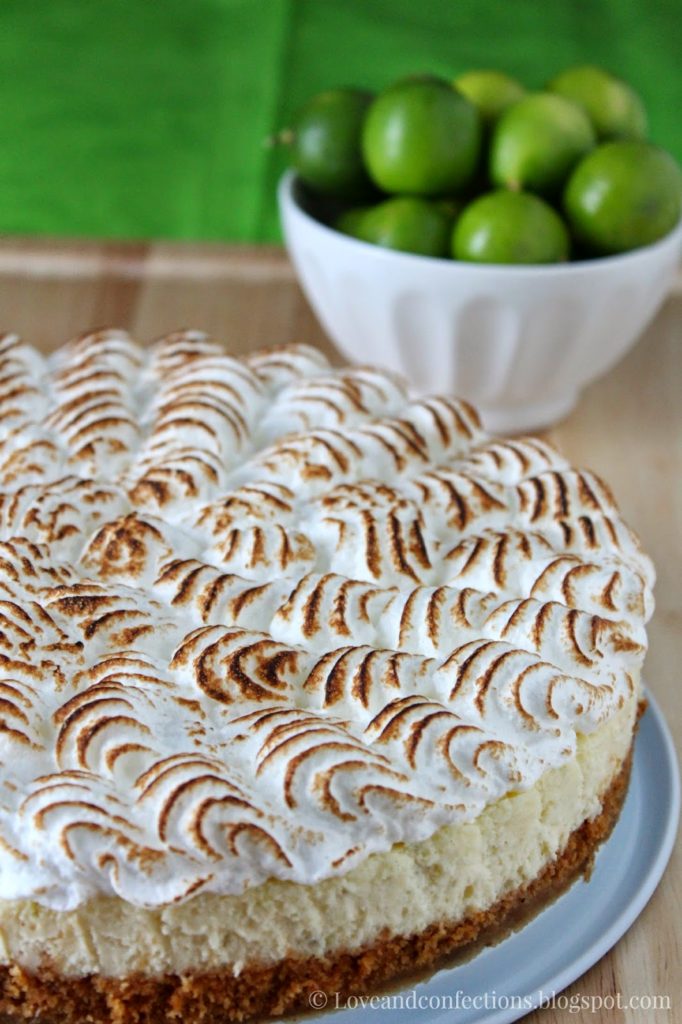
That is definitely not the case with this cheesecake. This Florida girl loves citrus – Key Limes being my favorite – so a Key Lime Pie Cheesecake was undoubtedly the first one I turned to for National Cheesecake Day. I have a love for Key Limes and often make Key Lime Curd, Key Lime Cupcakes and even Key Lime Pie Ice Cream!

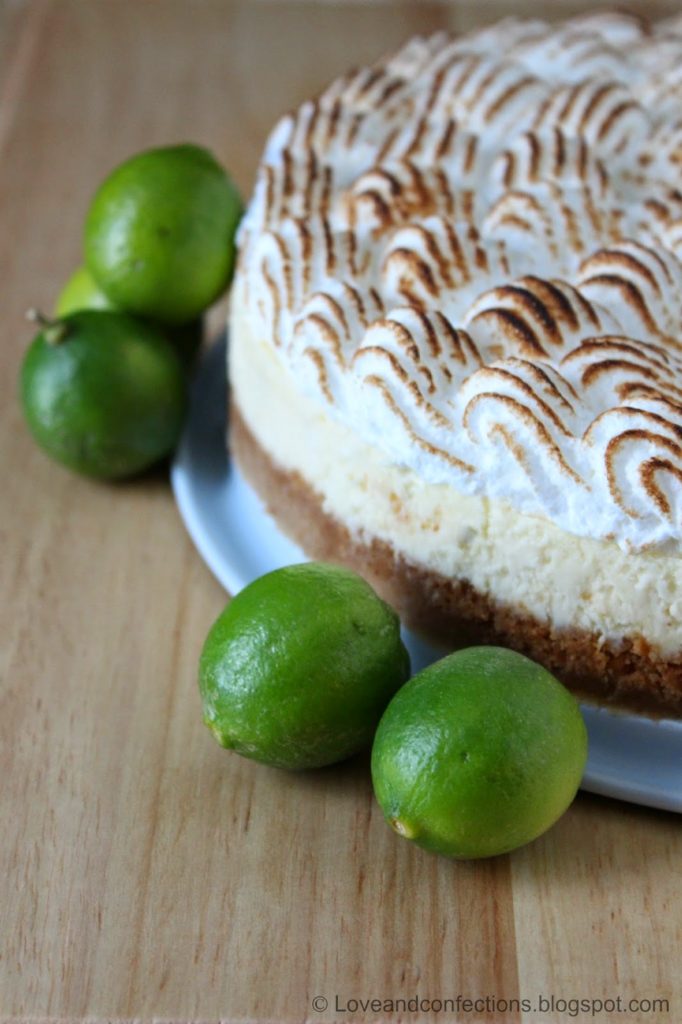
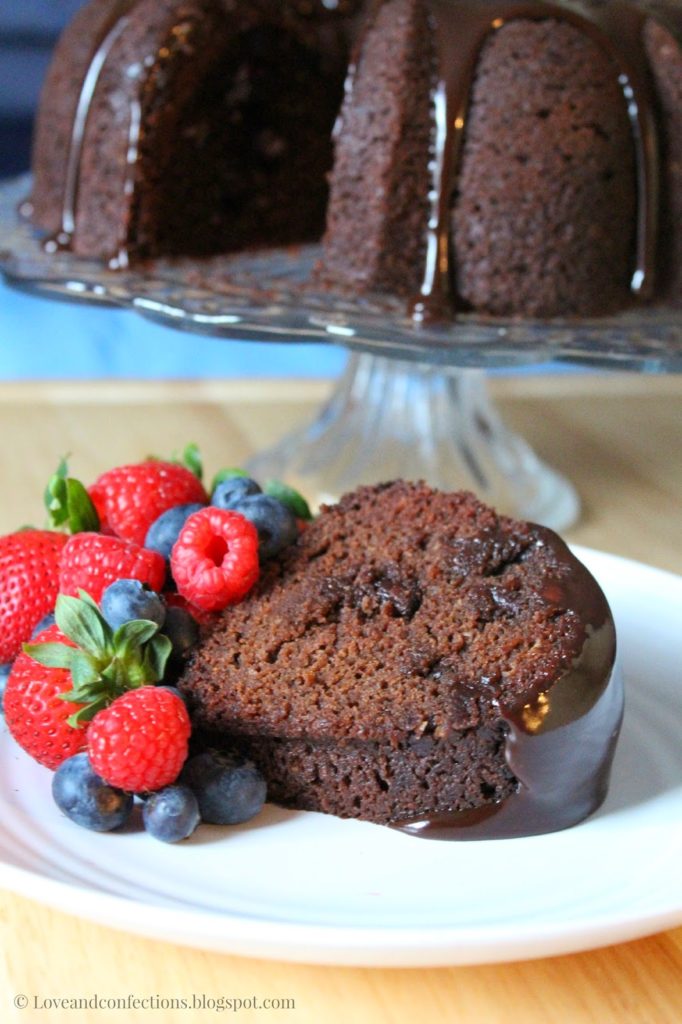
This cheesecake tastes just like a Key Lime Pie, but doesn’t have a drop of sweetened condensed milk in it. I added toasted meringue, but you could easily have whipped cream or leave it plain. For an added flair, you could even top it with toasted coconut.

Key Lime Pie Cheesecake
a Love and Confections original
Click here for the printable recipe

Key Lime Pie Cheesecake Ingredients:
– 115 grams Graham Cracker Crumbs
– 40 grams melted Unsalted Butter
– 45 grams Granulated Sugar
– 445 grams Cream Cheese, at room temperature
– 20 grams Cornstarch
– 125 grams Granulated Sugar
– 150 grams large Eggs, at room temperature
– Zest of 4 Key Limes
– Juice of 4 Key Limes
– 1-2 teaspoons Key Lime Extract, optional
– 50 grams Milk
– 100 grams Heavy Cream
– Hot Water for water bath
– 150 grams Egg Whites
– 150 grams Granulated Sugar

Graham Cracker Crust Directions:
1. Heat oven to 350°F and spray the inside of a 9 inch spring-form pan with cooking spray.
2. In a small bowl, mix the Graham Cracker Crumbs, Butter and first measure of Sugar together. Pour into the pan and smooth out with the back of a large spoon.
3. Bake for 10-12 minutes, then set aside while making the filling.
4. Reduce oven to 300°F.

Key Lime Pie Cheesecake Directions:
1. In a medium bowl with a hand blender or in the bowl of your stand mixer, combine the Cream Cheese and Cornstarch. Add in the second measure of Granulated Sugar and mix until combined. Scrape down the sides of the bowl if necessary.
2. Add in the Eggs, one at a time, making sure it is combined before adding each additional egg. Add the Zest and Juice of 4 Key Limes along with the Key Lime Extract. Mix to incorporate.
3. Being careful not to over mix, add in the Milk and Heavy Cream. You do not want to whip the cream too much.
4. Pour batter into pan and place pan into a large, sided baking dish. Place the baking dish onto the oven rack, then fill with Hot Water, being careful not to get any water inside the foil or the spring-form pan.
5. Bake for 60-70 minutes, or until the sides are set and the middle “jiggles” a little when the pan is touched. Be extremely careful when taking the baking dish out of the oven! I sometimes just take the spring-form pan out to cool and leave the baking dish in to cool before attempting to take it out.
6. Let the Cheesecake cool to room temperature, then cover and refrigerate a minimum of 8 hours, but overnight is preferable. Run a paring knife that had the blade in hot water (and wiped off so it isn’t wet) around the edge of the cheesecake before releasing it, to insure that it separates from the side.
– If you are making meringue or whipped cream for a topping, leave the cheesecake in the refrigerator until those are made.

Swiss Meringue Directions:
1. In the bowl of your stand mixer combine the Egg Whites and third measure of Granulated Sugar. Place it on top of a small pot of water, making sure the water does not touch the bottom of the mixing bowl.
2. Heat the water on medium and whisk the Egg Whites and Sugar until it is warm and the sugar is all dissolved. If you run your finger through the mixture and rub your finger and thumb together, it should feel warm and not feel grainy.
3. Immediately, place the whip attachment on your stand mixer and whip the mixture on high. Place foil around the bowl’s opening – warm eggs whip up better.
4. Once the meringue is whipped to stiff peaks, you can pipe or spread it on the cheesecake and torch the top. Enjoy!

Until next time,
LOVE & CONFECTIONS!

Featured on A Southern Fairytale’s Moutwatering Mondays

Here are all the Bloggers participating in Cheesecake Day:


Baked Cheesecakes:

  • Apricot Ricotta Cheesecake from Diethood
  • Blackberry Goat Cheese Cheesecake from Baking a Moment
  • Blueberry Ricotta Cream Cheesecake from Hungry Couple
  • Caramel Macchiato Cheesecake from Wishes and Dishes
  • Cheesecake Factory Vegan Copycat Oreo Cheesecake from Namely Marly
  • Chocolate Cheesecake w/ Whisky Toffee Shards from girlichef
  • Chocolate Chip Cookie Mini Cheesecakes from My Sweet Zepol
  • Chocolate-Covered Strawberry Cheesecake from Savvy Eats
  • Coconut Cheesecake with Macadamia Crust from All Day I Dream About Food
  • Gluten-Free Mini Cheesecakes with Toasted Coconut Crust from Quarter Life (Crisis) Cuisine
  • Hawaiian Chantilly Layer Cheesecake from Wallflour Girl
  • Key Lime Pie Cheesecake from Love and Confections
  • Lemon Cheesecake from Shugary Sweets
  • Lemon Ginger Panna Cotta Cheesecake + Blueberry Sauce from Girl Versus Dough
  • Lightened Up Apricot-Swirl Cheesecake from Take A Bite Out of Boca
  • Lilikoi Cheesecake with Macadamia Nut Shortbread Crust from Dieter’s Downfall
  • Mini Hawaiian Cheesecakes from Pint Sized Baker
  • Mini Mascarpone Cheesecakes with Strawberry Balsamic Topping from Boulder Locavore
  • Mom’s Cheesecake from Magnolia Days
  • New York Style Cheesecake from URBAN BAKES
  • Oreo Ripple Cheesecake from Overtime Cook
  • Peanut Butter Cheesecake with Nutella Ganache Topping from The Redhead Baker
  • Pear cheesecake with gingersnap crust from Roxana’s Home Baking
  • Pumpkin Cheesecake from Lady Behind The Curtain
  • Rainbow Cheesecake from In Katrina’s Kitchen
  • Raspberry Cheesecake with Oreo Crust from Hip Foodie Mom
  • Ricotta Cheesecake with Strawberry Basil Sauce from French Press
  • Salted Caramel Apple Cheesecake from Jane’s Adventures in Dinner
  • Snickers Cheesecake from Life, Love and Sugar
  • Sugar Cookie Cheesecake from Munchkin Munchies
  • Vanilla Bean Cheesecake from Wine & Glue
  • Vegan Mango Coconut Cheesecake from Jessiker Bakes
  • Very Berry Cheesecake from JavaCupcake
  • White Chocolate Cheesecake with Macadamia Nuts and Caramel from Taste and Tell
  • White Chocolate Frangelico Cheesecake from That Skinny Chick Can Bake
  • White Chocolate Raspberry Swirl Cheesecake from Will Cook For Smiles

No Bake Cheesecakes:

  • Butter Pecan Caramel No-Bake Mini Cheesecakes from Simply Southern Baking
  • Cherry and Pistachio No Bake Cheesecake with Animal Cracker Crust from Cravings of a Lunatic
  • Mini No Bake Lime Cheesecakes from Miss in the Kitchen
  • Neapolitan No Bake Cheesecake from Grandbaby Cakes
  • No-Bake Berry Cheesecake from Food Lust People Love
  • No Bake Blackberry Cheesecake from You Made That?
  • No Bake Dulce de Leche Cheesecake with Caramelized Peaches from The Food Charlatan
  • No-Bake Limoncello Cheesecake from Cake Duchess
  • No Bake Oatmeal Chocolate Chip Cookie Dough Cheesecake from White Lights on Wednesday
  • No Bake Peanut Butter Cheesecake from Dinners, Dishes, and Desserts
  • No-Bake Peanut Butter Cheesecake from Crunchy Creamy Sweet
  • S’mores Cheesecake from The Gunny Sack

Cheesecake Beverages:

  • Black Raspberry Cheesecake Milkshake from Blahnik Baker
  • Caramel Cheesecake Martini from Happy Food, Healthy Life

Cheesecake Cookies and Bars:

  • Caramel Apple Cheesecake Bars from Cooking with Jax
  • Caramel Overload Cheesecake Bars from Crumbs and Chaos
  • Cherry Cheesecake Brownies from Inside BruCrew Life
  • Chocolate Brownie Cheesecake Cookies from Lemons for Lulu
  • Chocolate Peanut Butter Cheesecake Bars from Chez CateyLou
  • Healthier Peanut Butter Cheesecake Brownie Bars from Texanerin Baking
  • Lemon Blueberry Cheesecake Bars from Cooking In Stilettos
  • No Bake Coconut Lime Cheesecake Bars from Beyond Frosting
  • No Bake Cookies and Cream Cheesecake Bars from Garnish with Lemon
  • Strawberry Chocolate Ganache Cheesecake Bars from A Kitchen Addiction

Cheesecake Desserts and Treats:

  • Banana Foster No Bake Cheesecake Shooters from Mind Over Batter
  • Chocolate Nutella Cheesecake Cake from gotta get baked
  • Key Lime Cheesecake Trifles from Hoosier Homemade
  • Strawberry Cheesecake Pots from Barbara Bakes
  • Triple Brigadeiro Cheesecake Tart from From Brazil To You

Frozen Cheesecakes and Treats:

  • Blackberry Cheesecake Popsicles from The Girl In The Little Red Kitchen
  • Chocolate Caramel Cheesecake Ice Cream from Chocolate Moosey
  • Frozen PB&C Cheesecake from Noshing With The Nolands
  • No Bake Frozen Peanut Butter Cheesecake {Nutter Butter Crust} from Crazy for Crust

Filed Under: Cheesecakes, Uncategorized

Chocolate Avocado Bundt Cake #BundtBakers

July 17, 2014

Chocolate Avocado Bundt Cake is incredibly moist and absolutely delicious! 
It’s even better when chocolate chips are added and topped with ganache!


Sometimes you get an idea into your head and you just go with it. That is definitely the case with this month’s bundt cake. Our theme this month is stone fruit. I love cherries, peaches, plums and nectarines, but a few other bloggers were already doing some of the ideas I had. I, instead, took a different route – avocado.

I have actually never baked with avocado, but I will definitely keep baking with it in the future! There are no eggs and butter in the cake, so it is easily adaptable for anyone on a specific diet/  The avocado acts like butter, being the fat in the cake. I was skeptical that the avocado flavor would be overly predominant and I actually did not taste it at all. Avocado also makes this cake incredibly moist! I was very surprised at how it turned out and definitely crossed my fingers praying I wouldn’t need to change my recipe and re-bake it the night before.

I made this cake the other night, after Baby L&C went to bed. I totally forgot that I needed the avocado to be extremely smooth and the food processor would have definitely woken her up. Instead I took my KitchenAid 5-Speed Hand Blender and pureed all the wet ingredients together. I was given this KitchenAid Hand Blender to review and I am in love with it. With 5 different speeds and 4 different options on how to blend/puree, this baby does the trick! It even has a whisk and chopper attachment, all in a nifty case. I am definitely grateful that I can put all the pieces away in one place, know where they are at all times, and not have to dig through my “baking drawer” to find something. I have made smoothies, purees, hollandaise and even mashed potatoes with it – the perfect kitchen tool!

Chocolate Avocado Bundt Cake
adapted from Joy the Baker
Click here for the printable recipe

Chocolate Avocado Bundt Cake Ingredients:
– 3 cups All-Purpose Flour
– 6 tablespoons Cocoa Powder
– 1/2 teaspoon Salt
– 2 teaspoons Baking Powder
– 2 teaspoons Baking Soda
– 1/4 cup Vegetable Oil
– 1 cup soft Avocado**
– 2 tablespoons White Vinegar
– 2 teaspoons Vanilla Extract
– 2 cups Water
– 2 cups Granulated Sugar
– 1 cup Semisweet Chocolate Chips
– Ganache or prepared Hot Fudge Sauce (optional)

Chocolate Avocado Bundt Cake Directions:
1. Heat oven to 350°F. Prepare large bundt pan with baking spray.
2. Sift together Flour, Cocoa Powder, Salt, Baking Powder and Baking Soda into a medium bowl.
3. In a food processor or another medium bowl and using a KitchenAid Hand Blender with S-blade attachment, mix together the Vegetable Oil, Avocado, White Vinegar and Vanilla Extract.
4. Add in the Water and Sugar and blend together. Pour the entire wet mixture into the dry mix and whisk until combined and smooth. Stir in the Chocolate Chips with a spatula or spoon
5. Pour the batter into the prepared bundt pan and bake for 40-50 minutes or until the cake springs back and a toothpick inserted into the center comes out clean.
6. Cool in pan for 15 minutes, then turn out onto cake serving plate. This cake is very moist and will most likely stick to whatever surface you put it on and be hard to transfer once completely cool, so its serving plate is best.

**When picking out an avocado to use in this recipe, it needs to be very ripe. I used a Florida Avocado, because it was available to me. One trick to pick out a ripe Florida Avocado is to shake it. If you hear the seed, it is ripe.

Until next time,

LOVE & CONFECTIONS!


BundtBakers

Don’t forget to check out these other fabulous bundt cakes:

  • All-American Chocolate Cherry Pie Cake from Lauren at So You Think You Can Cook
  • Black Forest Bundt Cake with Cherry Ganache Topping from Teri at The Freshman Cook 
  • Cherry Almond Ginger Bundt from Jane at Jane’s Adventures in Dinner 
  • Cherry Carrot & Banana Bundt from Kelly at Passion Kneaded 
  • Cherry Chocolate Chip Bundt Cake from Renee at Magnolia Days 
  • Chocolate Avocado Bundt Cake from Terri at Love and Confections 
  • Cinnamon Peach Bundt Cake from Bea and Mara at I Love Bundts 
  • Peaches n Cream Melba Bundt Cake from Laura at Baking in Pyjamas 
  • Peachy Bundt from Margaret at Tea and Scones 
  • Plum, Chocolate and Orange Bundt Cake by Maria at Box of Stolen Socks 
  • Roasted Cherry Kugelhopf with Cherry Bourbon Glaze by Tux from Brooklyn Homemaker
  • Upside-down Apricot Butter Bundt from Stacy at Food Lust People Love

#BundtBakers is a group of Bundt loving bakers who get together once a month to bake Bundts with a common ingredient or theme.  Follow our Pinterest board right here. Links are also updated each month on the BundtBakers home page. We take turns hosting each month and choosing the theme/ingredient. If you are a food blogger and would like to join us, just send Stacy an email with your blog URL to foodlustpeoplelove@gmail.com.


* I was given the KitchenAid 5-Speed Hand Blender for reviewing purposes. All opinions are my own. I only work with companies I love. There are affiliate links in this post, which means that if you click on it and buy it, I will make a percentage from the sale.

Filed Under: Cakes & Frostings, Uncategorized

OXO Tot #Firstbites Easy Baby Food Recipes and a Giveaway!

July 14, 2014

This post is sponsored by OXO Tot. I also have 2 simple baby food recipes and an amazing GIVEAWAY at the end of the post!

OXO Tot Products

I am so excited about this post. I love working with the OXO company. When I hear they had a campaign for baby first foods I jumped on it. We recently started solid foods for Baby L&C and she has done great so far. If you happen to follow my Instagram Feed, you’ll definitely see tons of picture of her enjoying her food and being all cute!

When it was time to get her a high chair, like any first-time Mom out there, I did a bunch of research. We wanted one that was in our price range – I was not about to pay $400 for a few pieces of snazzy-named wood, no offense to anyone who has that, but it’s just not us. We went back and forth between a few of the big brands, but I also researched OXO Tot. I was pleasantly surprised by the features it had, similar to other high chairs, so it went in the running. Mr. L&C is a “hands on” tester, so we went to our local baby store and played around with them. OXO was my top choice from online research and after looking and trying out a few brands, everyone agreed that it was the perfect high chair for Baby L&C. It doesn’t feel big and bulky, it’s very sturdy, can easily move around our small apartment, and its machine washable!!! Now I just need a few interchangeable covers for when one is in the wash!!

I had fun playing with all the great baby tools in the package from OXO Tot. The food mill takes a bit of time to properly puree food, but I think it is worth it. It’s so nice to have bright colored fruits and veggies, instead of the dull green and beige of most prepared baby food. Don’t get me wrong, I do use prepared baby food, but with the food mill, it’s nice that I prepared it, pureed it and it has no preservatives or anything extra. I also like the small feeding blocks. They are dishwasher safe and easily hold her small amounts of food. The storage tray is great because I don’t have to go digging through the refrigerator for food, I can just pull it out and it’s all in one spot.

Baby L&C isn’t too sure about the bib yet, Since we’re only on small amounts of pureed food, she doesn’t have much spills. When she moves to more advanced food I think it will come in handy more. For right now, it’s a weird plastic thing that can hold her extra spoon.

Speaking of extra spoon, these OXO Tot spoons are great! I have a few different types of spoons, but none that have the silicone like these. The curve of the spoon is different than most, but I think it works well with feeding her the purees and oatmeal. It’s also great that it comes in a 2-pack, because she has a thing about holding a spare spoon while I am trying to feed her. It becomes another dinner time teething toy.

I love the divided feeding dish, especially since it’s microwave safe! I am usually juggling two small bowls and this makes feeding time a lot easier! I am seriously thinking about switching all my spatulas to the OXO silicone spatula. That is a big leap coming from a Pastry Chef. I was once totally in love with those wooden-handled name-brand spatulas, but not any more. Give me a spatula that is heat resistant to 600°F and does not come unattached in the middle of stirring a thick batter and I’m a happy girl.

Pureed Carrots
– Peel and cut organic carrots into small 1/4 inch pieces. Heat enough water to cover the carrots and boil them until soft. Strain and place carrots in the food mill placed over mixing bowl or measuring cup. Make puree, remembering to move the food mill back and forth to clean the top. Use the spatula to scrape the puree off the bottom of the mill every few passes. Portion into OXO Tot Baby Blocks, leaving room if you are freezing. Let it cool to room temperature before placing in the refrigerator or freezer. If using from the freezer, thaw in the refrigerator over night. Be careful when reheating, as it can get hot spots.

Pureed Peas
– Steam organic peas until tender and soft. Strain any water out and place peas in the food mill placed over mixing bowl or measuring cup. Make puree, remembering to move the food mill back and forth to clean the top. Use the spatula to scrape the puree off the bottom of the mill every few passes. Portion into OXO Tot Baby Blocks, leaving room if you are freezing. Let it cool to room temperature before placing in the refrigerator or freezer. If using from the freezer, thaw in the refrigerator over night. Be careful when reheating, as it can get hot spots.


Until next time,
LOVE & CONFECTIONS!

Disclaimer: I received product from OXO Tot including an OXO Tot Bib, OXO Tot Feeding Spoon Set, OXO Tot Divided Feeding Dish, OXO Tot 2 oz Baby Blocks, OXO Medium Silicone Spatula and OXO Food Mill. I only work with companies I love. All opinions are my own.

Filed Under: Family & Festivities, Uncategorized

Chocolate Chip Pound Cake

July 9, 2014

Chocolate Chip Pound Cake is a family favorite. The recipe makes 3 cakes, so you can freeze the extra for when company stops in.


Sometimes cake makes everything right. In this instance, it’s my Aunt B’s Pound Cake. This recipe is so versatile, you can add almost anything to it. I have made Vanilla Pound Cake and Orange Marmalade Pound Cake with this recipe too.

Chocolate chips are one of my favorite baking ingredients. You can usually find me with a hand in the chocolate chip bag if it happens to be on the counter for cookies or cake. Those little morsels make me smile. I love chocolate. This cake is the perfect balance of vanilla goodness with chocolate sprinkled throughout.

Chocolate Chip Pound Cake
adapted from a Love and Confection family recipe
Click here for printable recipe

Chocolate Chip Pound Cake Ingredients:
– 2 sticks Unsalted Butter, room temperature
– 3 cups Granulated Sugar
– 7 Eggs, room temperature
– 1 cup Sour Cream
– 3 cups All Purpose Flour
– 1/4 teaspoon Baking Soda
– 1/4 teaspoon Baking Powder
– 1 teaspoon Salt
– 1 tablespoon All Purpose flour
– 1 cup Chocolate Chips, I used this kind

Chocolate Chip Pound Cake Directions::
1. Heat oven to 300F. Grease and flour 3 loaf pans.
2. In the bowl of a stand mixer, cream the Butter and Sugar together for 10 minutes, until light and fluffy.
3. While on a low speed, add in the Eggs, one at a time, scraping the sides as needed. Add in the Sour Cream and mix to combine.
4. Sift together the Flour, Baking Soda, Baking Powder and Salt. Add into the egg mixture gradually.
5. In a small bowl, toss the tablespoon of Flour and the Chocolate Chips together to coat. Add 3/4 of the Chocolate Chips into the batter and fold in gently.
6. Divide mix evenly between 3 cake or loaf pans. Sprinkle the remaining chips over the cake and bake for 45 minutes to 1 hour and 15 minutes, depending on the pan, or until a cake tester comes out clean. Cool on a wire rack and enjoy!

Until next time,
LOVE & CONFECTIONS!

Disclaimer: this post contains affiliate links.

Filed Under: Quick Breads-Muffins-Scones, Uncategorized

White Chocolate Blondies

July 3, 2014

 White Chocolate Blondies with White Chocolate Frosting are a great dessert for a last-minute party invite. You can customize the sprinkles for any occasion too!

If you need a quick dessert recipe, these are your go-to bars. They are simple to make, bake in 30 minutes, and the frosting can be made while the blondies cool. I absolutely love my mini star sprinkles, but who doesn’t love sprinkles. Sprinkles make every baked good better, in my opinion.


This Independence Day, I will be having a barbecue and pool party with the family. Baby L&C will be decked out in her adorable red, white and blue outfit, and of course she has a cute bathing suit and float for the pool. I love grilling outdoors and grilling with family and friends is one of the best parts of Summer. If you need any good grilling recipes for this weekend, check out my friend, Kim’s site – Kiss My Smoke. 

This will be Baby L&C’s first 4th of July. Here’s hoping that the fireworks don’t freak her out. Granted, she can sleep through a lot, but I’m still hoping there aren’t any idiots and/or drunks patriotic party-goers setting off fireworks at our apartment complex at midnight (crossing fingers). 


White Chocolate Blondies with White Chocolate Frosting
a Love and Confection original
Click here for the printable recipe

White Chocolate Blondie Ingredients:
– 2 sticks Unsalted Butter, room temperature
– 6 ounces White Baking Chocolate
– 1 cup Brown Sugar
– 1 cup Granulated Sugar
– 2 large Eggs
– 2 teaspoons Vanilla Extract
– 1 teaspoon Salt
– 2 cups All-Purpose Flour
– 1/4 cup Milk
– 2 tablespoons Sprinkles (optional)

White Chocolate Blondie Directions:
1. Heat the oven to 350°F. Prepare a 9×13 baking pan with parchment paper and baking spray (leaving an overhand so you can get the blondies out easily).
2. In a small saucepan, melt the Butter and White Baking Chocolate until there are no lumps, stirring frequently so it doesn’t burn.
3. In the bowl of your stand mixer or a medium bowl with a hand mixer, add the Butter/Chocolate mixture, Brown Sugar, Granulated Sugar, Eggs, Vanilla Extract and Salt. Blend until combined.
4. Add in the Flour, one cup at a time and the Milk. Mix to combine.
5. Add the Sprinkles and mix by hand with a spatula. Pour into pan and bake for 30-35 minutes, or until a toothpick inserted in the center comes out clean.
6. Cool in pan for 10 minutes, then using the parchment paper, remove from pan and cool on wire rack. Frost when cool (optional).

White Chocolate Frosting Ingredients:
– 2 ounces White Baking Chocolate
– 3 tablespoons Unsalted Butter, room temperature
– 1 teaspoon Vanilla Extract*
– Pinch of Salt
– 1 cup Powdered Sugar
– 2 tablespoons Heavy Cream
– Sprinkles (optional)

White Chocolate Frosting Directions:
1. Melt White Baking Chocolate in a microwave-safe bowl for 20 second intervals, stirring after each round in the microwave.
2. In a small bowl, mix the White Chocolate, Butter, Vanilla Extract and Salt until combined.
3. Add in the Powdered Sugar, one half cup and a time and mix together – I used a hand mixer for the frosting. Add in Heavy Cream and blend
4. Frost on cool blondies with an offset spatula. Decorate with
* for a whiter frosting, use clear vanilla extract – although it will not be completely white because of the color of butter and white chocolate.


Until next time,
LOVE & CONFECTIONS!


Disclaimer: post contains affiliate links.

Filed Under: Brownies & Bars, Family & Festivities, Holiday, Uncategorized

Primary Sidebar

Meet Terri
founder & pastry chef

Subscribe to Love and Confections

Popular Posts

Pumpkin Pecan Cupcakes with Cinnamon Cream Cheese Frosting
Pumpkin Spice Cinnamon Roll Cake
Oatmeal Cream Pie Layer Cake - oatmeal brown sugar layer cake, marshmallow frosting filling, and vanilla bean buttercream with oatmeal cream pie garnish
Easy Piña Colada Poke Cake - pineapple cake, coconut cream pudding, whipped topping, pineapple chunks and maraschino cherries
Mermaid layer cake
PIneapple cake with pineapple curd, teal frosting and tropical sprinkle mix
Irish Cream chocolate cupcakes topped with white and green buttercream piping and shamrock sprinkle mix

AMAZON AFFILIATE

Love and Confections is a participant in the Amazon Services LLC Associates Program, an affiliate advertising program designed to provide a means for sites to earn advertising fees by advertising and linking to amazon.com.

Copyright © 2018 Love and Confections · Log in