• Skip to primary navigation
  • Skip to main content
  • Skip to primary sidebar
  • Home
  • About
  • Work With Me
  • Media
  • Recipes

Uncategorized

Peach Cobbler (FHC)

April 13, 2010

For my second FHC I am baking Peach Cobbler. I have never made peach cobbler, nor have I ever eaten peach cobbler either. I love peaches, but normally eat them as is. Honestly, warm peaches have never been appealing, until now. My Food Holiday Challenge is to not only to bake items I like, but also to take a chance and make something I either do not like, or have never made before.

Unfortunately, peaches aren’t available here – Florida – because they aren’t “in season”. I had to make do and use canned peaches – I opted not to buy frozen peaches because they were a little outside my budget. For all the cobbler purists out there, the recipe I chose was the easiest for me to make at this point – or so I thought. Next year, I will probably make one with a dough to compare and see which I personally like better.

A little cobbler history:
– A cobbler is a type of deep-dish fruit dessert with a thick biscuit or pie dough crust that is prepared and then served warm to guests. It is very similar to a pie, except that the crust is thicker and it is traditionally placed only on top. However, over the years, ingredients and preparation methods have been created that bake the cobbler crust on the top for some recipes and on the bottom for others – like mine today.
– In the US, a cobbler is typically made with fruit or berries, but in the UK, it is typically a meat dish.
– Peach, apple, blueberry and cherry cobblers are among the most popular US varieties.
– The American Cobbler, which is different from a Crisp or Crumble – future blog posts – has nicknames like the Betty, Buckle, Sonker, Grunt, and Slump. New Englanders make Slumps and Grunts in a stove-top iron skillet, topping the fruit with dumplings. Buckles are made with yellow batter that is mixed with the filling. The Brown Betty is made with layers of fruit and bread or graham cracker crumbs, almost like a fruity bread pudding. Sonkers are deep-dish cobblers from North Carolina – my personal favorite nickname, not only because it sounds hilarious, but because my parents now call NC home, and it holds a special place in my heart.

Grandma’s Peach Cobbler
adapted from texascooking.com

Ingredients:
– 1 stick Unsalted Butter
– 1 cup Flour
– 1+1/2 teaspoon Baking Powder
– 1/2 teaspoon Salt
– 1 cup Sugar
– 1 cup Milk
– 1-15 ounce can Sliced Peaches, with juice

Directions:
– Preheat oven to 350 degrees Farenheit
– Slice butter into pats and place in 9×13 baking dish and put the dish in the preheating oven. The recipe above is a single batch. I doubled the recipe and used both an 11×13 dish and 8×8 dish. It doesn’t necessarily have to be the same size, just make recipe accordingly.
– While the butter is melting, mix up the batter by combining the Flour, Baking Powder, Salt, Sugar and Milk.
– When the butter is completely melted, remove the pan and pour the batter into the melted butter.
– Carefully spoon the peaches and juice evenly over the batter. Since I used canned peaches, I did not use all the juice, because the batter would be too watery. The extra juice will be saved for another day.
– return the dish to the oven and bake for X minutes. The original recipe says to bake for 30, but that was not even close to what it needed in my oven, which usually runs hot, so I left it in longer – an extra 40 minutes.
– As the cobbler cooks, the batter will rise up around the peaches.

The extra bake time totalled an hour and ten minutes! Now you know why this recipe might not have been the best choice today – thank goodness I didn’t have any other pressing matters or time constraints.

I still might tweak it a bit. Ease of preparation – wonderful, bake time – doable, end product – DELICIOUS! It is especially good with homemade vanilla ice cream – but that will be another Blog day. I am now a fan of peach cobbler.

Until next time,
Love & Confections!

Filed Under: Crisps-Crumbles-Bread Puddings, Uncategorized

Conversions & Equivalents

April 11, 2010

Measurements and conversions for everyone – Baking & Pastry or Culinary. Keep these handy!

Conversions & Equivalents from Smitten Kitchen

Temperature Conversions
275°F = 140°C = gas mark 1
300°F = 150°C = gas mark 2
325°F = 165°C = gas mark 3
350°F = 180°C = gas mark 4
375°F = 190°C = gas mark 5
400°F = 200°C = gas mark 6
425°F = 220°C = gas mark 7
450°F = 230°C = gas mark 9
475°F = 240°C = gas mark 10


Volume Equivalents
60 drops = 1 teaspoon
1 dash = 1/16 teaspoon
1 pinch = 1/8 teaspoon
1 teaspoon = 1/3 tablespoon = 1/6 ounce
2 teaspoons = 2/3 tablespoon = 1/3 ounce
3 teaspoons = 1 tablespoon = 1/2 ounce
2 tablespoons = 1/8 cup = 1 ounce = 1 standard coffee scoop
4 tablespoons = 1/4 cup = 2 ounces
5 1/3 tablespoons = 1/3 cup = 2 2/3 ounces
8 tablespoons = 1/2 cup = 4 ounces = 1 gill
16 tablespoons = 1 cup = 8 ounces
2 cups =1 pint = 1/2 quart = 16 ounces
4 cups = 2 pints = 1 quart = 32 ounces
16 cups = 8 pints = 4 quarts = 1 gallon


Ingredient-Specific Equivalents
Butter
1 stick = 4 ounces = 8 tablespoons = 1/2 cup
4 sticks = 16 ounces = 32 tablespoons = 2 cups
Chocolate
1 ounce = 1/4 cup grated
6 ounces chips = 1 cup chips
1 pound cocoa = 4 cups cocoa
Creams
Half and half = 1/2 milk + 1/2 cream = 10.5 to 18 percent butterfat
Light cream = 18 percent butterfat
Light whipping cream = 30 to 26 percent butterfat
Heavy cream = whipping cream = 36 percent or more butterfat
Double cream = extra-thick double cream = clotted or Devonshire cream = 42 percent butterfat
Eggs
1 large egg (approximately) = 1 tablespoon yolk + 2 tablespoons white
1 cup = 4 jumbo = 4 to 5 extra-large = 5 large = 5 to 6 medium = 7 small
Flour
1 pound = 4 cups all-purpose or bread flours = 4 3/4 cups cake flour
1 cup sifted cake flour = 7/8 cup sifted all-purpose
1+ cup self-rising flour = 1 cup sifted all-purpose flour + 1 1/2 teaspoons baking powder + 1/2 teaspoon salt
Lemon
1 lemon = 1 to 3 tablespoons juice, 1 to 1 1/2 teaspoons grated zest
4 large lemons = 1 cup juice = 1/4 cup grated zest
Onion
1 pound = 2 1/2 cups sliced or chopped
Sugars
1 pound white = 2 cups white = 454 grams
1 pound packed brown = 2 1/4 cups packed brown
1 cup packed brown = 1 cup white
1 pound superfine sugar = 1 cup white sugar = 190 grams
1 pound powdered sugar = 3 1/2 to 4 cups
1 3/4 cups powdered sugar = 1 cup white sugar
1 cup powdered sugar = 80 grams
100 grams white sugar = 1/2 cup
Yeast
1 cake = 3/5 ounce = 1 packet dry = 2 1/4 to 2 1/2 teaspoons dry

Until next time,
Love & Confections

Filed Under: Kitchen Tips, Uncategorized

Dry Milk (FHC)

April 9, 2010

Over the Christmas holidays, I decided to make Semolina Bread, which used instant Nonfat Dry Milk (iNDM or NFDM). The only iNDM I could find came in a large, 32 ounce can. I only needed 1/4 cup per batch, but figured since I was given 30 pounds of Semolina – we’ll leave that story for another time – I would end up using it, since I was going to be making a lot of Semolina Bread. As it turns out, I haven’t made any more bread, and the giant can of dry milk has been sitting in my pantry. What better way to use some of the dry milk than in my first Food Holiday Challenge.

Now for the info – gathered from various sources:
Instant Nonfat Dry Milk is regular cow’s milk that has had the water and fat removed. It still has all the calcium, protein, vitamins and minerals of fresh milk and is low in cholesterol, too.

You can purchase powdered milk that isn’t nonfat, but it tends to be more difficult to reconstitute because of the fat content. NFDM is usually the easiest to mix, but some people have difficulty getting the milk solids to blend with the water.

Nonfat Dry Milk will not taste the same as fresh milk, especially if you’re used to milk from the carton, but the taste is negligible when it is used as an additive in baked goods or smoothies. One of many advantages of NFDM is the long storage time. If stored in a cool, dry place, it will usually last 18 months.

Dry Milk

Dry Milk Biscuits
from Mountain Maid recipe website

2 cups All-Purpose Flour
1 tablespoon Baking Powder
1 teaspoon Salt
1/3 cup Instant Nonfat Dry Milk
1/2 cup Shortening
3/4 cups Water

Mix the Flour, Baking Powder, Salt and iNDM.

Mash in the shortening with a fork, until the mixture is crumbly.

Stir in the water, a little at a time, to make a dough that is soft, but not sticky.

Knead the dough gently on a lightly floured board or counter-top.

Roll or pat the dough to 1/2 or 3/4 inch thickness; cut it with a knife, or a small glass or cutter that has been dipped in flour.

Place the biscuits about 1 inch apart on an ungreased baking sheet.

Bake at 450 degrees Fahrenheit for 12-15 minutes or until golden brown.

Dough before kneading

Despite the fact that my oven cooks unevenly, the biscuits turned out good. I love watching butter melt away on a warm, right-out-of-the-oven biscuit. Pair melted butter on a warm biscuit with strawberry jam and I am in Heaven – it’s my Kryptonite! Unfortunately, I am out of strawberry jam, so raspberry preserves it is.

Butter melting… yum!

OTHER DRY MILK RECIPES: 1 Quart of Fluid Milk
– put 3+3/4 cups cold water in a container
– add 1+1/3 cups iNDM
– mix thoroughly
– cover and chill for at least 4 hours before serving
– store in refrigerator and use within 3 to 5 days

1 Cup of Fluid Milk
– 1 cup water
– add 1/3 cup iNDM to water
– mix thoroughly
– cover and chill for at least 4 hours before serving

Evaporated Milk
– whisk together 1/2 cup water and 1 cup plus 2 tablespoons iNDM

I found a good amount of recipes for iNDM and will use them in some of my future Food Holiday Challenges. I am now more open-minded about using dry milk in recipes.

Until next time,
Love & Confections

Filed Under: Quick Breads-Muffins-Scones, Uncategorized

Buona Pasqua 2010

April 3, 2010

Happy Easter… or Buona Pasqua in Italian!

I’m doing the family Easter traditions on my own this year, because we can’t all be together.

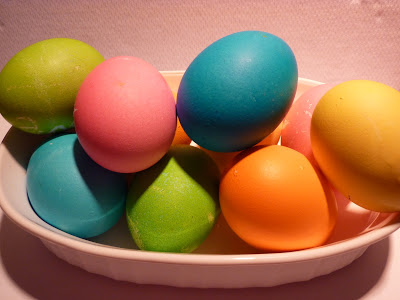
I still love dying Easter eggs. The $2 kit is a bargain for the joy of pulling out a dozen or more brightly colored eggs. When we were little, we only used vinegar with the color tablets. Now they now have choices for coloring methods…

For pastel colored eggs use only water with the colored tablet.
For traditional colored eggs use lemon juice and water with the colored tablet.
For ultra-vibrant colored eggs use vinegar and water with the colored tablet.

This year I decided to go with my family’s “traditional” method and used vinegar. The little matching cups make dying eggs so easy, unless you can’t figure out which tablet is which. I had to guess the colors 3 out of the 5 tablets and hoped I put them in the correct corresponding colored cup – which I did. Yellow, orange and green – yes, green! – look way too similar.

Another family tradition is baking and decorating sugar cookies. My mom, along with other family members, decorated cookies and dyed eggs today. I love picture text messages! My mom text messaged some pictures of her Easter cookies this year and of the table decorated for her Easter Brunch.

Another Tradition is Easter Bread. My grandmother, Grace, made it every year. She taught my mom how to make and and they both taught me when I was younger. I remember the first time I was taught how to make Easter Bread, in my mom’s kitchen. I watched them make the dough and waited patiently for it to rise. I loved when the dough had to double in size, because I was the one to either put it on a table in the garage – when it was warm enough, or on top of the running clothes dryer – which always made me laugh inside. The smell of Easter Bread baking is one of my favorite smells in the whole world. I don’t use anise seeds because I don’t like the taste. Instead, I make the recipe without and put colored sprinkles on top.

After my grandmother passed away, making Easter Bread became more meaningful. Easter Bread is not only a way to remember her, but also to keep a tradition alive that has been passed down through our family.

Until next time,
Love & Confections!
Filed Under: Holiday, Uncategorized

Cupcake Overload!

March 25, 2010

It has been a while… Sorry it has been so long since the last post – lots of things have happened/are happening. I was really sick for a few weeks and my husband and I are in the process of moving. Long story short, the neighborhood has gotten worse and we want to live someplace we actually like… so I will try to post more, but packing and moving is obviously priority.

Here are some pictures of cupcakes I made for my husband’s birthday. He wanted some for a dinner with friends – I made beef wellington, roasted potatoes and green beans, yum! – and some for people at the two places he works. I miscalculated the amount made and ended up with a lot more than planned. These aren’t from scratch, but I added to them. *Disclaimer – I never said I was going to bake everything on my blog from scratch – time constraints and funds are to blame. When I have the available time and funds, I will gladly make everything from scratch, well, almost from scratch. “If you want to make an apple pie from scratch, you must first create the universe,” -Carl Sagan.

Some people might cringe or criticize and say, “You used a box mix? You call yourself a baker?” To answer, yes I used a box mix. Duncan Hines “Devil’s Food”, “French Vanilla,” and “Yellow Cake, ” to be exact. They’re the best and only cake mixes I use. Even one of my professors in culinary school, who is an Executive Pastry Chef at a Hyatt hotel said he uses Duncan Hines at home, “because when you make things from scratch, the last thing you want to do is go home and make more cakes, and besides, it’s the best.”

I have actually always used Duncan Hines my entire life. So back to the actual cupcakes – I miscalculated because I normally get 25 cupcakes out of the box mixes, but the husband requested mini cupcakes, so people could try all the varieties and not have to eat whole, big ones. I was perfectly fine with that, except for the fact that instead of 2 mini cupcakes per one regular, it ended up being 3 mini cupcakes per regular, and with only 1 mini cupcake tin of 24 cups, it took a while. (I searched at a place I thought would have another tin, but they didn’t, and didn’t have enough time to actually find one).

So, 200 mini cupcakes later – and a few bigger cupcakes because I only had 200 mini wrappers – I had 3 different flavor cupcakes and was ready to decorate.

The Devil’s Food cupcake was made into a S’more cupcake. The first picture is what I originally did for the S’more cupcakes – crushed graham cracker crumbs on the bottom, followed by the Devil’s Food batter, then a mini marshmallow in the center. I had decided against hollowing the cupcake out and filling it with melted marshmallow, and experimented this way.

Needless to say, thank goodness for the experiment, because they did not turn out how I would have liked them.

The second time around I decided to ditch the graham crackers on the bottom – they got lost and you couldn’t taste them – and the marshmallows in the middle – they kind of melted into the batter and you couldn’t taste it either. Instead I melted the marshmallows with a little bit of milk, in a pot on the stove, and once cooled, mixed into the French Buttercream I had been planning on using. It turned out delicious, and I sprinkled graham cracker crumbs on top.

The next are the Boston Cream cupcakes. I hollowed out the center of the French Vanilla cupcakes and used Jell-O pudding – yes, Jell-O pudding. Like the aforementioned disclaimer said, no time to make pastry cream, especially when I had a whole dinner to put together as well. Then I topped it with the French Buttercream and chocolate sauce. As far as the chocolate sauce goes, I didn’t want to use it but had little time in between dinner and dessert to temper chocolate. I’ll leave the discussion about tempering chocolate for another day.

The last were the Key Lime cupcakes. I used the yellow cake cupcakes and hollowed them out as well. I used some vanilla Jell-O pudding mixed with a little bit of Nellie & Joe’s Key Lime Juice and lime zest for the filling. The French Buttercream also got some lime zest and was topped with lime slice jelly candy. The individual Key Lime cupcake picture didn’t turn out well, but you can still see them in the picture below. The Boston Cream cupcakes turned out to be the biggest hit.

French Buttercream (the “from scratch” element)
from About Professional Baking by Gail Sokol

200 grams Granulated Sugar
60 milliliters Light Corn Syrup (4 tablespoons or 1/4 cup)
60 milliliters Water (2 fluid ouces or 1/4 cup)
114 grams Egg Yolk
450 grams Unsalted Butter – very soft, but not melted
10 milliliters Vanilla Extract (2 teaspoons)

In saucepan, combine sugar, corn syrup and water and bring mixture to a rolling boil, stirring just until sugar dissolves.*

While sugar syrup is cooking, beat the egg yolks on high speed in the bowl of an electric mixer using the whip attachment, until the color lightens to a pale yellow.

On high speed, slowly add the hot syrup tot he egg yolks, pouring it down the sides of the mixing bowl and not directly onto the whip. Keep beating until the bowl feels cool to the touch.

Gradually add the softened butter**, a few tablespoons at a time, until it is all incorporated, blending in each addition of butter thoroughly. The buttercream may appear curdled until all the butter has been incorporated. Add the vanilla extract and blend well.

* cook to 250°F – firm ball stage
** Can use colder butter if sugar is slightly warmer – balances out temperature

Until next time,

Love & Confections!
Filed Under: Cakes & Frostings, Cupcakes, Uncategorized

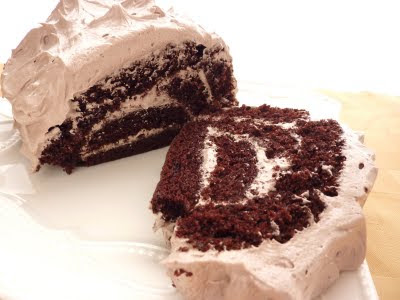
Mocha Roulade

March 3, 2010

Chocolate and coffee – what a combination! Coffee enhances the flavor of chocolate, so combining the two works great.

It feels like I have been going nonstop these past few days. I am prepping everything for surgery tomorrow. I will be having my 2nd Carpal Tunnel surgery – this time on my right hand. I needed to clean everything in the house, do laundry, many, many dishes, and everything else I won’t be able to do for a little while. Luckily, I have the greatest husband in the world, who is able to take care of me while I’m recovering. He cleans, He cooks – and most of the time he doesn’t burn anything – He is the best.

I’m not as nervous as I was before my first CT surgery, but I still have worries. No one ever likes going to the hospital, getting IVs and anesthesia, and the recovery period. I am worried for one major reason. This will be the surgery on my dominant hand – my right hand. With the last surgery – you can read about it here – I was able to function a good deal, because I could still use my right hand. I am hoping that everything will go as smooth as the last surgery and that my fears are not necessary. Well, we’ll find out.

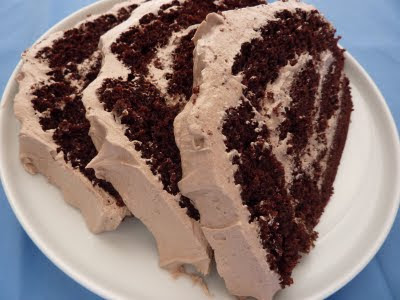
I have been doing a lot of baking this past week and weekend, so I will be able to have blog posts while I’m recovering, and you won’t wonder if I’ve fallen off the face of the Earth. This recipe is always great for presentation, and it tastes pretty darn good too! It seems complicated, with the amount of ingredients and instructions, but it is pretty simple once you get started. This cake is a lot thicker than other roulades I have done. I might tweak it later in another recipe. Enjoy!

Here are a few secrets for the best buttercream:
– use room temperature eggs
– when the eggs/sugar are hot, wrap the mixer in foil. warm eggs whip better
– make sure you get stiff peaks from the meringue

Mocha Roulade
Buttercream adapted from Chef Steven Rujak at Sweet and Savory Seasons

Cake Ingredients Part 1:
– 80 grams Egg Yolks (about 4 egg yolks), room temperature
– 6 ounces granulated Sugar
– 6 ounces Vegetable Oil
– 4 ounces Water
– 1 teaspoon Vanilla Extract
– 1 tablespoon Espresso or Coffee

Cake Ingredients Part 2:
– 180 grams Egg Whites (about 6 egg whites), room temperature
– 6 ounces granulated Sugar

Cake Ingredients Part 3:
– 5 ounces All-Purpose Flour
– 3 ounces Cocoa Powder (I used Dutch-Processed Cocoa, but you can use whatever you have)
– 2 teaspoons Baking Powder
– 1 teaspoon Baking Soda

Cake Directions:
1. Preheat oven to 350F
2. Whip Egg Yolks with sugar until light in color (part 1)
3. Add Oil, Water, Vanilla and Espresso (part 1)
4. Sift all the dry ingredients together (part 3)
5. Add the sifted dry ingredients into the Egg Yolk mixture
6. Whip Egg Whites and Sugar in a separate bowl. Start with just the whites and once they become foamy, slowly add in all the sugar. Whip until stiff peaks form. (part 2)
7. Fold the whipped egg whites into the egg yolk/chocolate mixture. Mix the egg whites in 3rds. Start with 1/3 of the whites and mix to lighten the egg yolk/chocolate mixture. Take another 1/3 of the egg whites and gently fold into the batter. When the whites are almost all combined, add the last 1/3 of egg whites and fold into batter. Make sure you do not deflate the egg whites while folding them in the mixture.
8. Lightly grease a Half-Sheet Pan/Jelly-Roll Pan (9×16). Place a piece of parchment on the bottom and lightly grease that as well
9. Gently spread the batter into the pan. Level the mixture with an off-set spatula
10. Bake for 15-20 minutes, until the center springs back when touched and a toothpick comes out clean
11. Let it cool completely in the pan.

Buttercream Ingredients:
– 6 Egg Whites, room temperature
– 2 cups granulated Sugar
– 1 pound unsalted Butter, room temperature
– 15 ounces Powdered Sugar
– 1 ounce Cocoa Powder
– Vanilla Extract to taste
– Coffee Extract to taste

Buttercream Directions:
– For those of you familiar with types of buttercream, this is a Swiss Meringue recipe.
1. In a bowl of your stand mixer, add the Egg Whites and granulated Sugar
2. Whisk together and place over a pot of simmering water – while being careful the water does not touch the bottom of the bowl!
3. Continue to whisk until the egg and sugar mixture are warm, and the sugar is dissolved. You can use your fingers to tell the temperature and to see if the mixture is still gritty with sugar, while making sure you don’t cook the egg whites too much. It should be warmer than room temperature.
4. Place bowl on stand mixer, attach whip and whip it on high.
5. Place a piece of foil completely around the bowl and your mixer. The warmer the egg whites are, the better they whip. The foil keeps them warm.
6. Remove the foil after the whites reach room temperature (feel the bottom of the mixing bowl. If it is cool to the touch, then you are okay to proceed.
7. Add in the Butter and mix on high speed until incorporated
8. Add the Powdered Sugar and flavorings and mix on high for 3 minutes.
9. Transfer to a bowl and reserve until you are ready to use.

Until next time,
LOVE & CONFECTIONS!

Filed Under: Cakes & Frostings, Uncategorized

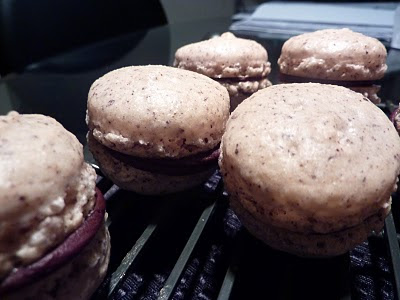
Hazelnut Mocha Macaroons

February 9, 2010

Macaroons are small confections made from egg whites, sugar and ground almonds. It has a crisp exterior and a soft, chewy interior. It can be flavored with other ingredients such as citrus, coffee, chocolate or coconut. Other ground nuts can be substituted for the almonds (which I did in this recipe). In France, macaroons are sandwiched together with a thin layer of ganache or raspberry or apricot jam. Their origin dates back to 14th century Venice and its name is derived from the Venetian word “macarone” which means “fine paste.”
The best known macaroons come from Paris. The most famous are Laduree and Pierre Herme and can sell 15,000 a day. Macaroons have remained relatively unknown in the United States and are often confused with coconut macaroons. They have recently become a novel dessert for weddings and a growing addition to specialty pastry and bakery shops. Classic flavors include vanilla, chocolate, coffee, almond pistachio, lemon and raspberry. Newer flavors can include pumpkin, cinnamon, passion fruit, peanut butter and jelly, green tea, truffles, olives, and many more.
I love macaroons! They are DELICIOUS! If you’ve never had one – try it. They are light and chewy and crispy – you can’t have just one.
I decided to use some hazelnut flour I had and use that instead of almond flour. Hazelnuts and chocolate – a great combination. I still need to practice more. I’ve only made them two or three times in school – mine have some peaks and a little too much volume. Like my mom says, “Good, Better, Best – Never, never rest until your Good gets Better, and your Better gets Best!”


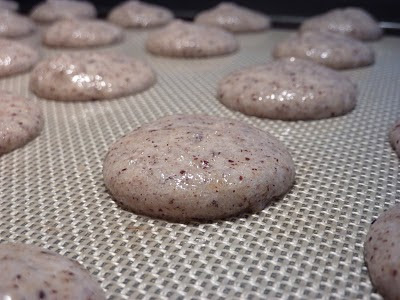
Macaroons after resting 1 hour
Hazelnut Mocha Macaroons
adapted from Tartelette

90 grams Egg Whites
2 tablespoons Sugar
110 grams Hazelnut Flour
200 grams Powdered Sugar
The egg whites need to age at room temperature for at least 24 hours, loosely covered.
Whip the egg whites until they are foamy. Gradually add 2 tablespoons granulated Sugar until you have a glossy meringue. Don’t overbeat.
place 110 grams of Hazelnut Flour and 200 grams Powdered Sugar in a large bowl.
Add the whipped egg whites and fold. You don’t have to fold too gently, but you don’t want to over fold either. If you want to color them, add powdered food color halfway through folding.
When the batter is ready, pour into a large pastry bag with #807 tip (I just used the largest tip I had). It will ooze out the end, so keep the bag folded or crimp the bottom until you are ready to pipe.
Make small piped circles on a baking sheet lined with a silicon mat or parchment paper.
Once the tray is filled, let it sit for an hour to harden the outer shell before baking.
Bake at 300F for 18-20 minutes and then let cool.

Mocha Ganache
from Food Network Kitchens

4 ounces Bittersweet Chocolate, chopped
1/2 cup Heavy Cream
1 tablespoon Instant Espresso Powder
Put Chocolate in a medium heat-proof bowl. In a small saucepan, bring cream, with espresso powder mixed in, to a boil. Pour cream over chocolate and shake bowl gently so cream settles around the chocolate. Set mixture aside until the chocolate is soft, about 5 minutes. Whisk gently until smooth, taking care not to incorporate too many air bubbles. Cool at room temperature until set up.

Until next time,
Love & Confections!
Filed Under: Cookies, Uncategorized

Mmm Bananas

February 6, 2010

I love baking. I love to mix ingredients that aren’t always appealing on their own, but when combined with others, they create something delicious. Magic and science working together in an oven.

I baked Banana Bread yesterday. I bought bananas a while back and, like a lot of people, they ripened before I could eat them all – so I put them in the freezer. The answer to all your banana problems: stick it in the freezer. And I forgot about them. Well, sort of. It isn’t that hard to forget about a few, frozen solid, beyond-brown bananas, because they’re staring at you every time you open the freezer door. I just kept putting it off, saying, “I’ll make them soon”.


I finally got tired of looking at them and decided to make Banana Bread, and I’m so glad I did. I love the smell of Banana Bread baking. It reminds me of my paternal grandmother’s house. She introduced me to Banana Bread years ago. She showed me how she liked eating it – making it warm in the toaster oven and spreading cream cheese on it – simply divine. I’ll eat it without cream cheese, of course, but it isn’t the same. Every time I make or eat Banana Bread, I think of her. I’ll have to make an extra loaf soon and send it to her.
Anyway… the picture is bad, but the Banana Bread was delicious!
Until next time,
Love & Confections

Banana Bread
from Advanced Bread and Pastry by Michael Suas
Makes 1 – 8 inch x 4 inch loaf
Ingredients:5 1/8 ounces Bananas
1/2 ounce Buttermilk
1/8 teaspoon Vanilla Extract3 1/4 ounces Sugar
1 5/8 ounces Brown Sugar
2 ounces Eggs
2 ounces Canola Oil
4 7/8 ounces Bread Flour
1/4 teaspoon Salt
1/2 teaspoon Baking Soda
1/2 teaspoon Baking Powder
1/8 teaspoon Cinnamon
1 1/2 ounces Walnuts (optional)

Process:

  1. In the bowl of a mixer fitted with the paddle attachment, premix the bananas, buttermilk, and vanilla extract until broken up. Reserve.
  2. Combine the sugar, brown sugar, eggs, and canola oil int he bowl of a mixer fitted with the paddle attachment and mix until well incorporated.
  3. Combine the dry ingredients and add to the wet ingredients and mix until 50% incorporation.
  4. Add the banana buttermilk mixture and then add the walnuts and mix to incorporate.
  5. Deposit into sprayed pan three-fourths up the pan.
  6. Score along the length of the loaf, 1/4 inch deep with a scraper dipped in vegetable oil.
  7. Bake at 335F for 40-45 minutes or until golden brown and the surface bounces back to the touch.

Filed Under: Quick Breads-Muffins-Scones, Uncategorized

Do What You Love & Love What You Do…

February 6, 2010

My name is Terri and I’m studying to become a Pastry Chef.

Professional chefs don’t run in the family. I didn’t grow up knowing I would make a career out of it. I just have a love of food. My family is Italian. We all love to cook and the kitchen really is the center of activity in the house – it might even be the biggest room, too. The kitchen is home. It is honestly where most of my favorite memories originate.

“When someone shares something of value with you, and you benefit from it, you have a moral obligation to share it with others.”

I honestly believe in this quote. I’ve learned so much from being in my family’s kitchen, the kitchen at school, and various other kitchens I’ve visited, that I want to be able to share what I have benefited from.

I like making people happy, and if I can make at least one person happy from something I’ve created as a chef, then it’s all worth it.

Until next time,

Love & Confections

Filed Under: Uncategorized

  • « Go to Previous Page
  • Page 1
  • Interim pages omitted …
  • Page 44
  • Page 45
  • Page 46

Primary Sidebar

Meet Terri
founder & pastry chef

Subscribe to Love and Confections

Popular Posts

Pumpkin Pecan Cupcakes with Cinnamon Cream Cheese Frosting
Pumpkin Spice Cinnamon Roll Cake
Oatmeal Cream Pie Layer Cake - oatmeal brown sugar layer cake, marshmallow frosting filling, and vanilla bean buttercream with oatmeal cream pie garnish
Easy Piña Colada Poke Cake - pineapple cake, coconut cream pudding, whipped topping, pineapple chunks and maraschino cherries
Mermaid layer cake
PIneapple cake with pineapple curd, teal frosting and tropical sprinkle mix
Irish Cream chocolate cupcakes topped with white and green buttercream piping and shamrock sprinkle mix

AMAZON AFFILIATE

Love and Confections is a participant in the Amazon Services LLC Associates Program, an affiliate advertising program designed to provide a means for sites to earn advertising fees by advertising and linking to amazon.com.

Copyright © 2018 Love and Confections · Log in