• Skip to primary navigation
  • Skip to main content
  • Skip to primary sidebar
  • Home
  • About
  • Work With Me
  • Media
  • Recipes

Archives for 2010

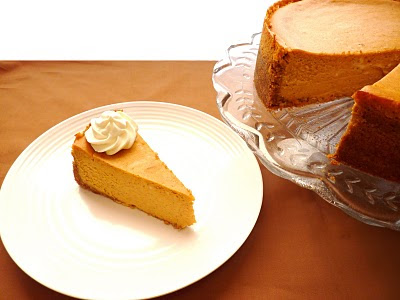
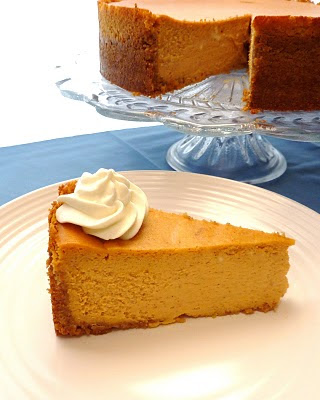
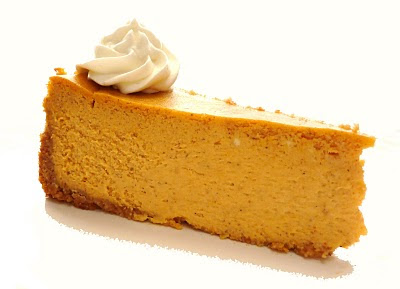
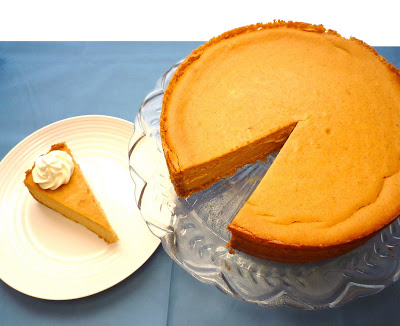
Pumpkin Cheesecake

October 29, 2010

Just in time for your fall festivities… and who doesn’t love cheesecake?

After making pumpkin cake and pumpkin pies at my internship, I decided to tackle pumpkin cheesecake on my day off. I really do bake 6-7 days out of the week. The difference is that I love baking at home, because I can make a variety of small things; as opposed to work, where I need to make sure I have enough to feed about 3,000 people per day. That, in and of itself, is not easy, and gourmet pastries, cakes, etc., in mass quantities with limited time and space is difficult.

Baking with family has always been some of my best memories. Being in the kitchen with my mother and grandmother was a requirement for most holidays. With my grandmother gone, and my mother a few hundred miles away, I still try to do holiday baking, even though they’re not with me – but they’re always on my mind. Fall was always the start of the big baking season for us. Halloween, followed by Thanksgiving and then Christmas, meant that we would spend a lot of time together in the kitchen. Because of them, there is no longer a “want” to bake for the holidays; now its a “need.” I need to keep the family traditions. I need to keep the memories alive. I need to keep them close, and if baking and being in the kitchen helps, then that’s what I need to do.

The smell of pumpkin and spices filled my apartment and it truly felt like Autumn – all we need is the cooler weather here in Florida. Yesterday it was 91 degrees! In October! I have a friend in Colorado that already shared a picture of the “first snow of the season” – can you say jealous. We are supposed to get a cold front next week. The temperature might make it down to the 50s!

Even with the warmer weather, I have been getting in the Fall spirit. I unpacked some Halloween/Autumn decorations, bought myself some mini pumpkins, and indulged in a bag of candy corn. I also bought myself some flowers, just because I wanted some, and to accentuate my Fall decorations. Sunflowers are one of my favorite types of flowers, and they look great next to the bright orange mini pumpkins.

This recipe is simple and delicious. It is creamy, rich, and perfect for any holiday gathering you plan to have this season. I hope you enjoy making it as much as I did.

Pumpkin Cheesecake
adapted from verybestbaking.com

Pumpkin Cheesecake Ingredients:
Crust
– 1 & 1/2 cups Graham Cracker Crumbs
– 1/3 cup unsalted Butter, melted
– 1/4 cup granulated Sugar

Cheesecake
– 3-8 ounce packages Cream Cheese, softened
– 1 cup granulated Sugar
– 1/4 cup packed Light Brown Sugar
– 2 large Eggs
– 1-15 ounce can 100% Pure Pumpkin
– 1-5 fluid ounce can Evaporated Milk
– 2 tablespoons Corn Starch
– 2 teaspoons Pumpkin Pie Spice
Pumpkin Cheesecake Directions:
Crust
1. Preheat oven to 350 degrees
2. Combine Graham Cracker Crumbs, Butter, and granulated Sugar in a medium bowl.
3. Press into bottom and 1 inch up the sides of a 9-inch springform pan. A little trick I use do is use the bottom and sides of a solid measuring cup to press down and around the sides – much easier and more precise than using your hands.
4. Bake for 6 to 8 minutes (do not allow it to brown)
5. Cool on wire rack for 10 minutes

Cheesecake
1. Beat Cream Cheese, granulated Sugar, and Brown Sugar in a large mixing bowl, until fluffy.
2. Beat in Eggs, Pumpkin and Evaporated Milk.
3. Add Corn Starch and Pumpkin Pie Spice, and beat well.
4. Pour into crust
5. Bake for 55 to 60 minutes – the edge will be set, but the center will still move slightly
6. Cool on wire rack and then refrigerate overnight – keep springform pan sides on while cooling and refrigerating

You can serve this by itself, but it would also be great with some freshly whipped cream or homemade ice cream! Yum!

Until next time,
LOVE & CONFECTIONS!

Filed Under: Cheesecakes, Uncategorized

Beautiful Blueberries & Jam

July 30, 2010

This blog entry is a special treat with 2 Blueberry recipes!


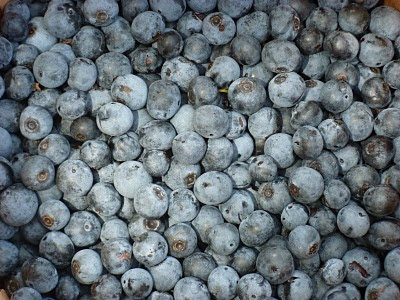
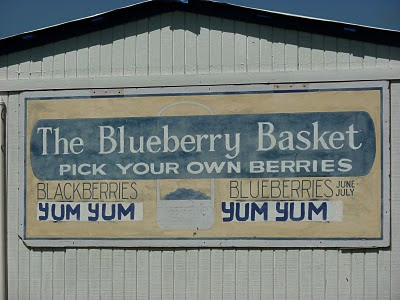
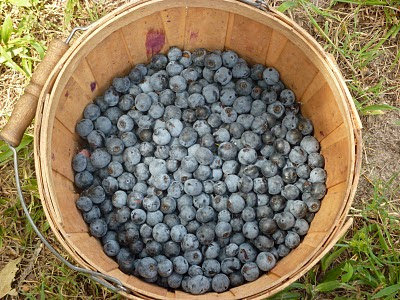
While out in Texas, my two Aunts took me blueberry picking. I had never done this before – only strawberry picking – and was very excited. Even though the day was incredibly hot, and we traveled 2 hours to get the the “Blueberry Basket” – our hunting ground – the trip was well worth it! We each filled baskets of blueberries, all the while, thinking what we would create with our delicious finds.


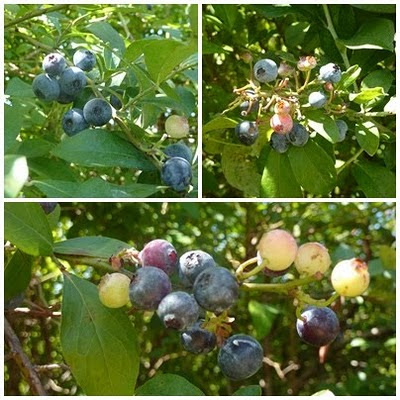
The workers told us to pick in one specific section, and as usual, Aunt W has a mind of her own, and found us some great rows of blueberries further down the farm. Clusters of blueberries sprang out from the bushes, but we also had to reach far into the bushes to get some of our loot.


The berries were all sizes and colors, from pale green and reddish-purple to the ripe blueish-purple berries. We ate as we picked – which was deliciously fun – and chatted about what we would bake – after all, they had a pastry chef under their roofs for a week. The rows of blueberry plants seemed like they never ended. The warm sun beat down on us, as we sweat in the 95+ degree weather. I can’t honestly tell you how many insects we encountered – my sister would not have like it. Our baskets quickly became full and we finished just before the hottest part of the day – yes, it got even hotter!

I have to admit that I was not a fan of blueberries before this trip. Yes, I have had blueberry muffins and blueberry pancakes before, but never really just ate blueberries. These blueberries tasted different, very different from the ones we usually get in the store. They were sweeter and juicier. I probably won’t eat blueberries from the store, but give me these any day – I even had a bowl of just blueberries, for breakfast one morning in Texas, along with an egg sandwich.

CRUMP-TOP BLUEBERRY MUFFINS

Muffin Batter Ingredients:
– 315 grams All Purpose Flour
– 60 grams Sugar
– 60 grams Light Brown Sugar
– 1 tablespoon Baking Powder
– 1 teaspoon Baking Soda
– 1/4 teaspoon Salt
– 2 large Eggs
– 75 grams Unsalted Butter, melted
– 1 teaspoon Vanilla Extract
– 8 fluid ounces Buttermilk
– 2 cups Blueberries

Crumb-Topping Ingredients:
– 2 & 1/2 tablespoons All Purpose Flour
– 2 tablespoons Sugar
– 2 tablespoons Light Brown Sugar, packed
– 1/2 teaspoon ground Cinnamon
– 2 tablespoons Unsalted Butter, cold

Crumb-Top Blueberry Muffin Directions:
1. Preheat oven to 375F and prepare a muffin tin.
2. To make the topping, in a small bowl, stir together the Flour, Sugars and Cinnamon. Cut the butter into pieces and using a pastry blender, cut it into the dry ingredients until the mixture resembles coarse crumbs.
3. To make the muffins, stir together the Flour, Sugars, Baking Powder, Baking Soda and salt in a bowl.
4. In another bowl, whisk together the Eggs, melted Butter, Vanilla Extract and Buttermilk.
5. Stir the buttermilk mixture into the dry ingredients just until combined. The batter should be lumpy. Fold the blueberries into the batter just until evenly distributed. Scrape down the sides of the bowl.
6. Spoon the batter into each muffin cup, filling it level with the rim of the cup. Sprinkle each muffin with about 1/2 tablespoon crumb topping
7. Bake until golden, dry and springy to the touch, 20-2 minutes. Serve warm.


I have never made jam and was extremely excited – I love learning new things. Our fresh blueberries were perfect for our jam adventure.

BLUEBERRY JAM
from Certo

Blueberry Jam ingredients:
– 1 & 1/2 quart fresh Blueberries, crushed to equal 4 & 1/2 cups
– 2 tablespoons Lemon Juice
– 7 cups Sugar
– 2 pouches Certo Fruit Pectin
– 1 teaspoon Butter
– 12 -8 ounce- Jars or 20 -4 ounce- Jars with lids, sterilized


Blueberry Jam Directions:
1. Prepare Jam Jars by boiling them for 10 minutes
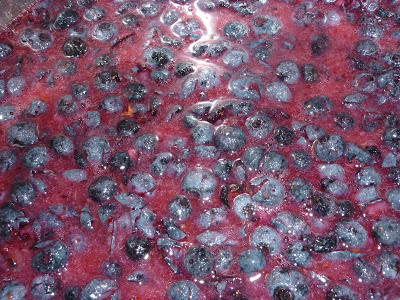
2. Crush Blueberries in large pan on stove.
3. Stir Sugar into Blueberries and mix well.
4. Add Butter to Blueberries and bring to a boil for 5 minutes over high heat while stirring constantly
5. Pour 2 Certo Fruit Pectin pouches into the Blueberries and continue to boil for 1 minute while stirring constantly.
6. Remove from heat and skim off foam.
7. Ladle into Jars and screw on lids. MAKE SURE YOU WIPE THE RIMS BEFORE PUTTING ON LID. EXCESS JAM WILL NOT ALLOW PROPER CANNING.
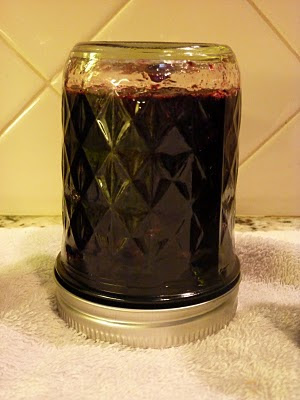
8. Turn jars upside down for 5 minutes, then turn upright. Let set for 1 hour. (Jars are sealed when “pop-top” center of lid is pushed completely down)
9. Refrigerate once opened.

Filed Under: Breakfast & Brunch, Quick Breads-Muffins-Scones, Uncategorized

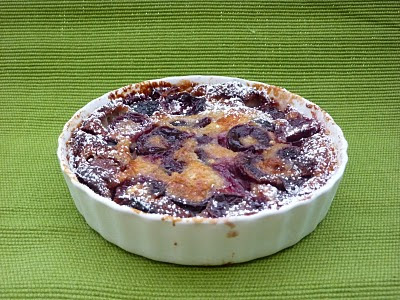
A Taste of Summer – Cherry Clafoutis

July 18, 2010

One of the best summer fruits are cherries! I remember sitting on the steps of our pool, as a kid, with a bowl full of cherries on the tile deck, and a bowl full of cherry pits right next to it. The sweet, and sometimes tart, fruit was always a welcomed treat. That was the life – a lazy summer day in the pool, a bowl full of cherries and lots of sunshine!

Unfortunately, when I recently purchased my cherries, they were not as good as I had hoped – and only discovered this at home. I had to use them rather quickly and decided to create a dish I had been thinking about for quite some time. I have never made a clafoutis and have always wanted to try one – it seemed so simple.

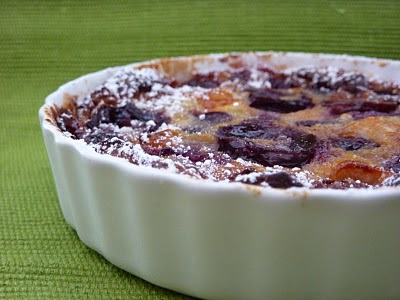
Clafoutis, or sometimes spelled Clafouti, is a baked French dessert with black cherries arranged in a buttered dish and covered with a thick, flan-like batter, dusted with powdered sugar and served warm. Clafoutis comes from the Limousin region of France. Black cherries are the traditional ingredient, but other variations include: red cherries, plums, peaches, pears, apples and blackberries – when other types of fruit are used instead of cherries, the dish is called a Flaugnarde.

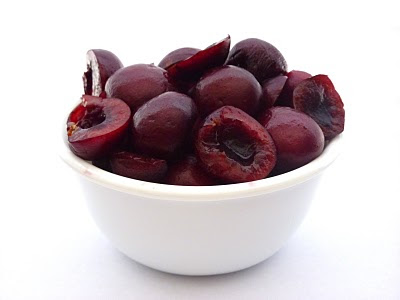
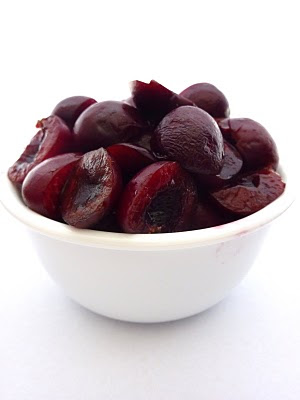
The traditional Limousin Clafoutis contains the pits of the cherries. Some bakers say, “the pits release a wonderful flavor when the dish is cooked. If the pits are removed prior to baking, the Clafoutis will be milder in flavor.” I prefer to pit my cherries before baking, just in case. Many people opt for a cherry pitter, but I just did it by hand – with latex gloves on, of course – cherry-stained fingertips are not attractive.

Cherry Clafoutis
adapted from Joy of Baking

Cherry Clafoutis Ingredients:
– 65 grams All-Purpose Flour
– 1/4 teaspoon Salt
– 2 large Eggs
– 25 grams granulated Sugar
– 180 milliliters Milk
– 1/2 teaspoon pure Vanilla Extract
– 1 pound or 340-454 grams sweet Cherries, pitted
– 13 grams unsalted Butter
– 25 grams granulated Sugar
– Butter or Non-stick Cooking Spray
– Confectioner’s Sugar for dusting

Cherry Clafoutis Directions:
1. Preheat the oven to 425F and place the rack in the center of the oven.
2. Prepare baking dish(es) by coating the bottom and sides with either Butter or Non-stick Cooking Spray
3. Wash the Cherries, remove the stems and pits
4. In your food processor or blender, place the Flour, Salt, Eggs, first measure of Sugar, Milk and Vanilla Extract.
5. Process for about 45-60 seconds, scraping down the sides of the bowl as needed. Once the batter is completely smooth, let it rest while you prepare the fruit.
6. In a medium saucepan, melt the butter over medium heat.
7. When the butter is bubbling, add the pitted Cherries and cook until they have softened a bit and are coated with butter (2-3 minutes).
8. Sprinkle the Cherries with the second measure of Sugar and cook until the Sugar dissolves and turns into a syrup (1-2 minutes).
9. Evenly divide the Cherries into the baking dish(es).
10. Pour the batter over the Cherries and bake for 20 minutes, or until the Clafoutis is puffed, set and golden brown around the edges. Do not open the oven door until the end of the baking time or it may collapse.
11. Serve immediately with a dusting of Confectioner’s Sugar.

Until next time,
LOVE & CONFECTIONS!

Filed Under: Pies-Tarts-Crostatas, Uncategorized

Pâte à Choux

July 12, 2010

Some of life’s greatest pleasures are desserts and pastries. Whether you’re a fan of cookies, cakes, pies, tarts, petit fours, pavlovas, etc., they are all delicious and appeal to everyone in their own way. My personal favorite are French Macaroons – but that’s for another day.

Whenever I meet a new Pastry Chef, I try and ask them what their favorite dessert or pastry is. I think it is a great way of getting to know more about the chef and a little insight into their personality. Executive Pastry Chef Stephane Cheramy, at the JW Marriott/Ritz-Carlton Grande Lakes likes Apple Almond Tarts. Executive Pastry Chef Steven Rujak, at the Hyatt Grand Cypress, likes Shortbread Cookies. Chef Erik Perez, from Boiron frozen Fruit Puree, likes tarts the best. These pastry chefs have been in the industry for years, create confectionary masterpieces daily, and still love these simple yet delicious pastries.

Cream Puffs are said to have originated in Renaissance France and Italy. Choux paste is different from other types of pastry because when baking, it uses the high moisture content to create steam to puff the pastry. When it rises, it produces a hollow center, which can have sweet or savory fillings. Pâte à Choux is a thick batter made from flour, milk, butter, and eggs. Choux paste is typically known for making profiteroles (cream puffs), croquembouches, eclairs, French crullers, beignets, and Gateau St. Honore. The shape resembles a cabbage, choux in French, hence the name Pâte à Choux.

I decided to make Cream Puffs today. They are relatively simple to make and extremely delicious! I filled my Cream Puffs alternating Pastry Cream and Chocolate Mousse. Both are suitable for Profiterole filling and easy to make. A Pastry Cream blog post will be coming soon, but for now, you can get the Chocolate Mousse recipe here. Enjoy!

Pâte à Choux Recipe:
from the Daring Baker’s Challenge, May 2010

– 175 milliliters Water
– 85 grams Unsalted Butter
– ¼ teaspoon salt
– 1 tablespoon Sugar
– 125 grams All-Purpose Flour
– 4 large Eggs

For Egg Wash:
– 1 Egg and a pinch of Salt

Pâte à Choux Directions: – Pre-heat oven to 425◦F/220◦C degrees. Line two baking sheets with parchment paper.
1. Combine water, butter, salt and sugar in a saucepan over medium heat. Bring to a boil and stir occasionally. At boil, remove from heat and sift in the flour, stirring to combine completely.
2. Return to heat and cook, stirring constantly until the batter dries slightly and begins to pull away from the sides of the pan.
3. Transfer to a bowl and stir with a wooden spoon 1 minute to cool slightly.
4. Add 1 egg. The batter will appear loose and shiny.
5. As you stir, the batter will become dry-looking like lightly buttered mashed potatoes.
6. It is at this point that you will add in the next egg. Repeat until you have incorporated all the eggs.

Piping the Pâte à Choux Batter:1. Transfer batter to a pastry bag fitted with a large open tip (I piped directly from the bag opening without a tip). Pipe choux about 1 inch-part in the baking sheets. Choux should be about 1 inch high about 1 inch wide.
2. Using a clean finger dipped in hot water, gently press down on any tips that have formed on the top of choux when piping. You want them to retain their ball shape, but be smoothly curved on top.
3. Brush tops with egg wash (1 egg lightly beaten with pinch of salt).

Baking the Pâte à Choux:1. Bake the choux at 425◦F/220◦C degrees until well-puffed and turning lightly golden in color, about 10 minutes.
2. Lower the temperature to 350◦F/180◦C degrees and continue baking until well-colored and dry, about 20 minutes more. Remove to a rack and cool. Can be stored in an airtight box overnight.

Until next time,
Love & Confections!

Filed Under: Pastries & Baked Goods, Uncategorized

Chocolate Pavlova

June 28, 2010

Daring Bakers Challenge The June 2010 Daring Bakers’ challenge was hosted by Dawn of Doable and Delicious. Dawn challenged the Daring Bakers’ to make Chocolate Pavlovas and Chocolate Mascarpone Mousse. The challenge recipe is based on a recipe from the book Chocolate Epiphany by Francois Payard.

I personally love Pavlovas. Meringue is a great light, sweet and tasty dessert. Paired with chocolate, and it is heaven. I also like to eat Pavlovas with fruit, for a lighter dessert. Pavlovas are easy to make and once you start, you’ll be hooked. I piped a few simple designs with a medium size pastry tip. I piped a base and either “built” it up on the sides to create a little cup or piped little peaks around the outside.

This recipe is comprised of 4 parts:
1. Chocolate Meringue
2. Mascarpone Mousse
3. Creme Anglaise (used in the Mascarpone Cream)
4. Mascarpone Cream

Chocolate Meringue Recipe:
– 90 grams Egg Whites
– 110 grams Granulated Sugar
– 30 grams Confectioner’s Sugar
– 30 grams Dutch-Processed Cocoa Powder

Chocolate Meringue Directions:
1. Place a rack in the center of the oven and preheat to 200F. Line one or two baking sheets with silicone mats or parchment and set aside.
2. Put the Egg Whites in a bowl and whip until soft peaks form. Increase speed to high and gradually add granulated sugar, 1 tablespoon at a time, until stiff peaks form. (The whites should be firm but moist.)
3. Sift the Confectioner’s Sugar and Cocoa Powder over the Egg Whites and fold the dry ingredients into the whites. (This looks like it will not happen. Fold gently and it will eventually come together.)
4. Fill a pastry bag with the meringue. Pipe the meringue into whatever shapes you desire. Alternatively, you could free form your shapes and level them with the back of a spoon or an offset spatula.
5. Bake for 2-3 hours until the meringues become dry and crisp. Cool and store in an airtight container for up to 3 days.

Chocolate Mascarpone Mousse Recipe:
– 335 milliliters Heavy Cream
– Zest of 1 average sized Lemon
– 255 grams 72% Chocolate, chopped
– 390 milliliters Mascarpone
– Pinch of Nutmeg
– 30 milliliters Grand Marnier or Orange Juic

Chocolate Mascarpone Mousse Directions:
1. Place 120 milliliters Heavy Cream and Lemon Zest in a saucepan over medium high heat. Once warm, add the chocolate and whisk until melted and smooth. Transfer the mixture to a bowl and let sit at room temperature until cool.
2. Place the Mascarpone, remaining cup of Cream and Nutmeg in a bowl. Whip on low for a minute until the Mascarpone is loose. Add the Grand Marnier and whip on medium speed until it holds soft peaks. (Do not overbeat as the Mascarpone will break)
3. Mix about 1/4 of the Mascarpone mixture into the chocolate to lighten. Fold in the remaining Mascarpone until well incorporated. Fill a pastry bag with the mousse or free form mousse on top of Pavlova.

Mascarpone Cream Recipe:
– 1 recipe Creme Anglaise (recipe below)
– 120 milliliters mascarpone
– 30 milliliters Sambucca (optional)
– 120 milliliters Heavy Cream

Mascarpone Cream Directions:
1. Prepare the Creme Anglaise. Slowly whisk the Mascarpone and Sambucca into the Creme Anglaise and let the mixture cool. Putt the cream in a bowl and beat with an electric mixer until very soft peaks are formed. Fold the cream into the Mascarpone mixture.

Creme Anglaise Recipe:
– 235 milliliters Whole Milk
– 235 milliliters Heavy Cream
– 1 Vanilla Bean, split or 1 teaspoon Pure Vanilla Extract
– 6 large Egg Yolks
– 75 grams sugar

Creme Anglaise Directions:
1. In a bowl, whisk together the egg yolks and sugar until the mixture turns pale yellow.
2. Combine the Milk, Cream and Vanilla in a saucepam over medium high heat, bringing the mixture to a boil. Take off the heat.
3. Pour about 1/2 cup of the hot liquid into the yolk mixture, whisking constantly to keep from making scrambled eggs. Pour the yolk mixture into the pan with the remaining cream mixture and put the heat back on medium. Stir constantly with a wooden spoon until the mixture thickens enough to lightly coat the back of a wooden spoon. Do not overcook.
4. Remove the mixture from the heat and strain it through a fine mesh sieve into a bowl. Cover and refrigerate until the mixture is thoroughly chilled, about 2 hours or overnight.

Pavlova Assembly:
– Pipe the Mousse onto the Meringues and drizzle with the Mascarpone Cream. Dust with confectioner’s sugar and fresh fruit if desired.

I hope you try this recipe. It it very easy, delicious and great for summer!

Until next time,
LOVE & CONFECTIONS!
MORE PICTURES TO COME… my computer is not liking me right now and I can’t upload any more pictures…

Filed Under: Pastries & Baked Goods, Uncategorized

German Chocolate Cake is not from Germany!

June 11, 2010

First and foremost – I am NOT a coconut girl! For some unexplained reason, I just don’t like the flavor or texture of coconut. Give me a Strawberry Daiquiri over a Piña Colada any day! Even though I do not like coconut, I refuse to make this recipe without the classic element. I suffer through it to enjoy to moist, delicious chocolate cake with creamy, gooey caramel frosting – and in the end, it is worth it!

Today is National German’s Chocolate Cake day. Yes, you read that right. There is an ” ‘s” in the title. The cake did not originate in Germany, like many believe. It is named after Englishman Samuel German, who created “Baker’s German’s Sweet Chocolate” in 1852 for the “Baker’s Chocolate” brand.

The first published recipe for German Chocolate Cake was submitted to a local newspaper by a Dallas, Texas homemaker in 1957. The cake became popular and “Baker’s Chocolate” sales increased. The possessive form – ‘s – was dropped in later publications of the recipe and the name still stands as we know today – German Chocolate Cake.

Now on to the good stuff…

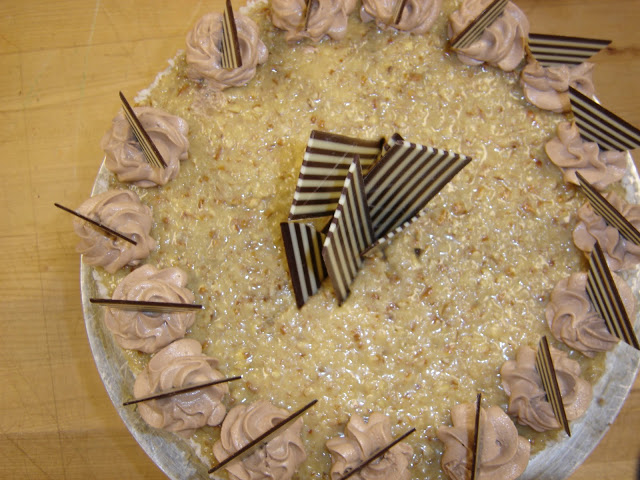
German Chocolate Cake is a layered chocolate cake filled and topped with a coconut-pecan frosting. Sweet Baking Chocolate is traditionally used in the actual cake, although some recipes today do not call for it. The Coconut-Pecan topping is a caramel made with egg yolks and evaporated milk, with coconut and pecans stirred in.

I first made this cake in my “Basic and Classical Cakes and Pastries” class in culinary school, and fell in love! This recipe is one of my favorites and a definite go-to cake for any occasion.

German Chocolate Cake with Coconut-Pecan Frosting
adapted from a culinary school recipe

German Chocolate Cake Ingredients:
– 240 grams Sweet Baking Chocolate
– 120 milliliters Boiling Water
– 240 grams Unsalted Butter, softened
– 480 grams Granulated Sugar
– 80 grams Egg Yolks
– 5 milliliters Vanilla Extract
– 300 grams Cake Flour
– 4 grams Baking Soda
– 3 grams Salt
– 240 milliliters Buttermilk
– 120 grams Egg Whites

German Chocolate Cake Directions:
– Chop Chocolate and melt in a bain marie over Boiling Water
– In a mixing bowl or stand mixer, cream the Butter and Sugar
– Add Egg Yolks one at a time, then Vanilla and Chocolate
– Sift Flour, Baking Soda, and Salt and add alternating with Buttermilk
– In a separate bowl, whip Egg Whites to stiff peaks and then fold into the batter
– Divide into 3 9-inch round pans lined with parchment
– Bake at 350F for 30-40 minutes

Coconut-Pecan Frosting Ingredients:
– 240 milliliters Evaporated Milk
– 240 grams Granulated Sugar
– 60 grams Egg Yolks
– 120 grams Unsalted Butter
– 5 milliliters Vanilla Extract
– 120 grams Coconut, flaked
– 120 grams Pecans, Chopped

Coconut-Pecan Frosting Directions:
– Combine Milk, Sugar, Egg Yolks and Butter in saucepan on medium heat
– Cook until it thickens
– Remove from heat and add Vanilla Extract, Coconut and Pecans
– Beat in electric mixer until cool and spreadable

Assembly:
– Make sure cakes are level, after cooling
– Place 1/4 of the frosting in between each layer and stack
– Frost the top with 1/4 of the frosting
– Frosting the outside of the cake with the last 1/4 of frosting
– Buttercream, Coconut and Chocolate decorations are optional
– Enjoy!

Until next time,
LOVE & CONFECTIONS!
Filed Under: Cakes & Frostings, Uncategorized

Pecan Bars

April 15, 2010

However you choose to pronounce it, it is still just as delicious and good!

Many people will automatically thing of Pecan Pie for National Pecan Day. Pecan Pie is okay in my book, but it is sometimes too much filling for the amount of crust. Depending on the recipe, it might also be too sweet – I know, me with the insatiable sweet tooth, but yes, it can happen. Anyway, I know I am a day late, but I was not able to blog this yesterday – even though I baked it two days ago – life got in the way.

For today’s FHC, I chose one of my favorite pecan recipes from a class in culinary school. It not only is my favorite pecan recipe, it is also one of my favorite recipes of all time. Don’t laugh – the ratio of pecans to “crust” is good, it is not too sweet, just buttery enough, and has such a great flavor. I bet any die-hard pecan pie fanatic will love this recipe just as much. Another plus, it is INCREDIBLY easy to make!

Pecan Pie Bars
Adapted from culinary school recipe
Yields 48 bars from one 1/2 sheet pan

Crust Ingredients:
– 10 ounces Unsalted Butter
– 8 ounces Cream Cheese
– 3.5 ounces Granulated Sugar
– 14.5 ounces All Purpose Flour
– 1 teaspoon Salt
– 1 teaspoon Baking Powder

Crust Directions:
1. Preheat oven to 425 degrees Farenheit
2. In a medium-sized bowl, beat the Butter and Cream Cheese together until smooth.
3. Add the Sugar, Flour, Salt and Baking Powder and stir until the dough is cohesive; it will be crumbly, but hold together when squeezed.
4. Press dough into and up the sides of a prepared – I use nonstick cooking spray, you can also use parchment on the bottom as well – sheet pan
5. Bake the crust for 10 minutes and remove from oven. Reduce the oven to 350 degrees Farenheit


Filling Ingredients:
– 4 large Eggs
– 3/4 cup Corn Syrup
– 7 ounces Granulated Sugar
– 2 ounces Unsalted Butter, melted
– 2 ounces Heavy Cream
– 2 tablespoons Rum
– 4 drops Butter Rum Flavor
– 1/2 teaspoon Salt
– 8 ounces Pecans, chopped

Filling Directions:
1. In a medium-sized bowl, whisk the filling ingredients together. I used my stand mixer. I also did not have Butter Rum flavor this time. I recommend getting it, but if you cannot, it is fine without
2. Pour the filling over the crust.
3. Bake the bars for 30 minutes, or until the filling looks puffy and deep golden brown. Mine took 20-25 minutes.
4. Remove from the oven and cool completely before cutting.

Look at that delicious pecan filling!

Until next time,
Love & Confections!

Filed Under: Brownies & Bars, Uncategorized

Peach Cobbler (FHC)

April 13, 2010

For my second FHC I am baking Peach Cobbler. I have never made peach cobbler, nor have I ever eaten peach cobbler either. I love peaches, but normally eat them as is. Honestly, warm peaches have never been appealing, until now. My Food Holiday Challenge is to not only to bake items I like, but also to take a chance and make something I either do not like, or have never made before.

Unfortunately, peaches aren’t available here – Florida – because they aren’t “in season”. I had to make do and use canned peaches – I opted not to buy frozen peaches because they were a little outside my budget. For all the cobbler purists out there, the recipe I chose was the easiest for me to make at this point – or so I thought. Next year, I will probably make one with a dough to compare and see which I personally like better.

A little cobbler history:
– A cobbler is a type of deep-dish fruit dessert with a thick biscuit or pie dough crust that is prepared and then served warm to guests. It is very similar to a pie, except that the crust is thicker and it is traditionally placed only on top. However, over the years, ingredients and preparation methods have been created that bake the cobbler crust on the top for some recipes and on the bottom for others – like mine today.
– In the US, a cobbler is typically made with fruit or berries, but in the UK, it is typically a meat dish.
– Peach, apple, blueberry and cherry cobblers are among the most popular US varieties.
– The American Cobbler, which is different from a Crisp or Crumble – future blog posts – has nicknames like the Betty, Buckle, Sonker, Grunt, and Slump. New Englanders make Slumps and Grunts in a stove-top iron skillet, topping the fruit with dumplings. Buckles are made with yellow batter that is mixed with the filling. The Brown Betty is made with layers of fruit and bread or graham cracker crumbs, almost like a fruity bread pudding. Sonkers are deep-dish cobblers from North Carolina – my personal favorite nickname, not only because it sounds hilarious, but because my parents now call NC home, and it holds a special place in my heart.

Grandma’s Peach Cobbler
adapted from texascooking.com

Ingredients:
– 1 stick Unsalted Butter
– 1 cup Flour
– 1+1/2 teaspoon Baking Powder
– 1/2 teaspoon Salt
– 1 cup Sugar
– 1 cup Milk
– 1-15 ounce can Sliced Peaches, with juice

Directions:
– Preheat oven to 350 degrees Farenheit
– Slice butter into pats and place in 9×13 baking dish and put the dish in the preheating oven. The recipe above is a single batch. I doubled the recipe and used both an 11×13 dish and 8×8 dish. It doesn’t necessarily have to be the same size, just make recipe accordingly.
– While the butter is melting, mix up the batter by combining the Flour, Baking Powder, Salt, Sugar and Milk.
– When the butter is completely melted, remove the pan and pour the batter into the melted butter.
– Carefully spoon the peaches and juice evenly over the batter. Since I used canned peaches, I did not use all the juice, because the batter would be too watery. The extra juice will be saved for another day.
– return the dish to the oven and bake for X minutes. The original recipe says to bake for 30, but that was not even close to what it needed in my oven, which usually runs hot, so I left it in longer – an extra 40 minutes.
– As the cobbler cooks, the batter will rise up around the peaches.

The extra bake time totalled an hour and ten minutes! Now you know why this recipe might not have been the best choice today – thank goodness I didn’t have any other pressing matters or time constraints.

I still might tweak it a bit. Ease of preparation – wonderful, bake time – doable, end product – DELICIOUS! It is especially good with homemade vanilla ice cream – but that will be another Blog day. I am now a fan of peach cobbler.

Until next time,
Love & Confections!

Filed Under: Crisps-Crumbles-Bread Puddings, Uncategorized

Conversions & Equivalents

April 11, 2010

Measurements and conversions for everyone – Baking & Pastry or Culinary. Keep these handy!

Conversions & Equivalents from Smitten Kitchen

Temperature Conversions
275°F = 140°C = gas mark 1
300°F = 150°C = gas mark 2
325°F = 165°C = gas mark 3
350°F = 180°C = gas mark 4
375°F = 190°C = gas mark 5
400°F = 200°C = gas mark 6
425°F = 220°C = gas mark 7
450°F = 230°C = gas mark 9
475°F = 240°C = gas mark 10


Volume Equivalents
60 drops = 1 teaspoon
1 dash = 1/16 teaspoon
1 pinch = 1/8 teaspoon
1 teaspoon = 1/3 tablespoon = 1/6 ounce
2 teaspoons = 2/3 tablespoon = 1/3 ounce
3 teaspoons = 1 tablespoon = 1/2 ounce
2 tablespoons = 1/8 cup = 1 ounce = 1 standard coffee scoop
4 tablespoons = 1/4 cup = 2 ounces
5 1/3 tablespoons = 1/3 cup = 2 2/3 ounces
8 tablespoons = 1/2 cup = 4 ounces = 1 gill
16 tablespoons = 1 cup = 8 ounces
2 cups =1 pint = 1/2 quart = 16 ounces
4 cups = 2 pints = 1 quart = 32 ounces
16 cups = 8 pints = 4 quarts = 1 gallon


Ingredient-Specific Equivalents
Butter
1 stick = 4 ounces = 8 tablespoons = 1/2 cup
4 sticks = 16 ounces = 32 tablespoons = 2 cups
Chocolate
1 ounce = 1/4 cup grated
6 ounces chips = 1 cup chips
1 pound cocoa = 4 cups cocoa
Creams
Half and half = 1/2 milk + 1/2 cream = 10.5 to 18 percent butterfat
Light cream = 18 percent butterfat
Light whipping cream = 30 to 26 percent butterfat
Heavy cream = whipping cream = 36 percent or more butterfat
Double cream = extra-thick double cream = clotted or Devonshire cream = 42 percent butterfat
Eggs
1 large egg (approximately) = 1 tablespoon yolk + 2 tablespoons white
1 cup = 4 jumbo = 4 to 5 extra-large = 5 large = 5 to 6 medium = 7 small
Flour
1 pound = 4 cups all-purpose or bread flours = 4 3/4 cups cake flour
1 cup sifted cake flour = 7/8 cup sifted all-purpose
1+ cup self-rising flour = 1 cup sifted all-purpose flour + 1 1/2 teaspoons baking powder + 1/2 teaspoon salt
Lemon
1 lemon = 1 to 3 tablespoons juice, 1 to 1 1/2 teaspoons grated zest
4 large lemons = 1 cup juice = 1/4 cup grated zest
Onion
1 pound = 2 1/2 cups sliced or chopped
Sugars
1 pound white = 2 cups white = 454 grams
1 pound packed brown = 2 1/4 cups packed brown
1 cup packed brown = 1 cup white
1 pound superfine sugar = 1 cup white sugar = 190 grams
1 pound powdered sugar = 3 1/2 to 4 cups
1 3/4 cups powdered sugar = 1 cup white sugar
1 cup powdered sugar = 80 grams
100 grams white sugar = 1/2 cup
Yeast
1 cake = 3/5 ounce = 1 packet dry = 2 1/4 to 2 1/2 teaspoons dry

Until next time,
Love & Confections

Filed Under: Kitchen Tips, Uncategorized

Dry Milk (FHC)

April 9, 2010

Over the Christmas holidays, I decided to make Semolina Bread, which used instant Nonfat Dry Milk (iNDM or NFDM). The only iNDM I could find came in a large, 32 ounce can. I only needed 1/4 cup per batch, but figured since I was given 30 pounds of Semolina – we’ll leave that story for another time – I would end up using it, since I was going to be making a lot of Semolina Bread. As it turns out, I haven’t made any more bread, and the giant can of dry milk has been sitting in my pantry. What better way to use some of the dry milk than in my first Food Holiday Challenge.

Now for the info – gathered from various sources:
Instant Nonfat Dry Milk is regular cow’s milk that has had the water and fat removed. It still has all the calcium, protein, vitamins and minerals of fresh milk and is low in cholesterol, too.

You can purchase powdered milk that isn’t nonfat, but it tends to be more difficult to reconstitute because of the fat content. NFDM is usually the easiest to mix, but some people have difficulty getting the milk solids to blend with the water.

Nonfat Dry Milk will not taste the same as fresh milk, especially if you’re used to milk from the carton, but the taste is negligible when it is used as an additive in baked goods or smoothies. One of many advantages of NFDM is the long storage time. If stored in a cool, dry place, it will usually last 18 months.

Dry Milk

Dry Milk Biscuits
from Mountain Maid recipe website

2 cups All-Purpose Flour
1 tablespoon Baking Powder
1 teaspoon Salt
1/3 cup Instant Nonfat Dry Milk
1/2 cup Shortening
3/4 cups Water

Mix the Flour, Baking Powder, Salt and iNDM.

Mash in the shortening with a fork, until the mixture is crumbly.

Stir in the water, a little at a time, to make a dough that is soft, but not sticky.

Knead the dough gently on a lightly floured board or counter-top.

Roll or pat the dough to 1/2 or 3/4 inch thickness; cut it with a knife, or a small glass or cutter that has been dipped in flour.

Place the biscuits about 1 inch apart on an ungreased baking sheet.

Bake at 450 degrees Fahrenheit for 12-15 minutes or until golden brown.

Dough before kneading

Despite the fact that my oven cooks unevenly, the biscuits turned out good. I love watching butter melt away on a warm, right-out-of-the-oven biscuit. Pair melted butter on a warm biscuit with strawberry jam and I am in Heaven – it’s my Kryptonite! Unfortunately, I am out of strawberry jam, so raspberry preserves it is.

Butter melting… yum!

OTHER DRY MILK RECIPES: 1 Quart of Fluid Milk
– put 3+3/4 cups cold water in a container
– add 1+1/3 cups iNDM
– mix thoroughly
– cover and chill for at least 4 hours before serving
– store in refrigerator and use within 3 to 5 days

1 Cup of Fluid Milk
– 1 cup water
– add 1/3 cup iNDM to water
– mix thoroughly
– cover and chill for at least 4 hours before serving

Evaporated Milk
– whisk together 1/2 cup water and 1 cup plus 2 tablespoons iNDM

I found a good amount of recipes for iNDM and will use them in some of my future Food Holiday Challenges. I am now more open-minded about using dry milk in recipes.

Until next time,
Love & Confections

Filed Under: Quick Breads-Muffins-Scones, Uncategorized

  • Page 1
  • Page 2
  • Go to Next Page »

Primary Sidebar

Meet Terri
founder & pastry chef

Subscribe to Love and Confections

Popular Posts

Pumpkin Pecan Cupcakes with Cinnamon Cream Cheese Frosting
Pumpkin Spice Cinnamon Roll Cake
Oatmeal Cream Pie Layer Cake - oatmeal brown sugar layer cake, marshmallow frosting filling, and vanilla bean buttercream with oatmeal cream pie garnish
Easy Piña Colada Poke Cake - pineapple cake, coconut cream pudding, whipped topping, pineapple chunks and maraschino cherries
Mermaid layer cake
PIneapple cake with pineapple curd, teal frosting and tropical sprinkle mix
Irish Cream chocolate cupcakes topped with white and green buttercream piping and shamrock sprinkle mix

AMAZON AFFILIATE

Love and Confections is a participant in the Amazon Services LLC Associates Program, an affiliate advertising program designed to provide a means for sites to earn advertising fees by advertising and linking to amazon.com.

Copyright © 2018 Love and Confections · Log in