• Skip to primary navigation
  • Skip to main content
  • Skip to primary sidebar
  • Home
  • About
  • Work With Me
  • Media
  • Recipes

Family & Festivities

Simple Southern Sweet Tea + A Virtual Baby Shower

September 22, 2017

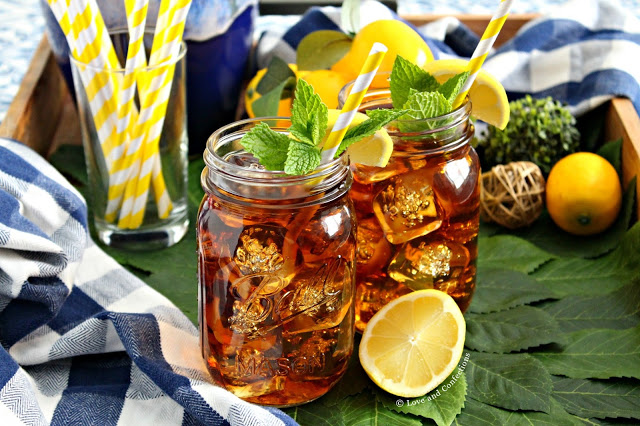
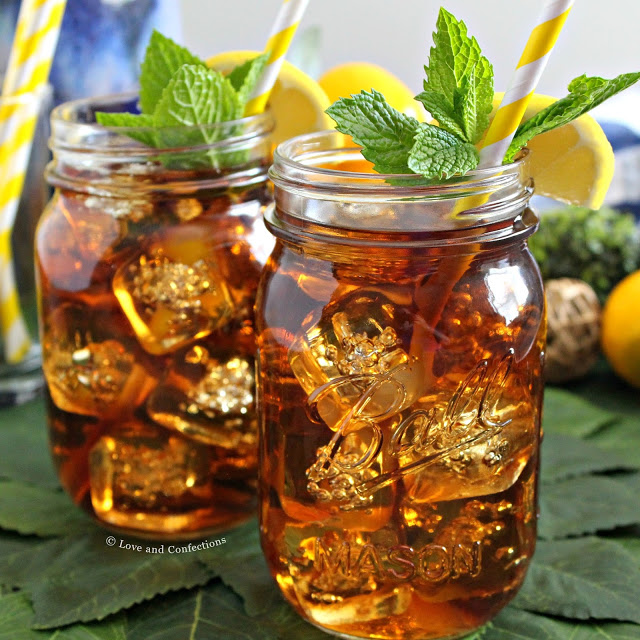
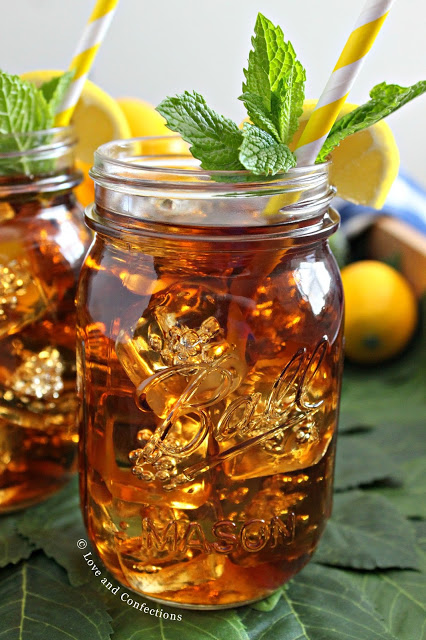
Simple Southern Sweet Tea is a staple at our family and holiday gatherings, and perfect for sipping on the porch while watching the sunset any time of year.

Simple Southern Sweet Tea from LoveandConfections.com


My best friend’s grandmother, who everyone called Gran, even if we weren’t her grandchildren (but in all reality she is seriously like my own grandmother and I love her just the same) was one of the people who started me on my love of sweet tea. She also makes THE best chicken wings in the entire world, but that is for another time.

Simple Southern Sweet Tea from LoveandConfections.com

The other person responsible for my love of sweet tea is my uncle’s mother-in-law, Nanny. Every family gathering we went to with my aunt’s family, sweet tea was present. Nanny is the sweetest lady and I always love being a part of their family parties, especially if she comes. She reminds me so much of my own grandmother with her warm smile and welcoming hugs.

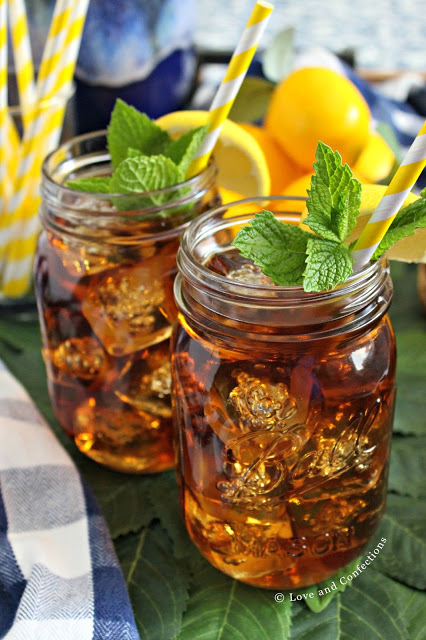
Simple Southern Sweet Tea from LoveandConfections.com

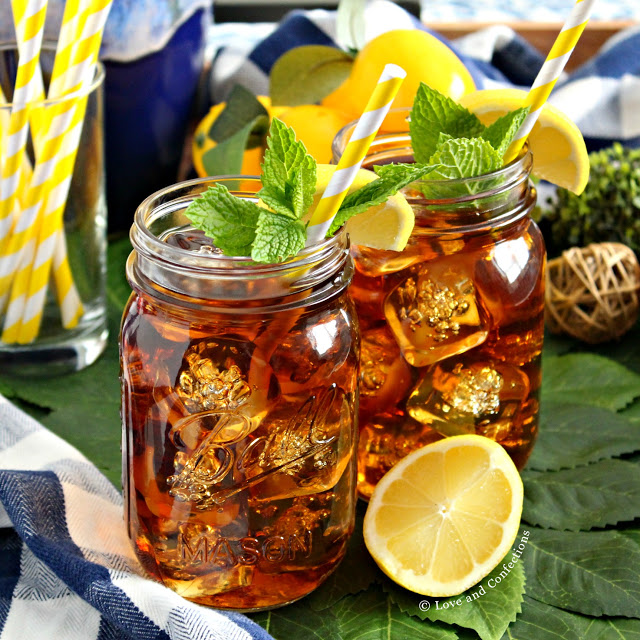
Sweet tea isn’t just a tradition, it’s more personal than that; it’s about community. Inviting someone in and offering a glass of cold sweet tea, sitting on the porch with friends in the Summer sipping from a delicious flavored tea, or enjoying a glass at a holiday party or celebration are all perfect occasions for my simple southern sweet tea.

Simple Southern Sweet Tea from LoveandConfections.com

Baby showers are also the perfect time for sweet tea, and today a group of blogging friends are celebrating a new mom and her adorable, just a little early, baby boy. Angie from Big Bear’s Wife was due in early October, but the little man decided he wanted to make an entrance 3 days ago, thus spoiling my surprise virtual baby shower–now turned surprise virtual baby welcome, LOL.

Simple Southern Sweet Tea from LoveandConfections.com

If you follow Angie, then you know she has some amazing recipes. I love her Southern-style and easy recipes, no-churn ice creams and she also has these delicious Strawberry Sweet Tea Popsicles that I cannot wait to make.

Angie, you are the most deserving, sweet and lovable person!! I know your baby boy is incredibly lucky to have you and Thomas as parents. You are going to be a great mother and you have an incredible village behind you ready to help support and love you all. Savor every moment, even the sleepless ones, because they truly do grow up too fast. All my love!

Simple Southern Sweet Tea from LoveandConfections.com

Simple Southern Sweet Tea

By Love and Confections
Published 09/22/2017

Simple Southern Sweet Tea with tips and tricks from a few grandmotherly sources – baking soda helps with bitterness, cooling on counter prevents cloudiness, Luzianne recommended for best tea.

Ingredients

  • 16 cups filtered/spring water, divided
  • 4 Luzianne large iced tea bags, not cold brew
  • 1/4 teaspoon baking soda
  • 1 1/2 – 2 cups extra fine granulated sugar – I use Dixie Crystals
  • Lemon and mint for garnish

Instructions

  1. In medium saucepan, bring 4 cups water just to a boil. Place tea bags and baking soda in a large glass measuring cup that is heat-safe.
  2. Pour water over tea bags and let steep for 5-8 minutes. Remove tea bags, letting them drip, but do not squeeze bags to get liquid out.
  3. Pour into large pitcher and stir in sugar. Pour remaining 12 cups water into pitcher and let cool to room temperature. Store in refrigerator and serve over ice with lemon slices and mint for garnish.

Yield: 1 gallon

Until next time,
LOVE & CONFECTIONS!


Please take some time to check out all the amazing recipes we made for Angie’s virtual baby shower!

Beverages:

Baby Blue Punch from Or Whatever You Do.
Easy Fall Party Punch from Miss in the Kitchen.
Simple & Fun Mimosa Bar from My Life Well Loved.
Simple Southern Sweet Tea from Love and Confections.

Appetizers & Salads:

Creamy Grape Salad with Toasted Pecans from Unsophisticook.
Mini Chicken and Waffles from Sweet Beginnings.
Pimento Cheese Stuffed Buttermilk Biscuits from It’s Yummi.
Savory Cucumber Melon Salad with Honey Thyme Vinaigrette from Cooking in Stilettos.
Spicy Southern Deviled Eggs from This Gal Cooks.

Entrees:

American Pierogi Casserole from Rants From My Crazy Kitchen.
Chicken Satay Skewers with Peanut Butter Sauce from Culinary Adventures with Camilla.
Pimento Cheese Tomato Ham Sliders from Honey and Birch.

Desserts:

Banana Pudding Layered Dessert from High Heels and Grills.
Brookies from Baked Bree.
Caramel Corn from The Redhead Baker.
Caramel Pecan Cheesecake from Cooking with Carlee.
Chocolate Chip Clouds from All Day I Dream About Food.
Lemon Donuts with Raspberry Glaze from Ashlee Marie
Low Carb Chocolate Peanut Butter Stuffed Cupcakes from Sugar-Free Mom.
Mickey Mouse Candy Pops from The Decorated Cookie.
Pumpkin Cheesecake Brownie Bars from The Bitter Side of Sweet.
Small Batch Rhubarb Strawberry Jam from The JavaCupcake Blog
Classic Yellow Butter Cake with Fudgy Chocolate Icing from That Skinny Chick Can Bake.
Yellow Cupcakes with Peach Cream Cheese Frosting from Cookie Dough and Oven Mitt.
Worms and Dirt Cookie Cups from Cupcakes & Kale Chips.

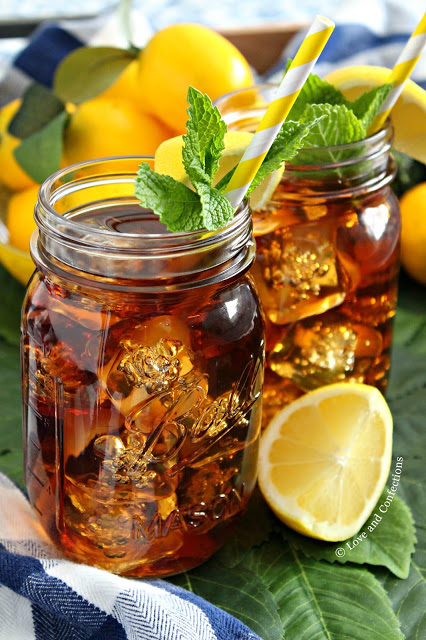
Simple Southern Sweet Tea from LoveandConfections.com

Filed Under: Beverages, Family & Festivities, Uncategorized

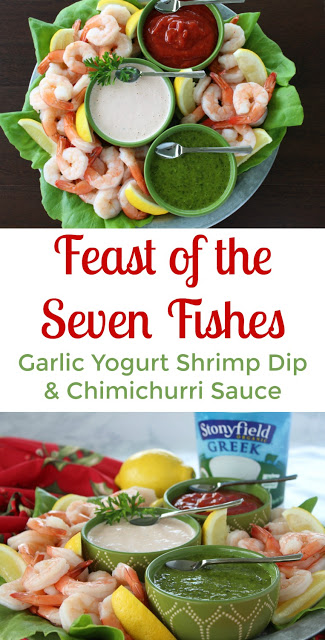
Feast of the Seven Fishes: Shrimp with Dipping Sauces #StonyfieldBlogger

December 14, 2016

Christmas Eve is my favorite holiday because my family celebrated the Feast of the Seven Fishes. 

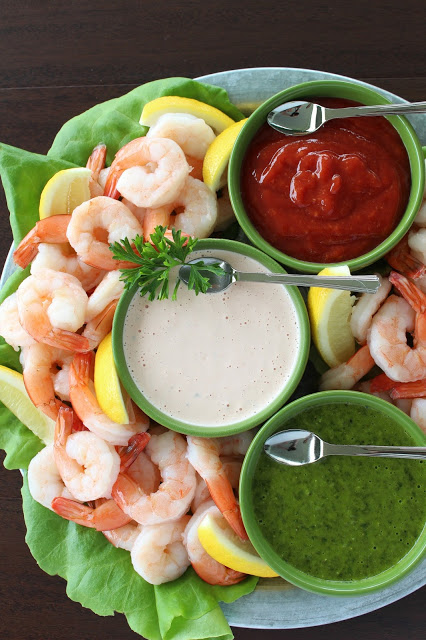
Stonyfield Yogurt Dish - Feast of the Seven Fishes from LoveandConfections.com

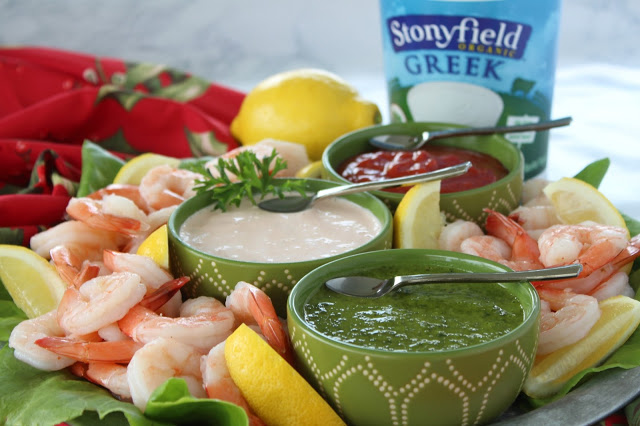
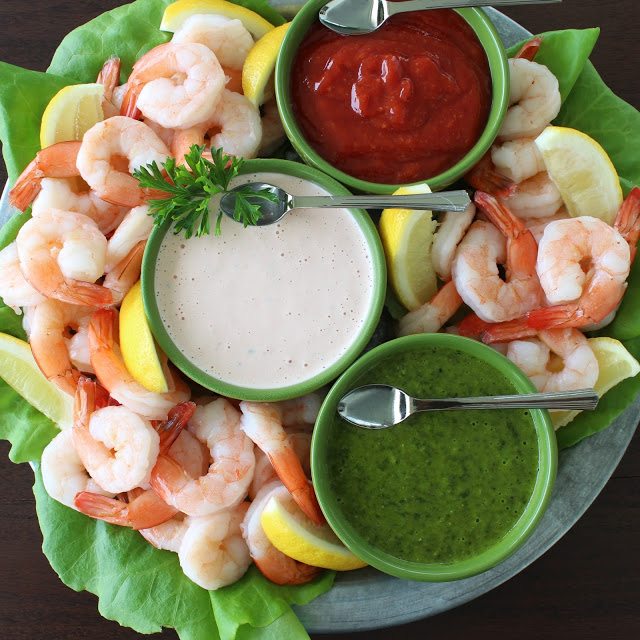
Head on over to Stonyfield Yogurt Dish Blog to read all about my family tradition of the Feast of the Seven Fishes, as well as two recipes. Garlic Yogurt Dip and Chimichurri Sauce, perfect for dipping delicious shrimp!

Stonyfield Yogurt Dish - Feast of the Seven Fishes from LoveandConfections.com
Stonyfield Yogurt Dish – Feast of the Seven Fishes with Shrimp Yogurt Dip


Stonyfield Yogurt Dish - Feast of the Seven Fishes from LoveandConfections.com

Until next time,
LOVE & CONFECTIONS!


Filed Under: Appetizers-Snacks-Dips, Family & Festivities, Holiday, Uncategorized

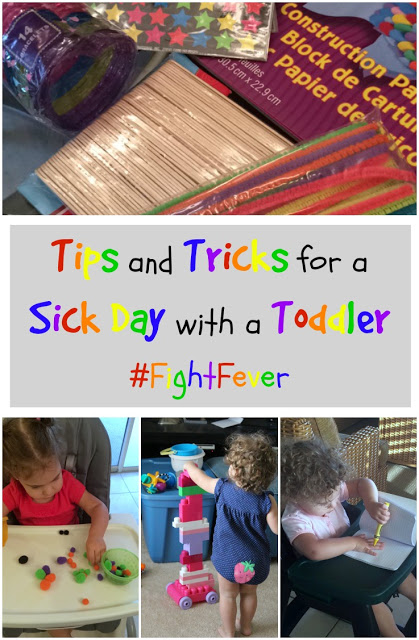
Tips and Tricks for a Sick Day with a Toddler #FightFever

November 17, 2015

This shop has been compensated by Collective Bias, Inc. and its advertiser. All opinions are mine alone. #FightFever #CollectiveBias

Sick days are no fun, especially when you are nearly two years old. Here are some tips and tricks to brighten up a sick day with a toddler.


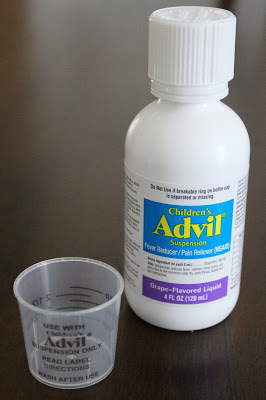
November has definitely been a month to remember. #ToddlerLnC got Hand, Foot and Mouth Disease while we were visiting my Mom for Halloween. She had some little red spots on her hands and when we checked, she had spots and blisters in her mouth and on her feet too. As soon as we got home, I took her to the pediatrician who confirmed it was HFMD. She told me to give her Children’s Advil® for discomfort and fever.

What I didn’t realize is how contagious Hand, Foot and Mouth is. A few days later, I showed signs of it as well. I think (and hope) that it is worse in adults than children, because I was miserable and wouldn’t want her to go through that. The Toddler was on the mend, thankfully, and I just needed to take care of myself too.

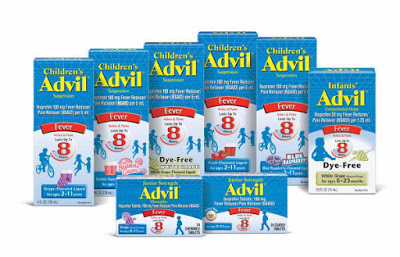
Whenever she is sick, I try and keep her comfortable and happy. I have a little checklist of items and activities that we do, so she can have fun, even while not feeling good. Children’s Advil® from Walgreens is always in our medicine cabinet. The Toddler loves Grape flavor, but I’m sure when she is older she might like some of the other tasty Sugar-free Dye-free flavors, like Berry, Bubble Gum, Blue Raspberry, Fruit Punch and Dye-Free White Grape. I remember, as a kid, having the Children’s Advil® Grape Chewables easy-to-swallow tablets, because I liked them better than liquid at that point. When my toddler has a fever, I want effective relief that I can count on. Children’s Advil® helps bring her fevers down, keeps them down longer with less medicine than Children’s Tylenol®, and gives relief, for both her and me.*


Sick Day Activities for a Happy Toddler:
  • Forts/Tents – we love building forts and the toddler loves playing hide-and-seek in them.
  • Coloring – crayons and coloring books are one of our favorite activities. It helps her learn the color names and fine motor skills
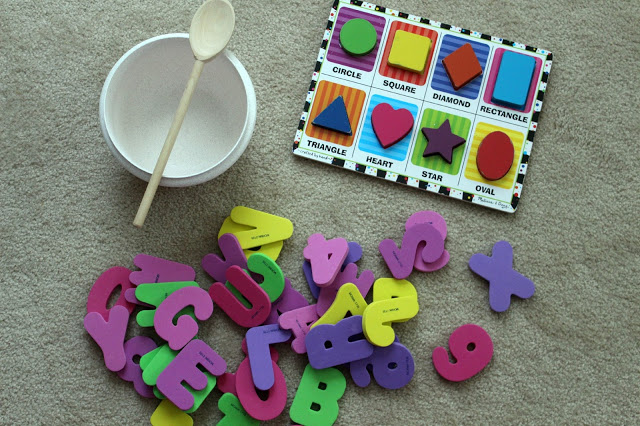
  • Puzzles & Books – these are two of her favorite things. She is so smart and loves her shape puzzles. She has her very own bookshelf with her favorite books, so she can grab them anytime and look through them – or bring one to Mommy or Daddy to read to her.
  • Bath Time – sometimes a little extra bath time makes her feel better, especially when we have fun bath toys to play with like foam alphabet letters.
  • Make Music – we make music with everything. She has some musical instrument toys, like bells, drums, and a piano, but we also use bowls, spoons, and anything else she can find. She loves listening to and making music.
  • Busy Books, Sensory Bins, and Crafts – a great resource and one of my favorite blogs is The Educators Spin On It, run by my friends Amanda and Kim. They have so many great ideas for children of all ages on their blog.
  • Cuddles – a necessity when sick, because cuddles make everything better!

Tips & Tricks
  • Rest, rest, rest – she normally has a set sleep/nap schedule, but when the Toddler is sick, that goes out the window. She needs rest to get better, so she naps and sleeps a bit more, and doesn’t do any strenuous activities.
  • Food – a lot of times, she doesn’t want to eat much, or at all, when she isn’t feeling good. I make sure we have some fruit and veggie pouches because I know she loves them and can get good nutrients from them too. Depending on her illness and what her pediatrician says, I also make her smoothies. She loves all kinds of smoothies and it cheers her up when I pull the blender out
  • Hydrate – I make sure she has a sippy cup of water available at all times. Depending on her illness and what the pediatrician says, sometimes she can have milk or juice mixed with water.
  • Ice Pops – if she has a sore throat, she loves Ice Pops. Homemade Ice Pops are great, but if you don’t have the molds or time, store bought is okay – I try and get the 100% fruit with no added sugar ones.
  • Humidifier – if needed, we plug in her humidifier at night, to help her sleep better.
  • Children’s Advil® – we always keep Children’s Advil® on hand in case of a fever, teething, or cold. 

What are your go-to sick day activities and what is your child’s favorite Children’s Advil® flavor?

Until next time,
LOVE & CONFECTIONS!
*Disclaimer: I am not a medical professional. Please, always, consult your child’s pediatrician with concerns and questions. Always read and keep the cartons for complete warnings and dosing information on Children’s Advil®. Refer to and only use the dosing device and information that comes packaged with Children’s Advil®. If known, dose child based on weight, as this is the most appropriate method. If weight is not known, use age. 

Filed Under: Family & Festivities, Uncategorized

Made to Matter #StonyfieldBlogger #MadeToMatter

July 31, 2015

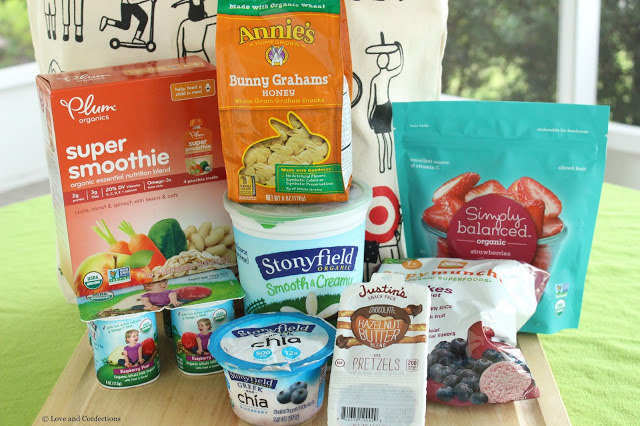
Stonyfield Smoothies, fun at the baby gym, playing in the water, and unlimited play time with Mommy is the most fun I have had in a while and a day that was truly “Made to Matter” with my Toddler.


Made to Matter from LoveandConfections.com #StonyfieldBlogger


I have been extremely busy with blog work lately. I recently went to a conference for a weekend (the re-cap will be up Friday), and have been working on a lot of projects for the blog. The days have been extremely hot here, with rain and thunderstorms almost every day. Sometimes it is too hot to go outside and play during the day and by the time we are finished with dinner and cleaning up, it’s almost #ToddlerLnC’s bedtime.

Made to Matter from LoveandConfections.com #StonyfieldBlogger

I decided to put the work aside for a day and enjoy some time with #ToddlerLnC. Albeit, I had deadlines and lots of work to do, but being with her was more important. After a delicious breakfast of eggs and Stonyfield YoTot Yogurt, we headed out to the baby gym.

Made to Matter from LoveandConfections.com #StonyfieldBlogger

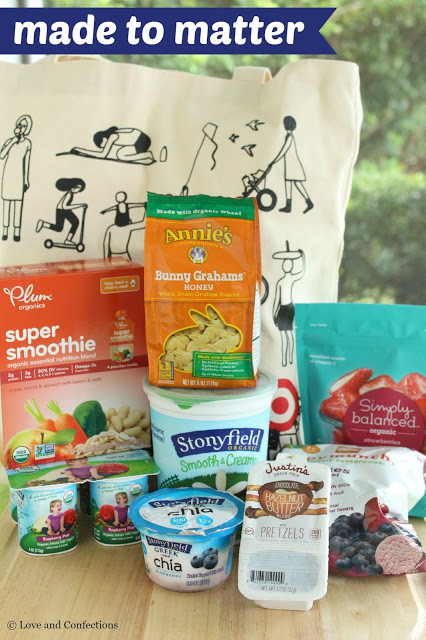
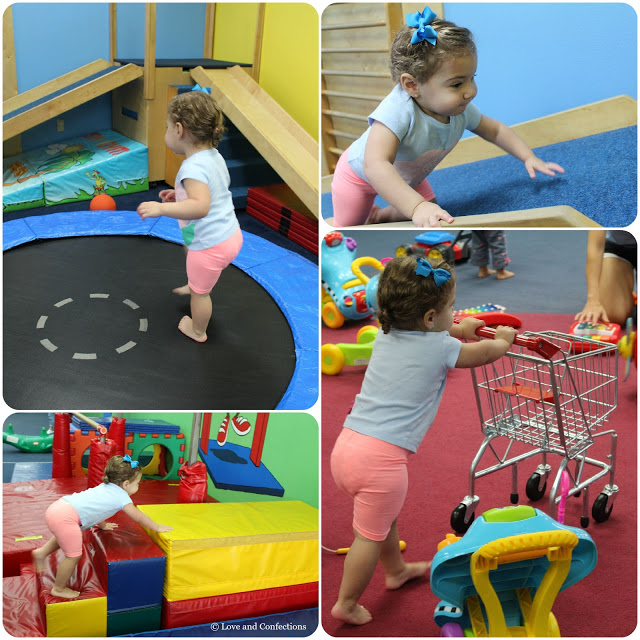
We had so much fun at the baby gym. She loves to jump on the trampoline, walk on the balance beam, and try to climb everything in her path. The gym is a great place to burn off energy especially since there is lots of fun music and activities. She usually has a Plum Organics fruit pouch after the gym time, so she can get a little snack in her before the car ride home. I love being able to give her a healthy snack and glad that Plum Organics is one of the Made to Matter brands.

Made to Matter from LoveandConfections.com #StonyfieldBlogger

We often go to the splash pad, and what better way to cool off on a hot day than play in the water. It’s so much fun to watch her encounter the fountains. She runs to and away from the spraying water, sometimes not realizing when one is going to hit her in the face. She is carefree and enjoying life, inquisitive, caring and so smart. I love watching her discover new things, learn, and have new experiences.

Made to Matter from LoveandConfections.com #StonyfieldBlogger

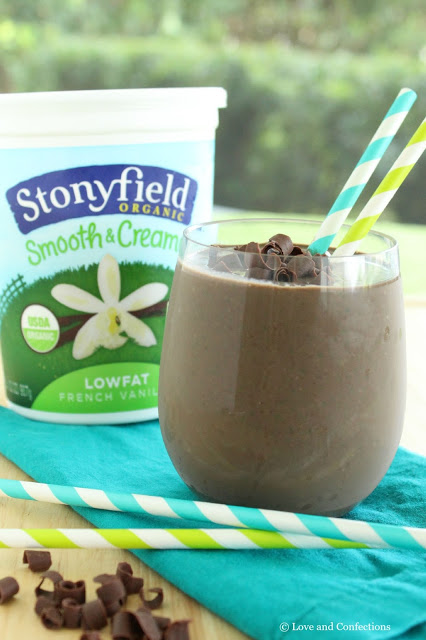
After the splash pad, we went home, had lunch and she took a really good nap – I tired her out. After her nap I fixed us both a smoothie and snack. I love using Stonyfield Yogurt in my smoothies. I am doing a 5-part smoothie series during August, so don’t forget to come back to check out all my delicious smoothies. You can also follow along with the hashtag #LnCSmoothieSaturdays on social media. We enjoyed a day playing at the gym, splash pad, reading books, building blocks, sharing smoothies and having fun thanks to inspiration from Stonyfield and Made to Matter from Target.

Made to Matter from LoveandConfections.com #StonyfieldBlogger

Target’s new Made to Matter collection of product includes options that are organic, non-toxic, non-GMO, fair trade and more. Stonyfield Organic is included in the list of handpicked companies included in Target’s Made to Matter collection. The collection has baby and children’s products, like Plum Organics, Annie’s, and Happy Family. There is also beauty, health and cleaning products, like Olly, Method and Seventh Generation. Some of the grocery products include Cascadian Farms, Justin’s and Target’s Simply Balanced to name a few. You can find the whole list of Made to Matter companies on the Target website.

Made to Matter from LoveandConfections.com #StonyfieldBlogger

Looking for a Greek yogurt with something…more? Stonyfield to the rescue with two new Target Made to Matter exclusives: Stonyfield Organic Super Seeds and Stonyfield Organic Super Grains Greek Yogurt. Organic Super Seeds features nonfat Greek yogurt with softened flaxseed, in orange-cranberry, blueberry and coconut flavors. Stonyfield Organic Super Grains pairs nonfat Greek yogurt with buckwheat and quinoa, in strawberry, maple and vanilla flavors. Each 5.3oz cup is packed with protein for a wholesome, truly satisfying snack – morning, noon or night. All six flavors are certified organic and gluten-free, and completely delicious. They will be available exclusively at Target stores nationwide starting in August. For more information on Stonyfield Super Seeds & Grains Greek Yogurt or any Stonyfield product, visit www.Stonyfield.com.

Made to Matter from LoveandConfections.com #StonyfieldBlogger

Until next time,
LOVE & CONFECTIONS!
Disclaimer: I received samples of some of the Made to Matter products as well as a Target gift card to purchase more Made to Matter Products. I have an ongoing relationship with Stonyfield as a member of the Clean Plate Club. I receive product, coupons and/or compensation for posts featuring their products. As always, all opinions are my own. #stonyfieldblogger #sponsored.

Filed Under: Family & Festivities, Uncategorized

Strawberry Freezer Jam

July 7, 2015

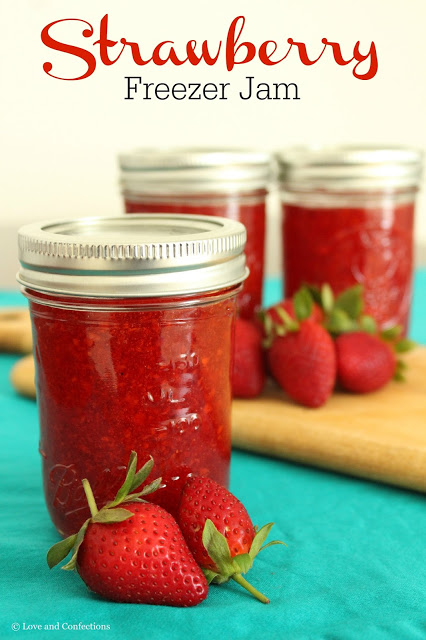
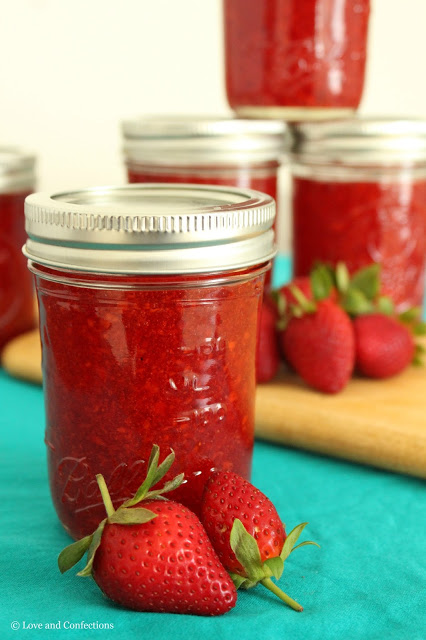
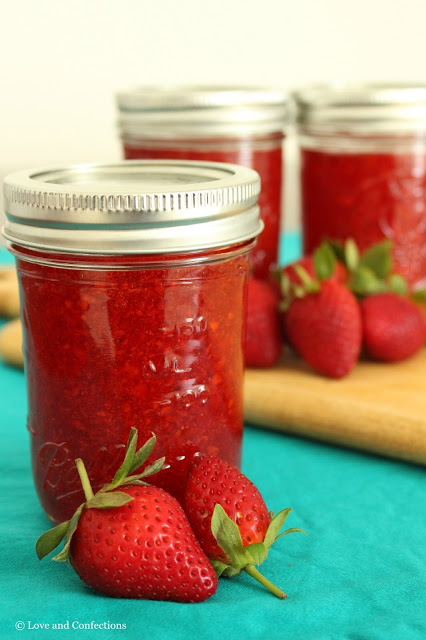
Strawberry Freezer Jam is an easy way to preserve those freshly picked strawberries 
and enjoy them for months after the season ends.

Strawberry Freezer Jam from LoveandConfections.com


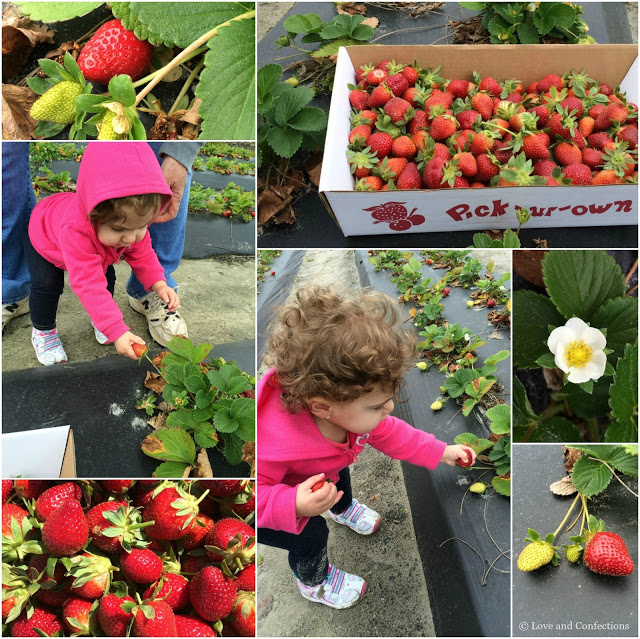
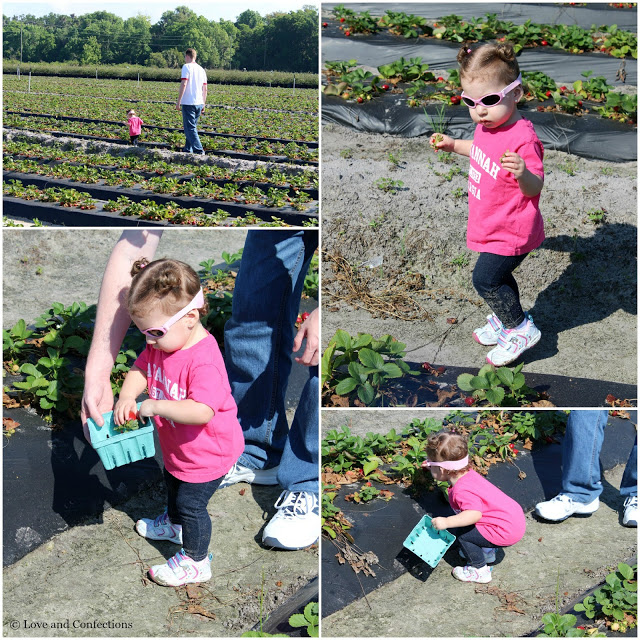
I really love picking fresh fruit. Every year I go blueberry picking with family and picked strawberries before, but this year was extra special because #ToddlerLnC joined us. We went strawberry picking twice this year. The first time was cold and wet day, and Toddler LnC didn’t know what was going on at first, until she realized it was strawberries, her favorite fruit.

Strawberry Freezer Jam from LoveandConfections.com

She loved running away from us down the rows, trying to eat the strawberries – even the bad ones – and picking berries, leaves and anything she could grab. Her little hands were stained red by the end of the picking, she had fallen into or ran through mud and she was a happy, adorable mess! It was so much fun to watch her experience something new.

Strawberry Freezer Jam from LoveandConfections.com

The second time we took her was at the end of the season and she was a “pro” carrying her own basket and pulling every berry in sight. Her favorite part was eating the berries straight from the field. I swear she can eat her weight in strawberries. Both times, we went to a family-friendly berry patch and it was adorable watching all the little kids with their own berry buckets, running back and forth between their moms and dads, asking “is this a good one”. Next year, Toddler LnC will probably romp around and actually fill her own cute berry basket too, instead of eating it all.

Strawberry Freezer Jam from LoveandConfections.com

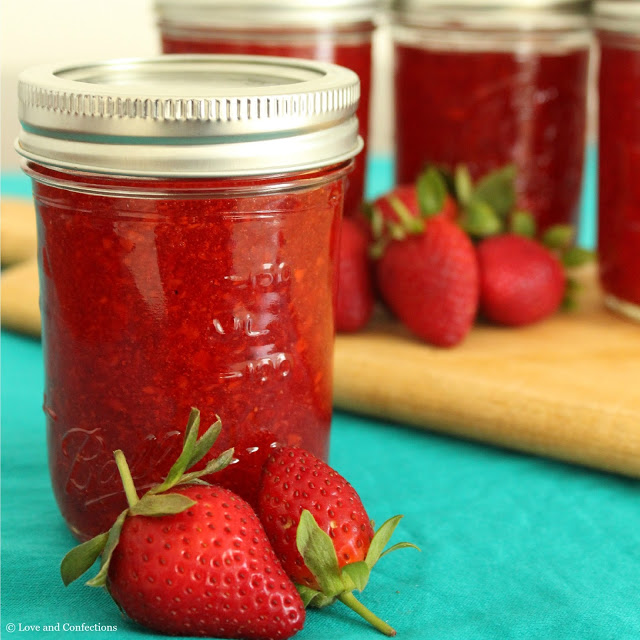
Freshly picked fruit tastes amazing and I decided to make some jam with our haul. I have canned before, but with a toddler running around my feet in the kitchen, I decided to make Freezer Jam instead. It is so simple and tastes amazing. I can hardly wait to make freezer jam with other fruit!

Let’s connect! Follow me on {Pinterest} {Facebook} {Twitter} {Instagram}


Strawberry Freezer Jam from LoveandConfections.com


Strawberry Freezer Jam
Recipe slightly adapted from SURE-JELL

Strawberry Freezer Jam Ingredients:
– 2 cups pureed fresh Strawberries
– 4 cups Extra Fine Granulated Sugar
– 3/4 cup Water
– 1 SURE-JELL Fruit Pectin package*
– 5-6 half-pint canning jars, cleaned and prepared

Strawberry Freezer Jam Directions:
1. Puree roughly a 1 quart container of Strawberries until you have 2 cups of pureed fruit.
2. Pour Strawberry puree into a large measuring cup or large bowl with spout. Stir in the Extra Fine Granulated Sugar.
3. In a small saucepan, whisk the Water and SURE-JELL Fruit Pectin together until it boils. Continue whisking while boiling for 1 minute.
4. Add the Pectin to the pureed fruit and whisk for three minutes. Immediately fill the jars, leaving 1/2 inch from the top for expansion. Screw the lids on tight and leave the jars to rest at room temperature on the counter for 24 hours.
5. After 24 hours you can either freeze the jars for up to 1 year or place in the refrigerator and use within 3 weeks. If freezing, allow the jar to thaw overnight in the refrigerator before using.

*SURE-JELL Fruit Pectin package is not the same as the pre-mixed Certo Fruit Pectin. Please be aware when you are purchasing this item.


Strawberry Freezer Jam from LoveandConfections.com

Until next time,
LOVE & CONFECTIONS!

Disclaimer: This is not a sponsored post. This post may contain affiliate links. All opinions are my own.

Filed Under: Family & Festivities, Jams-Butters-Condiments-Toppings, Uncategorized

OXO Tot #Firstbites Easy Baby Food Recipes and a Giveaway!

July 14, 2014

This post is sponsored by OXO Tot. I also have 2 simple baby food recipes and an amazing GIVEAWAY at the end of the post!

OXO Tot Products

I am so excited about this post. I love working with the OXO company. When I hear they had a campaign for baby first foods I jumped on it. We recently started solid foods for Baby L&C and she has done great so far. If you happen to follow my Instagram Feed, you’ll definitely see tons of picture of her enjoying her food and being all cute!

When it was time to get her a high chair, like any first-time Mom out there, I did a bunch of research. We wanted one that was in our price range – I was not about to pay $400 for a few pieces of snazzy-named wood, no offense to anyone who has that, but it’s just not us. We went back and forth between a few of the big brands, but I also researched OXO Tot. I was pleasantly surprised by the features it had, similar to other high chairs, so it went in the running. Mr. L&C is a “hands on” tester, so we went to our local baby store and played around with them. OXO was my top choice from online research and after looking and trying out a few brands, everyone agreed that it was the perfect high chair for Baby L&C. It doesn’t feel big and bulky, it’s very sturdy, can easily move around our small apartment, and its machine washable!!! Now I just need a few interchangeable covers for when one is in the wash!!

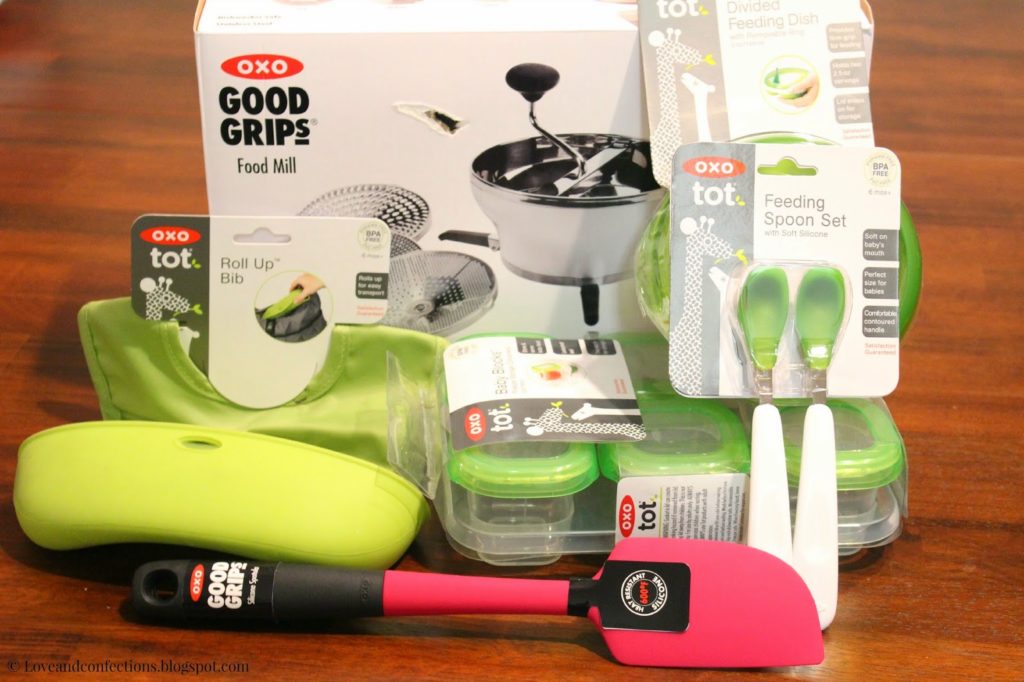
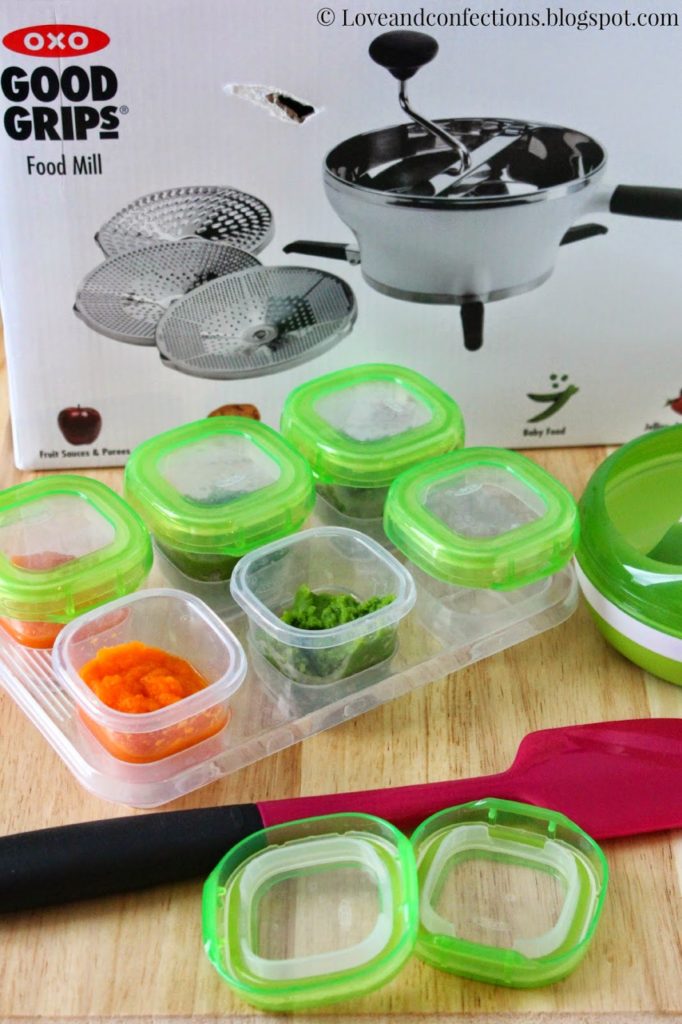
I had fun playing with all the great baby tools in the package from OXO Tot. The food mill takes a bit of time to properly puree food, but I think it is worth it. It’s so nice to have bright colored fruits and veggies, instead of the dull green and beige of most prepared baby food. Don’t get me wrong, I do use prepared baby food, but with the food mill, it’s nice that I prepared it, pureed it and it has no preservatives or anything extra. I also like the small feeding blocks. They are dishwasher safe and easily hold her small amounts of food. The storage tray is great because I don’t have to go digging through the refrigerator for food, I can just pull it out and it’s all in one spot.

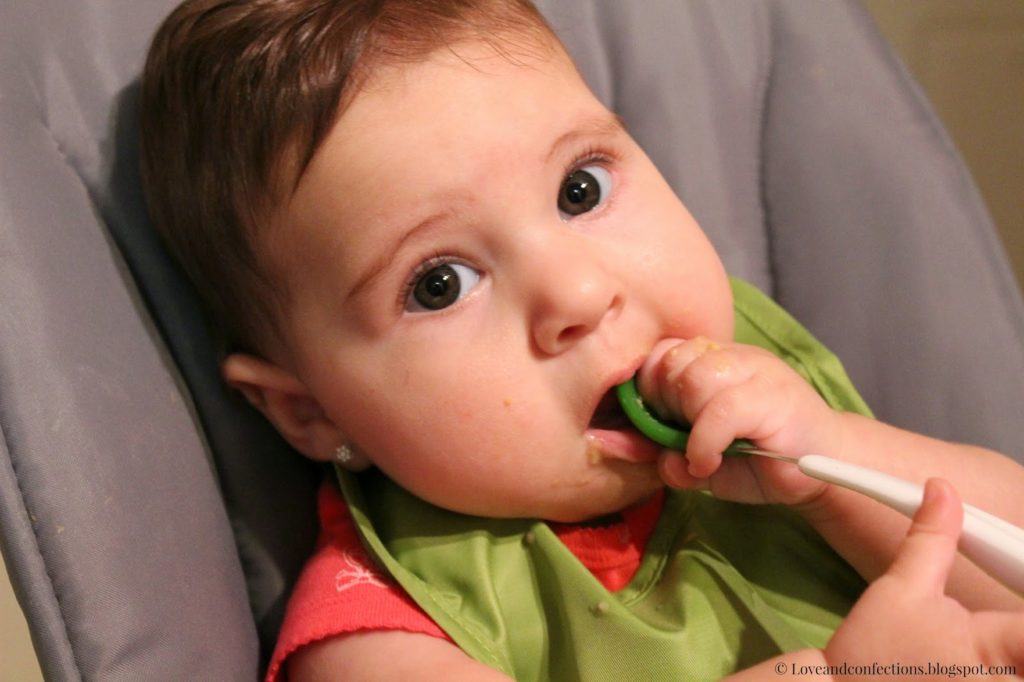
Baby L&C isn’t too sure about the bib yet, Since we’re only on small amounts of pureed food, she doesn’t have much spills. When she moves to more advanced food I think it will come in handy more. For right now, it’s a weird plastic thing that can hold her extra spoon.

Speaking of extra spoon, these OXO Tot spoons are great! I have a few different types of spoons, but none that have the silicone like these. The curve of the spoon is different than most, but I think it works well with feeding her the purees and oatmeal. It’s also great that it comes in a 2-pack, because she has a thing about holding a spare spoon while I am trying to feed her. It becomes another dinner time teething toy.

I love the divided feeding dish, especially since it’s microwave safe! I am usually juggling two small bowls and this makes feeding time a lot easier! I am seriously thinking about switching all my spatulas to the OXO silicone spatula. That is a big leap coming from a Pastry Chef. I was once totally in love with those wooden-handled name-brand spatulas, but not any more. Give me a spatula that is heat resistant to 600°F and does not come unattached in the middle of stirring a thick batter and I’m a happy girl.

Pureed Carrots
– Peel and cut organic carrots into small 1/4 inch pieces. Heat enough water to cover the carrots and boil them until soft. Strain and place carrots in the food mill placed over mixing bowl or measuring cup. Make puree, remembering to move the food mill back and forth to clean the top. Use the spatula to scrape the puree off the bottom of the mill every few passes. Portion into OXO Tot Baby Blocks, leaving room if you are freezing. Let it cool to room temperature before placing in the refrigerator or freezer. If using from the freezer, thaw in the refrigerator over night. Be careful when reheating, as it can get hot spots.

Pureed Peas
– Steam organic peas until tender and soft. Strain any water out and place peas in the food mill placed over mixing bowl or measuring cup. Make puree, remembering to move the food mill back and forth to clean the top. Use the spatula to scrape the puree off the bottom of the mill every few passes. Portion into OXO Tot Baby Blocks, leaving room if you are freezing. Let it cool to room temperature before placing in the refrigerator or freezer. If using from the freezer, thaw in the refrigerator over night. Be careful when reheating, as it can get hot spots.


Until next time,
LOVE & CONFECTIONS!

Disclaimer: I received product from OXO Tot including an OXO Tot Bib, OXO Tot Feeding Spoon Set, OXO Tot Divided Feeding Dish, OXO Tot 2 oz Baby Blocks, OXO Medium Silicone Spatula and OXO Food Mill. I only work with companies I love. All opinions are my own.

Filed Under: Family & Festivities, Uncategorized

White Chocolate Blondies

July 3, 2014

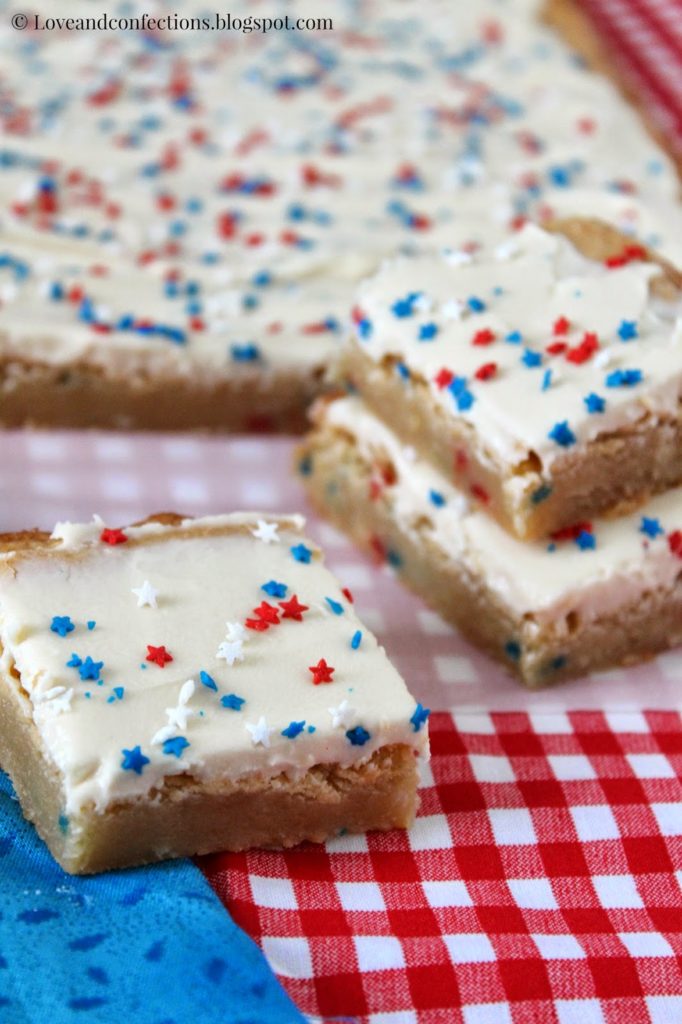
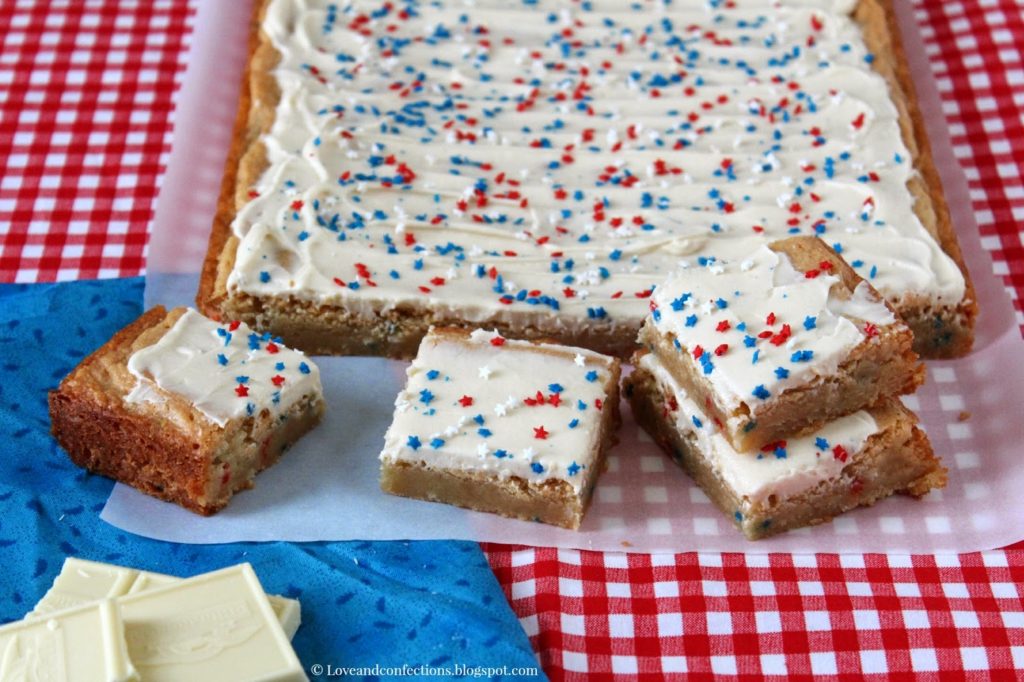
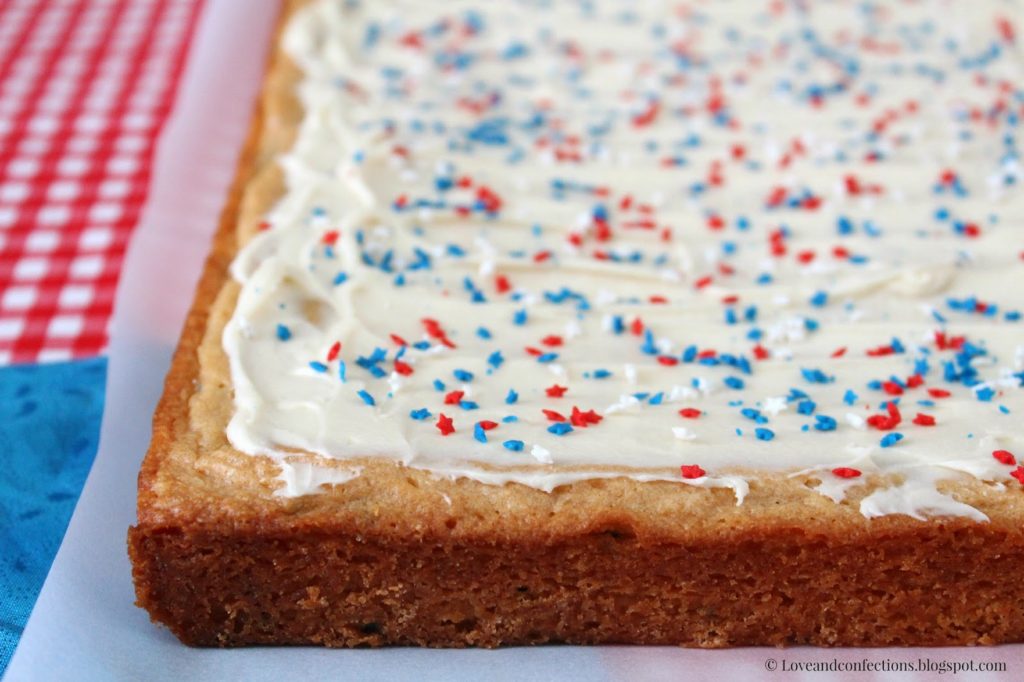
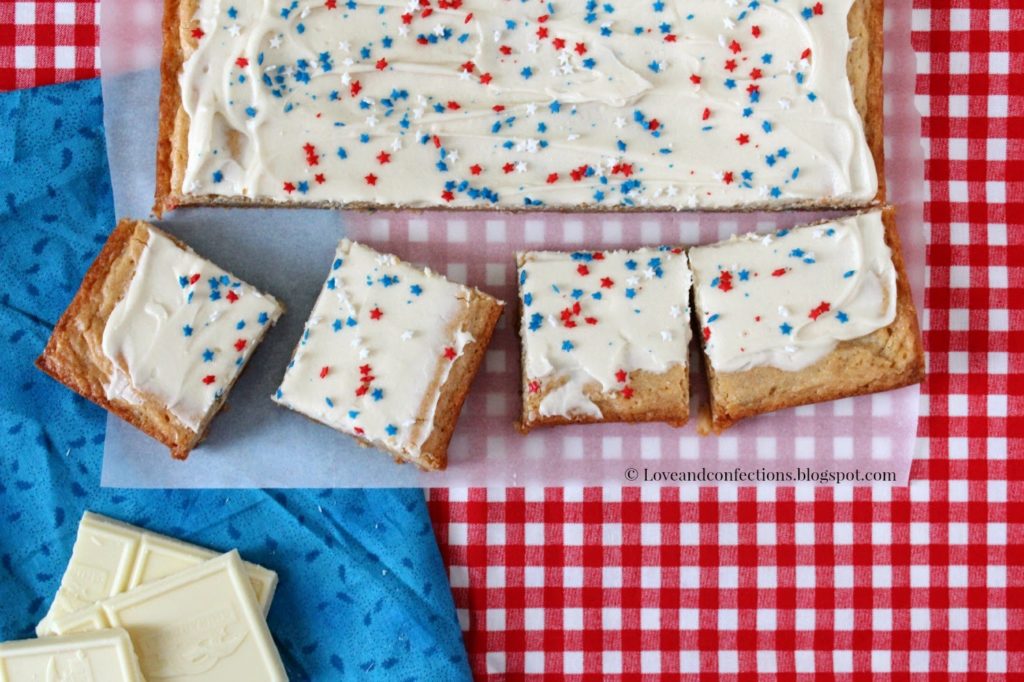
 White Chocolate Blondies with White Chocolate Frosting are a great dessert for a last-minute party invite. You can customize the sprinkles for any occasion too!

If you need a quick dessert recipe, these are your go-to bars. They are simple to make, bake in 30 minutes, and the frosting can be made while the blondies cool. I absolutely love my mini star sprinkles, but who doesn’t love sprinkles. Sprinkles make every baked good better, in my opinion.


This Independence Day, I will be having a barbecue and pool party with the family. Baby L&C will be decked out in her adorable red, white and blue outfit, and of course she has a cute bathing suit and float for the pool. I love grilling outdoors and grilling with family and friends is one of the best parts of Summer. If you need any good grilling recipes for this weekend, check out my friend, Kim’s site – Kiss My Smoke. 

This will be Baby L&C’s first 4th of July. Here’s hoping that the fireworks don’t freak her out. Granted, she can sleep through a lot, but I’m still hoping there aren’t any idiots and/or drunks patriotic party-goers setting off fireworks at our apartment complex at midnight (crossing fingers). 


White Chocolate Blondies with White Chocolate Frosting
a Love and Confection original
Click here for the printable recipe

White Chocolate Blondie Ingredients:
– 2 sticks Unsalted Butter, room temperature
– 6 ounces White Baking Chocolate
– 1 cup Brown Sugar
– 1 cup Granulated Sugar
– 2 large Eggs
– 2 teaspoons Vanilla Extract
– 1 teaspoon Salt
– 2 cups All-Purpose Flour
– 1/4 cup Milk
– 2 tablespoons Sprinkles (optional)

White Chocolate Blondie Directions:
1. Heat the oven to 350°F. Prepare a 9×13 baking pan with parchment paper and baking spray (leaving an overhand so you can get the blondies out easily).
2. In a small saucepan, melt the Butter and White Baking Chocolate until there are no lumps, stirring frequently so it doesn’t burn.
3. In the bowl of your stand mixer or a medium bowl with a hand mixer, add the Butter/Chocolate mixture, Brown Sugar, Granulated Sugar, Eggs, Vanilla Extract and Salt. Blend until combined.
4. Add in the Flour, one cup at a time and the Milk. Mix to combine.
5. Add the Sprinkles and mix by hand with a spatula. Pour into pan and bake for 30-35 minutes, or until a toothpick inserted in the center comes out clean.
6. Cool in pan for 10 minutes, then using the parchment paper, remove from pan and cool on wire rack. Frost when cool (optional).

White Chocolate Frosting Ingredients:
– 2 ounces White Baking Chocolate
– 3 tablespoons Unsalted Butter, room temperature
– 1 teaspoon Vanilla Extract*
– Pinch of Salt
– 1 cup Powdered Sugar
– 2 tablespoons Heavy Cream
– Sprinkles (optional)

White Chocolate Frosting Directions:
1. Melt White Baking Chocolate in a microwave-safe bowl for 20 second intervals, stirring after each round in the microwave.
2. In a small bowl, mix the White Chocolate, Butter, Vanilla Extract and Salt until combined.
3. Add in the Powdered Sugar, one half cup and a time and mix together – I used a hand mixer for the frosting. Add in Heavy Cream and blend
4. Frost on cool blondies with an offset spatula. Decorate with
* for a whiter frosting, use clear vanilla extract – although it will not be completely white because of the color of butter and white chocolate.


Until next time,
LOVE & CONFECTIONS!


Disclaimer: post contains affiliate links.

Filed Under: Brownies & Bars, Family & Festivities, Holiday, Uncategorized

How to Freeze Blueberries

June 5, 2014

  When you have a bunch of Blueberries, freeze them so you always have some on hand.

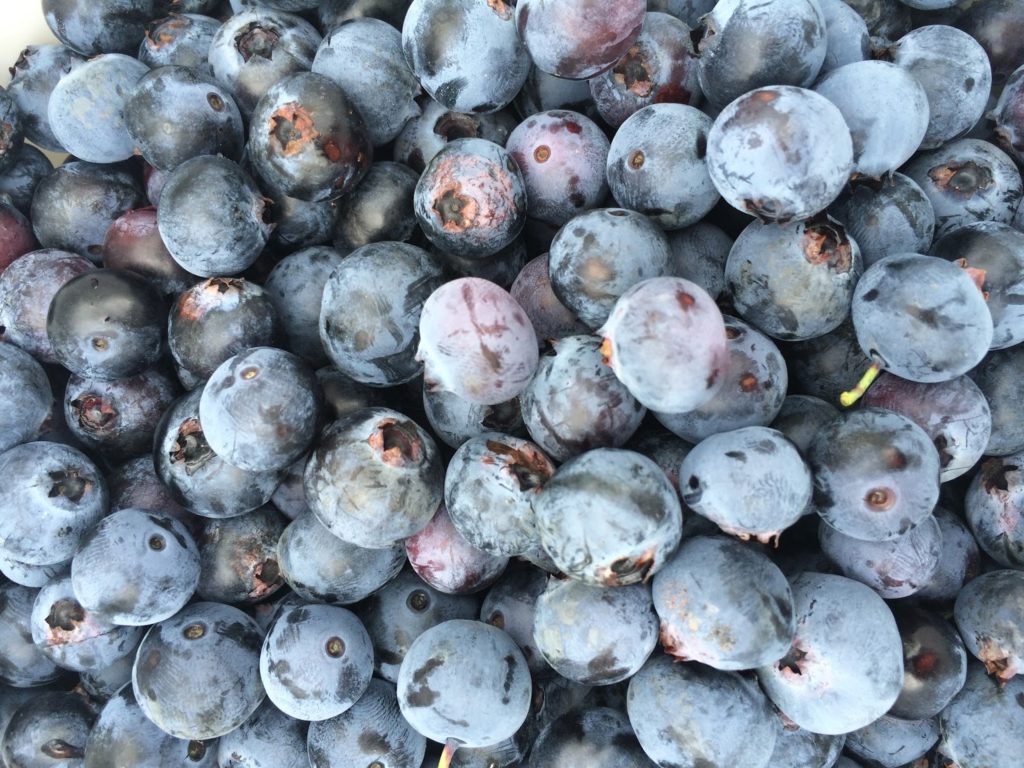
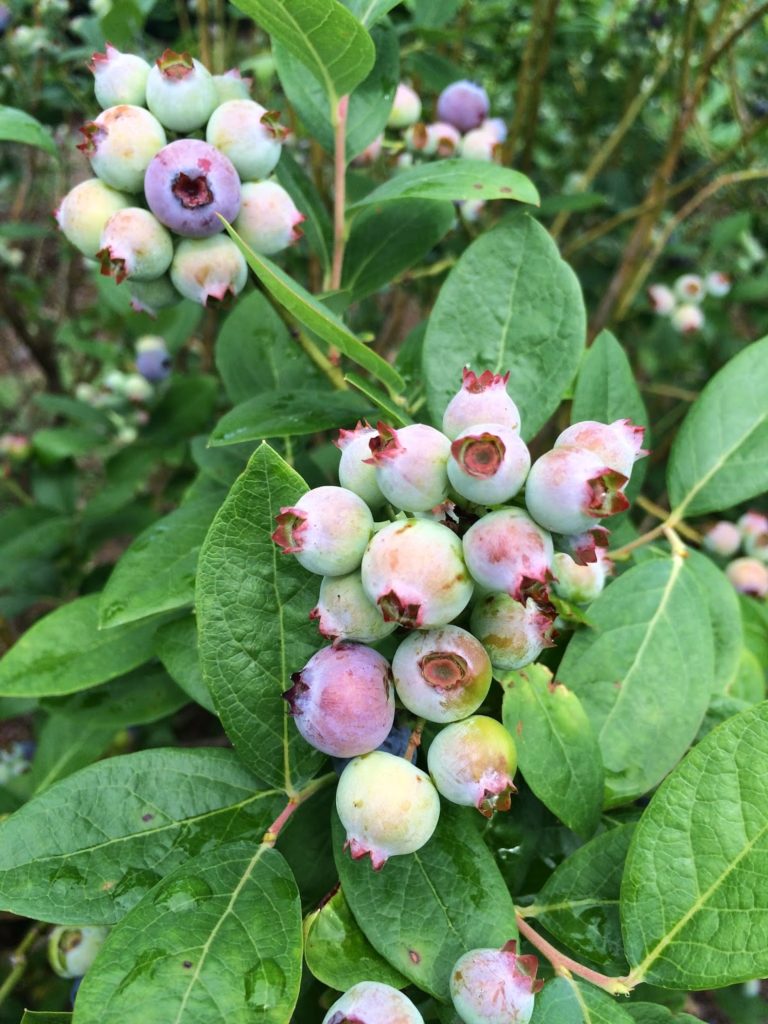
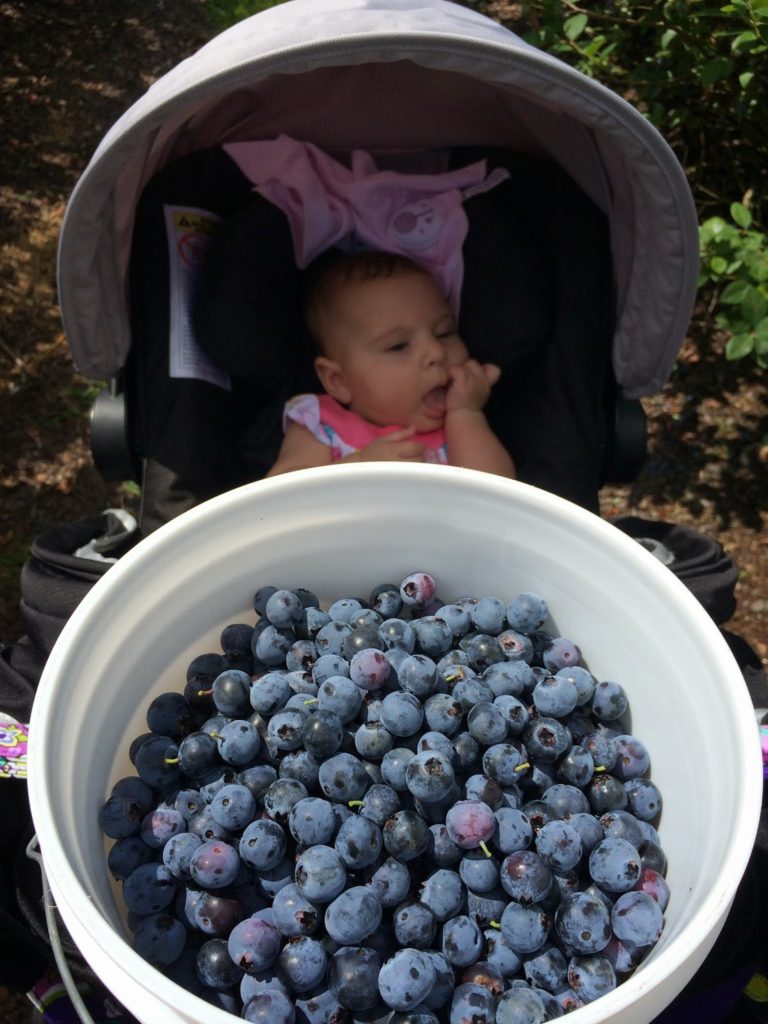
I recently went Blueberry picking. I go every year and I love it. There is nothing like a freshly picked blueberry, but when I pick at least 5 lbs at a time, I need a good way to store all those blue beauties. I went picking the second weekend of our season, so some of the bushes weren’t completely ripe yet – that didn’t deter me, because we still left with a huge amount.

To freeze blueberries, there are basically 2 different schools of thought: washing before freezing or washing after thawing. I always wash my blueberries before I freeze them, mainly because I just take them straight from the freezer and put them right into a recipe. Some people think that washing before freezing results in a tough skin, but I really don’t notice a difference.

How to Freeze Blueberries
1. Sort through Blueberries, picking out any stems or berries that are not good.
2. Thoroughly rinse your Blueberries. I generally do this in batches because there are so many.
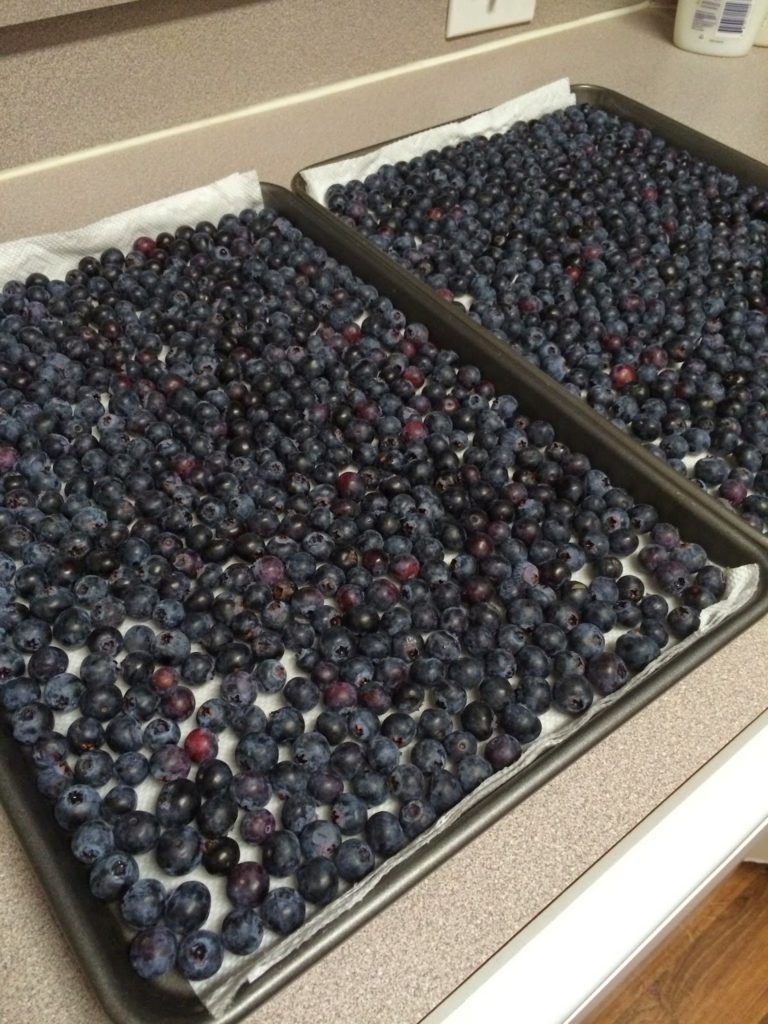
3. Place Blueberries on a sheet tray with sides (jelly roll pan) lined with paper towels.
4. Let the Blueberries dry completely. Remove the paper towels.
5. Place the tray in your freezer for a minimum 4 hours.
6. Once the Blueberries are completely frozen, place them in a freezer-safe plastic bag that is labeled with the date. You can also measure/weigh out how many Blueberries are in each bag to make it easier for future recipes.


Even Gracie had fun Blueberry picking!

Until next time

LOVE & CONFECTIONS!

Filed Under: Family & Festivities, Kitchen Tips, Uncategorized

BABY L&C IS HERE and Pink Vanilla Bean Cupcakes

December 19, 2013

I am so excited to publish this post. Baby Grace has decided to make her appearance! Mr. L&C and I could not be happier with our little princess. If you follow my Instagram feed, there will be many more pictures to come! Thanks to everyone for all the well-wishes and following my progress through this experience. We are doing well and can’t wait to start this new journey with our little one.

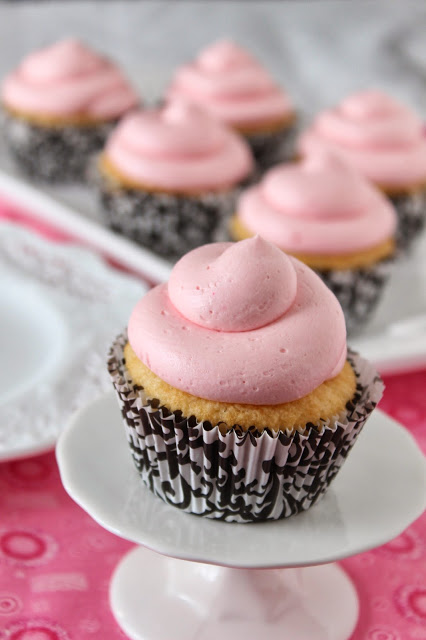
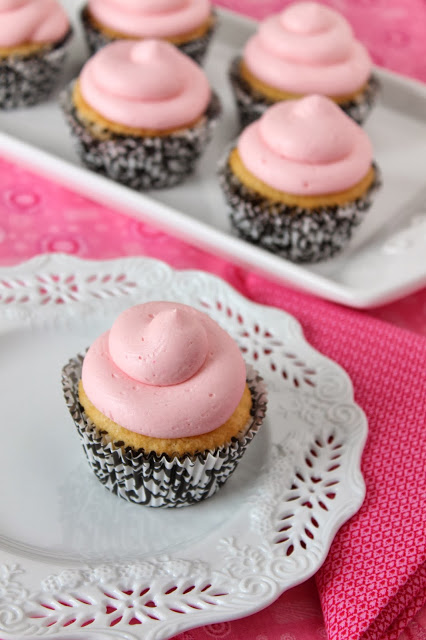
To celebrate our new arrival I thought I’d share a go-to cake recipe of mine. Everything around here has been pink lately – even the cupcakes! This is a great recipe to whip up for any occasion. The cake flour makes it so light and I love the little flecks of vanilla seeds from the Vanilla Bean Paste.


Vanilla Bean Cupcakes
adapted from Swans Down Cake Flour

Vanilla Bean Cupcake Ingredients:
 – 2 sticks unsalted Butter, room temperature
 – 2 cups granulated Sugar
 – 2 teaspoons Vanilla Bean Paste*
 – 4 Eggs, room temperature
 – 3 cups Cake Flour
 – 1 tablespoon Baking Powder
 – 1/2 teaspoon Salt
 – 1 cup Milk

Vanilla Bean Cupcake Directions:
 – Heat oven to 350F. Line a cupcake tin with cupcake wrappers.
 – In the bowl of a stand mixer with the paddle attachment, cream together the Butter and Sugar. Scrape the sides of the bowl. Add in the Vanilla Bean Paste and mix to combine.
 – Add in Eggs, one at a time, mixing well after each addition. Scrape down sides before adding flour.
 – In a separate bowl, sift together the Cake Flour, Baking Powder and Salt. Add Flour mixture and Milk, alternating by starting and ending with the Flour. Be careful not to overmix. Only mix until just combined to prevent a dense, dry cake.
 – Using a cookie scoop, evenly distribute in the cupcake tin and bake for 10-12 minutes for mini cupcakes or 15-18 for standard size cupcakes, or until the cupcakes are just done and a cake tester or toothpick comes out clean.
 – Cool for a few minutes in the tin, then transfer to a wire rack to cool completely before frosting.

Whipped Vanilla Frosting from Sweetapolita – I tinted it light pink

*If you don’t have Vanilla Bean Paste, you can use Vanilla Extract instead.

Until next time,
LOVE & CONFECTIONS!

Filed Under: Cakes & Frostings, Cupcakes, Family & Festivities, Uncategorized

For Grace – September 16, 2013

September 16, 2013

Every year this day seems to get harder and harder, but this year is different. For the first time in 12 years, even though its hard, I have something special to celebrate today…

My grandmother, Grace, was one of the most important and influential people in my life. She was like a second mother to me. She instilled the true meaning of Family in our lives and loved us unconditionally. My love of baking stemmed from being in the kitchen with her, and even though she was gone, she inspired me to become a chef.

Like I said, we have something to celebrate on this painful day – Mr. Love & Confections and I are expecting our first child, a little Girl! We are so excited to become parents. Years ago, while talking with my Grandmother, I happened to discuss baby names with her if she had been fortunate enough to have had another girl. She told me the name she liked and I thought it was a pretty name that would be good if I ever had a daughter.

It came time for Mr.L&C and I to think about baby names. The name my Grandmother liked was one of my top choices, but it just didn’t feel right. We looked through baby name books and went back and forth on options, but didn’t find anything we truly liked. Nothing seemed to fit, but then I suggested we name her after my Grandmother. Mr. L&C and I agreed, and so we had a name for our baby girl… Grace which means “God’s favor; blessing”!

It’s unbelievable how much I love little Grace already, and haven’t even met her yet. I’m sure my Grandmother would love her just as much if she were here to meet her namesake. I know she is watching over us and keeping an eye on our baby girl.

Grace’s Sugar Cookies
a Family Recipe adapted from Pillsbury

Ingredients:
 – 3 cups All Purpose Flour
 – 1 & 1/2 teaspoon Baking Powder
 – 1/2 teaspoon Salt
 – 1 cup granulated Sugar
 – 1 cup unsalted Butter, room temperature
 – 1 Egg
 – 3 tablespoons Heavy Whipping Cream
 – 1 teaspoon Vanilla Extract

Directions:
 – Sift Flour, Baking Powder, Salt and Sugar into a large mixing bowl. Cut in Butter using a pastry blender.
 – In a small bowl or measuring cup, put Egg, Cream and Vanilla and beat slightly to break up the egg.
 – Pour egg mixture into the flour/butter mixture and combine with a spoon, or by hand, until it forms a cohesive ball of dough.
 – Wrap the dough in plastic wrap and refrigerate for a minimum of 4 hours. If not using the same day, the dough can stay in the refrigerator overnight, or you can securely wrap it and place in a ziploc bag and store in the freezer for up to 2 weeks. Thaw overnight in refrigerator or a few hours on the counter.
 – When ready to make cookies, heat oven to 400F, roll out to 1/2 inch thick, cut out shapes with cookie cutters and place on an ungreased baking sheet.
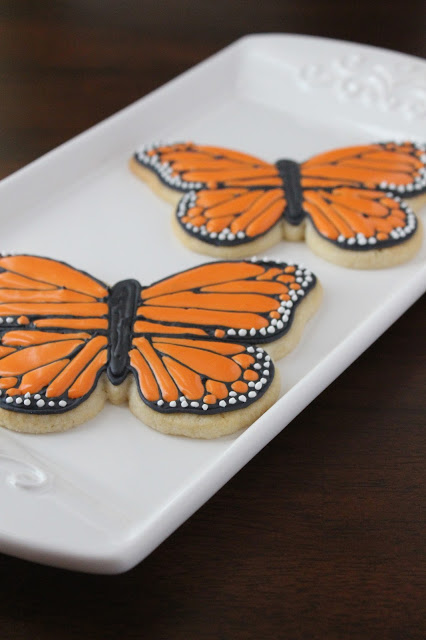
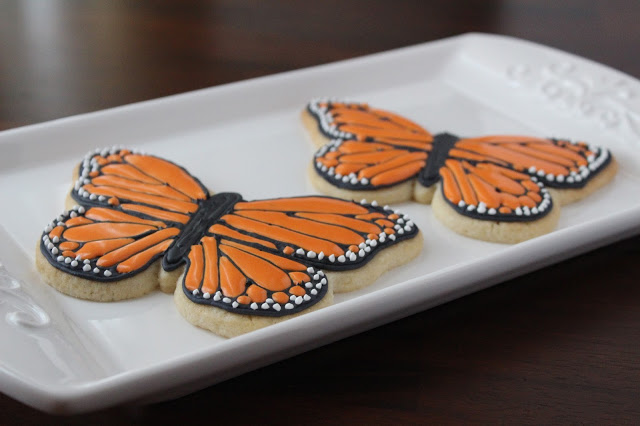
 – Bake for 5-8 minutes or until just golden brown around the edges. Cool on cookie sheet for 5 minutes, then transfer to cooking rack and cool completely before icing.

Royal Icing & Flooded Icing
adapted from Bake at 350

Bridget shares her recipe and step-by-step pictures. Head on over to her Blog for the recipe and to learn how to make royal and flooded icing.

Until next time,
LOVE & CONFECTIONS!

Filed Under: Cookies, Family & Festivities, Uncategorized

  • Page 1
  • Page 2
  • Go to Next Page »

Primary Sidebar

Meet Terri
founder & pastry chef

Subscribe to Love and Confections

Popular Posts

Pumpkin Pecan Cupcakes with Cinnamon Cream Cheese Frosting
Pumpkin Spice Cinnamon Roll Cake
Oatmeal Cream Pie Layer Cake - oatmeal brown sugar layer cake, marshmallow frosting filling, and vanilla bean buttercream with oatmeal cream pie garnish
Easy Piña Colada Poke Cake - pineapple cake, coconut cream pudding, whipped topping, pineapple chunks and maraschino cherries
Mermaid layer cake
PIneapple cake with pineapple curd, teal frosting and tropical sprinkle mix
Irish Cream chocolate cupcakes topped with white and green buttercream piping and shamrock sprinkle mix

AMAZON AFFILIATE

Love and Confections is a participant in the Amazon Services LLC Associates Program, an affiliate advertising program designed to provide a means for sites to earn advertising fees by advertising and linking to amazon.com.

Copyright © 2018 Love and Confections · Log in