• Skip to primary navigation
  • Skip to main content
  • Skip to primary sidebar
  • Home
  • About
  • Work With Me
  • Media
  • Recipes

Breakfast & Brunch

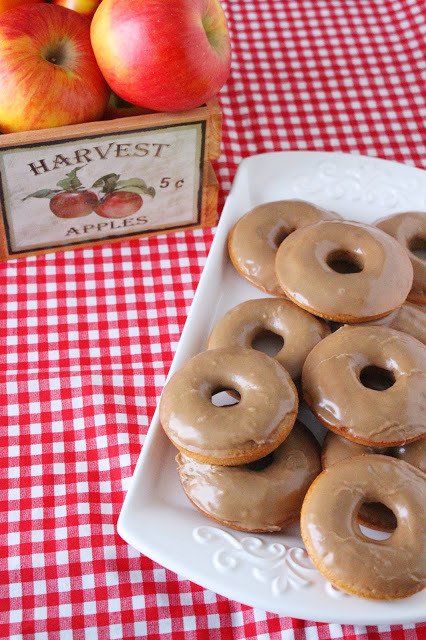
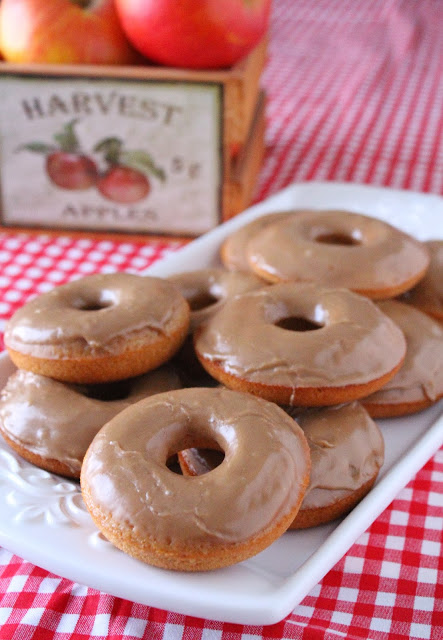
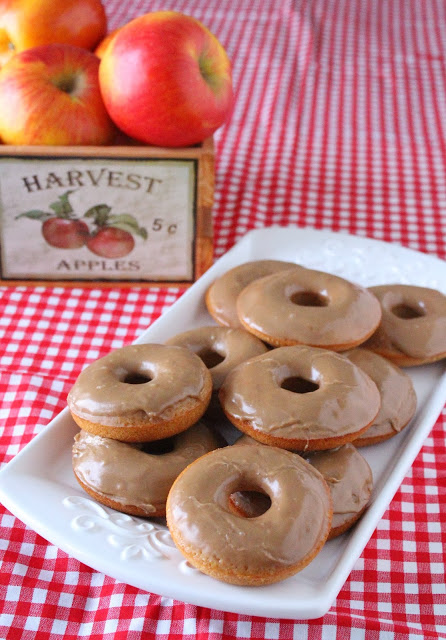
Apple Cider Baked Doughnuts

December 3, 2013

I hope you all had a fabulous Thanksgiving holiday and long weekend! Now that it is December, I am counting down the days until Baby L&C makes her appearance. We are so excited (and scared – first-time Mom here) and ready to meet our little one. I have been doing some last minute baking to prep for baby down-time from the Blog. Hoping she holds out so I can get a few more recipes done. Speaking of recipes, here is one that I have wanted to try for a while…

I love doughnuts! Who doesn’t? I mean, when you decide to go to the local mom & pop donut shop to celebrate your birthday, it’s kind of a given. I love all kinds of doughnuts: baked, fried, filled, etc. There is no doughnut snobbery in this household.

I was given the opportunity to try out King Arthur Flour‘s Doughnut Pan recently. Aside from doughnuts, this pan is great for making Breakfast Sandwiches. King Arthur Flour also gave me a bottle of Boiled Cider to try out – man is this stuff good! There was no question when I decided to make Apple Cider Doughnuts for my first doughnut-making experience – I know, never made doughnuts. It’s crazy, especially since they are so easy to make.

This is a great doughnut pan. It bakes evenly and is a breeze to clean. The little handles make it easy to take out of the oven. I still use cooking spray, even though it is a non-stick surface – you can never be too careful. It is slightly bigger than my other doughnut pan by another baking company. I will probably adjust my recipes to make a fluffier doughnut because it is slightly bigger. There are no complaints on my end about it and I can’t wait to whip up another batch of delicious doughnuts!

Apple Cider Baked Doughnuts
adapted from King Arthur Flour
yield 18 doughnuts

Apple Cider Baked Doughnut Ingredients:
 – 1/3 cup Vegetable Oil
 – 3 large Eggs
 – 1 & 1/4 cups granulated Sugar
 – 1 cup Applesauce
 – 4 tablespoons Boiled Cider*
 – 1 & 1/2 teaspoon Vanilla Extract
 – 1 teaspoon ground Cinnamon
 – 1 & 1/2 teaspoon Salt
 – 1 & 1/2 teaspoon Baking Powder
 – 8 ounces All Purpose Flour

Apple Cider Baked Doughnut Directions:
 – Heat oven to 350F and lightly grease the doughnut pan with cooking spray.
 – In the bowl of your stand mixer with the paddle attachment, combine all the ingredients except the Flour. Add in the flour and mix until combined.
 – Using a 1/4 measuring scoop, fill the doughnut tray and bake for about 16-18 minutes or until a toothpick comes out clean.

Maple Glaze Ingredients:
 – 1 & 1/2 cups Powdered Sugar
 – 1 teaspoon Maple Flavoring, optional
 – 2 tablespoons Maple Syrup
 – 3-5 tablespoons Heavy Cream, depending on glaze consistency

Maple Glaze Directions:
 – Mix all the ingredients together in a small bowl and dip the doughnut tops to cover. Alternatively, spoon glaze over doughnuts. Let sit for a few minutes so the glaze sets. Enjoy!

Until next time,
LOVE & CONFECTIONS!

* The Boiled Cider has a very tangy and potent apple flavor. You can use anywhere from 2-4 tablespoons depending on the flavor profile you want.


Disclaimer: I received a Doughnut Pan and bottle of Boiled Cider for review purposes. All opinions are my own.

Filed Under: Breakfast & Brunch, Uncategorized

Ham, Egg and Cheese Mini Sandwiches

November 20, 2013

Depending on what day it is, I may be a morning person. I mean, if necessary, I will wake up and be ready to go. Other times, I don’t want to wake up until it’s afternoon. Waking up late is a problem when you love breakfast as much as I do. I guess that it the beauty of Brunch – you can have it anytime of the day.

Last month, my Dad got transferred here for his job and moved in with us. Mr. L&C, Dad and I are mostly adjusted to each other’s schedules – I haven’t lived with Family for 11 years. Dad wakes up for work earlier than we do, so he eats breakfast first. He asked if I could make these little egg “muffins” like my sister does up at home.

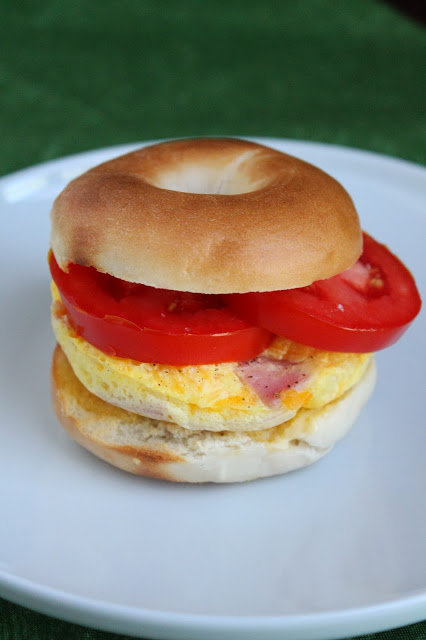
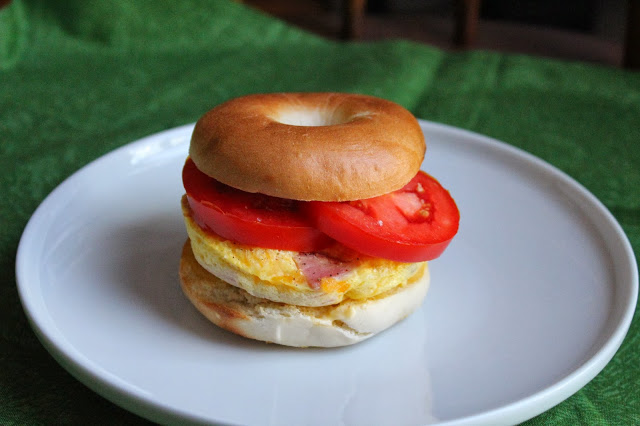
I didn’t have any recipe to follow, but I think they turned out pretty darn good. KB uses muffin tins, but I think they turn out a little too tall for sandwiches. Dad bought mini bagels to use for the egg sandwiches and that gave me the brilliant idea to use a doughnut pan!

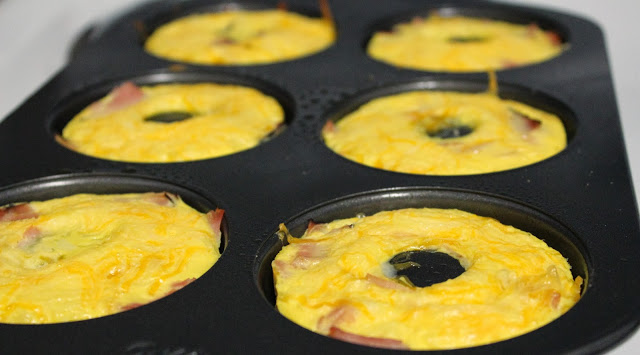
I recently received a doughnut pan from King Arthur Flour to use. I love doughnuts – eating more than making, of course – and was wondering if I could use the pan for something other than just doughnuts (the donuts will be in an upcoming post). I like being able to use pans and utensils for more than just one task. This pan is perfect for not only doughnuts, but also for making these mini egg “doughnuts”. It bakes evenly and is a breeze to clean. The non-stick surface would have probably been fine just the way it is, but I used cooking spray just to make sure that the egg would come out perfect.

This recipe is easy to adjust for quantity and add your own spin on ingredients. I am going to make my next batch with spinach and swiss, possibly also a tomato and mozzarella version too.

Ham, Egg and Cheese Mini Sandwiches
a Love and Confections original recipe
yield 12 Ham, Egg and Cheese Sandwiches

Ham, Egg and Cheese “Doughnut” Ingredients:
 – 8 slices of Ham, I used regular deli slices, but you can use thicker cubed ham if you prefer
 – 1 cup shredded Cheddar Cheese
 – 1.25 cups Egg Beaters or about 8-10 Eggs
 – 1 teaspoon Salt
 – 1/2 teaspoon Pepper
 – Mini Bagel, toasted and buttered
 – Tomato Slices, optional

Ham, Egg and Cheese “Doughnut” Directions:
 – Heat oven to 350F. Spray pan with a little bit of non-stick cooking spray, just to make sure they come out perfect. You will have to work in 2 batches because there are only 6 cavities per regular doughnut pan
 – Cut the Ham into small pieces/cubes and equally distribute in the doughnut pan cavities.
 – Equally distribute and sprinkle Cheddar Cheese on top of the Ham.
 – Whisk Egg Beaters – or Eggs, if using – with Salt and Pepper, then pour over Ham and Cheese, leaving a little room at the top, because the eggs will bake and puff up slightly.
 – Bake for about 15 minutes, depending on how correct your oven temperature is, or until fully cooked and springs back to the touch.
 – Let it cool slightly before removing from doughnut pan. Repeat for second batch.
 – Cool completely before storing. I recommend storing in zip-top bags in the refrigerator for up to 4 days or in the freezer for up to 2 weeks.

 To assemble Sandwich:
 – Toast and Butter mini Bagel. Layer Ham, Egg and Cheese “doughnuts” with Tomato slices and enjoy!

Until next time,
LOVE & CONFECTIONS!

Disclaimer: I received a Doughnut Pan by King Arthur Flour for review purposes. All opinions expressed are my own. 
Filed Under: Breakfast & Brunch, Sandwiches-Paninis-Flatbreads-Pizzas, Uncategorized

Ham and Swiss Puff Pastry Bites

September 1, 2013

A few weeks ago, I traveled home to North Carolina to visit my family and help my Mom host a Bridal Shower Brunch for my cousin – and you all know how much I LOVE Brunch. Her favorite color is purple so everything was decorated with that in mind.

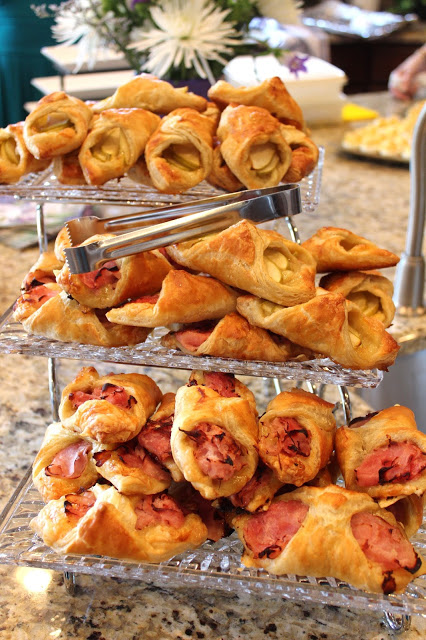
All the local mothers helped by bringing food. We had a great spread including a French Toast Casserole, Mini Frittatas, Deviled Eggs, Hash Brown Casserole, Tomato-Pesto Tarts, a build-your-own Yogurt Parfait and a Mimosa Bar.

I helped Mom with all the decorations as well as the Puff Pastry Bites and French Macarons. We also had a dessert table with Cupcakes, Chocolate Dipped Strawberries, Mints and Peach Cake.

I think she enjoyed herself and had a great Bridal Shower. Congratulations and I cannot wait for the wedding in October!


Ham and Swiss Puff Pastry Bites
inspired by Pinterest

Ham and Swiss Puff Pastry Bites Ingredients:
 – 1 package Puff Pastry Sheets, thawed overnight in refigerator
 – 1 pound shaved deli Ham
 – 1/4 pound sliced deli Swiss Cheese, cut in half
 – 1-2 eggs beaten with 1-2 tablespoons water for Egg Wash

Ham and Swiss Puff Pastry Bites Directions:
 – Heat oven to 425F and lightly spray some baking sheets.
 – Lightly flour a surface to roll out one Puff Pastry Sheet at a time. You don’t want to stretch or make them too thin, just maybe an extra 1/2 to 1 inch on each side, and to flatten the fold. Cut into 9 equal squares.
 – Set squares on a diagonal in front of you and place a 1/2 slice of Swiss Cheese, followed by some shaved Ham.
 – Using the Egg Wash, fold one side over, brush the corner and fold the other side on top – to create a sealed puff pastry bite. Brush the entire piece of Puff Pastry with the Egg Wash, including the tops, sides, and little corners still visible under the Ham and Swiss.
 – Repeat process with second Puff Pastry Sheet, remembering to work fast, so the fat does not melt out of the sheets before baking – that’s what makes it flaky and delicious!
 – Bake for 15-18 minutes or until golden brown. Can be served warm or at room temperature.

Until next time,
LOVE & CONFECTIONS!

Filed Under: Breakfast & Brunch, Family & Festivities, Pastries & Baked Goods, Uncategorized

Berry Parfaits for BrunchWeek

May 9, 2013

Don’t forget to visit my Food Blogger Brunch Week Post to see the AMAZING prizes for #BrunchWeek and enter to win these FABULOUS prizes below in the Rafflecopter (ARV $1800)! This week I have posted a great Blood Orange Mimosa recipe, a recipe for Tomato and Mozzarella Quiche, Almond Croissants and Crumb-Top Blueberry Muffins – so good! Happy Brunching!!!

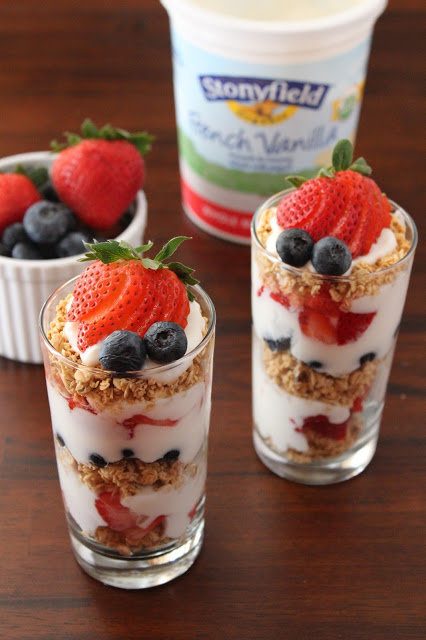
After all the heavy and sweet items, I decided to go a little healthier for today’s post – Berry Parfaits! This is such an easy recipe to put together. You can have it for any meal any time of the day – breakfast, brunch, afternoon snack or even dessert.

The crunchy Granola is great with the creaminess of Stonyfield Organic’s French Vanilla Yogurt. The Strawberries I had were slightly tart, but balance by the sweetness of the Blueberries I picked a few weeks ago.

Berry Parfaits
a Love and Confections original recipe
serves 2

Berry Parfait Ingredients:
– 1/2 cup Granola*
– 1 cup Stonyfield Organic French Vanilla Yogurt
– 1/2 cup Strawberries, diced plus more for garnish
– 1/4 cup Blueberries

Berry Parfait Directions:
– Starting with the Granola, layer about 2 tablespoons in the bottom of your glass. Followed by 1 tablespoon of Strawberries and 2 tablespoons of Yogurt. Repeat the layers, alternating strawberries and blueberries for the fruit part, until you reach the top.
– Place a dollop of Yogurt on top, a sliced Strawberry and 2 Blueberries for presentation. Eat immediately

*for a great homemade Granola check out Blueberry Granola by Katie’s Cucina

Today’s Brunch Recipes from participating #BrunchWeek Food Bloggers

Brunch Drink Recipes
St-Germain and Prosecco Cocktails by Culinary Adventures with Camilla
Strawberry Lemongrass Martinis by White Lights on Wednesday

Breads, Grains, Cereals and Pancake-type Yums
Banana Peanut Butter Baked Oatmeal by Big Bear’s Wine
Apple and Beecher’s Flagship Reserve Cheddar Wheat Belly Crepes by Vanilla Lemonade
Garden Squares by {i love} my disorganized life
Maple Sausage French Toast Bake by Real Housemoms

Brunch Egg Recipes
Mediterranean Frittata by Spontaneous Tomato

Potato Recipes for Brunch
Potato and Bacon Hash by Cravings of a Lunatic

Meat, Poultry, Fish and Legume Brunch Recipes
Key Lime Shrimp Salad by The Domestic Mama & The Village Cook
Black Bean Breakfast Tacos by Sweet Remedy
Fruit for Brunch
Fruit Salad with Orange Poppy Seed Dressing by Kokocooks

Brunch Dessert Recipes
Chocolate Chip Buttermilk Muffins by Rachel Cooks
Rustic Apple Cake & Tea with Mom by The Vintage Cook
Toasted Almond and Chocolate Muffins by Jane’s Adventures in Dinner
Crumb Cake Parfait by Take A Bite Out of Boca
Rum and Raisin French Toast by Noshing With The Nolands
Cinnamon Raisin Banana Stuffed French Toast by Katie’s Cucina
Breakfast Cookies by Cooking In Stilettos
Berry Parfaits by Love and Confections
Rhubarb Vanilla Yogurt Parfaits by Kelly Bakes

a Rafflecopter giveaway

Until next time,
LOVE & CONFECTIONS!

Disclosure: I have not been given any monetary compensation for this post or any #BrunchWeek post involving the above sponsors and/or prizes. Samples and bits of promotional material have been given to me, not exceeding a value of $100 total.

Filed Under: #BrunchWeek, Breakfast & Brunch, Trifles-Parfaits-Mousses-Curds, Uncategorized

Almond Croissants for #BrunchWeek

May 7, 2013

Don’t forget to visit my Food Blogger Brunch Week Post to see the AMAZING prizes for #BrunchWeek and enter to win these FABULOUS prizes below in the Rafflecopter (ARV $1800)! Sunday I posted a great Blood Orange Mimosa recipe and yesterday I posted a recipe for Tomato and Mozzarella Quiche – delicious!. Happy Brunching!!!

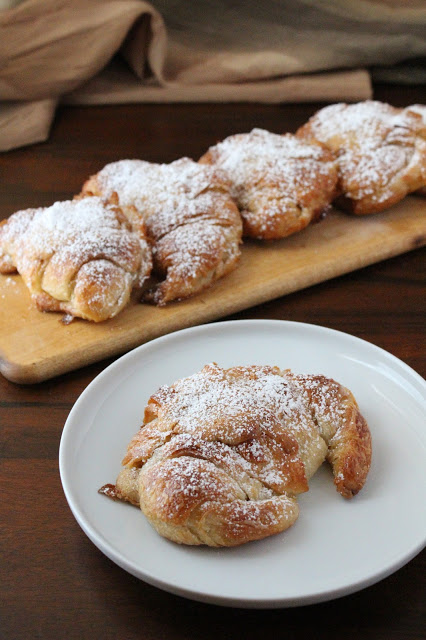
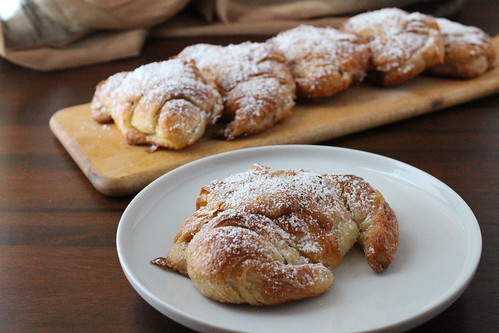
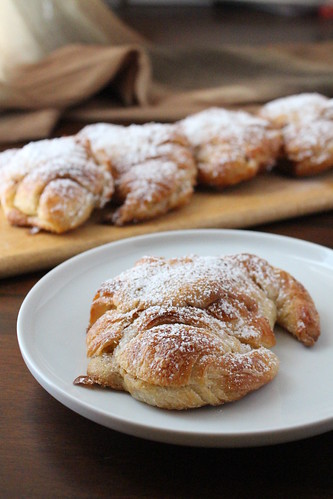
I LOVE Almond Croissants. L-O-V-E! It needs to be professed from the highest mountain how good these things really are. It’s kind of a common joke among chefs that Almond Croissants are the crack of the pastry world – totally addicting and if you see one, you have to have it.

These babies are moist and sweet and have such a great almond flavor that you will make them again and again. When making these delectable beauties, day-old croissants are the best. It soaks up the warm simple syrup and gets it all gooey and sugary. If you are hell-bent on making your own croissants for this – by all means – I didn’t have the time or energy to do so this go-around. I get my croissants from a little French bakery I used to work at. The Master Baker, Denny, is a friend of mine, and makes THE best croissants in town. I learned how to make these from him, but use my own almond filling recipe.

Almond Croissants
A Love and Confections original recipe

Almond Croissant Ingredients:
– 12 day-old Croissants
– 500 grams Sugar
– 500 grams water

Almond Cream

– 16 ounces Almond Paste
– 100 grams Sugar
– 195 grams Butter, room temperature
– 30 grams Bob’s Red Mill Almond Flour
– 250 grams Eggs (5 large eggs), room temperature
– 115 grams Flour, sifted

– Powdered Sugar, for topping

Almond Croissant Directions:
– Heat the oven to 350F. Line 1 or 2 sheet pans with parchment paper
– Slice the Croissants horizontally in half, starting at the fattest part. Do not slice completely through, leave the tips attached.
– Combine the first measure of Sugar and Water in a medium saucepan and heat until the sugar has dissolved and a simple syrup has formed.
– Dip the Croissants into the simple syrup, making sure the insides of the croissants get soaked. Be careful because the syrup is hot – you may want to use a few layers of gloves. Squeeze the syrup from the croissants and place cut side up on the sheet trays.

– Combine Almond Paste, second measure of Sugar, Butter and Almond Flour in the bowl of a stand mixer with the paddle attachment. Mix the ingredients on medium, stopping and scraping down the sides of the bowl every few minutes.
– While on low, add in the Eggs one at a time, making sure the Egg is thoroughly mixed in before adding the next. Scrape the sides of the bowl to ensure that everything is mixed properly
– Add in the Flour and mix on low until incorporated.
– Scoop the Almond Cream into a piping bag fitted with a large tip. Pipe a generous amount onto one side of each croissant.

– Close the croissants and pile a dollop on top.

– Bake for 25-30 minutes, or when the Almond Cream filling looks cake-like and not liquid.
– Let it cool, then dust with Powdered Sugar.
– Any leftover Almond Cream can be put into freezer bags and frozen for future use. Thaw in refrigerator.


Today’s Brunch Recipes from participating #BrunchWeek Food Bloggers

Beverages

Irish Cream Coffee by Sweet Remedy
{Grown-Up} Lemonade by {i love} my disorganized live


Brunch Egg Recipes

Asparagus Tomato Frittata by Big Bear’s Wife
Sausage and Egg Muffins by Small Wallet Big Appetite
Mennonite Gold Hash & Eggs by The Vintage Cook
Brie and Herb Omelette by Noshing With The Nolands
Hangover Breakfast Burrito by Cooking In Stilettos


Brunch Recipes for Breads, Grains, Cereals and Pancake-Type Yums

Almond Croissants by Love and Confections
Granola Pancakes by Jane’s Adventures in Dinner
Blueberry Scones with Lemon Glaze by Katie’s Cucina
Strawberry Scones by Real Housemoms


Brunch Dessert Recipes
 
Marcona Almond and Duck Fat Brittle by Vanilla Lemonade
Kiwi and Rose Cream Trifle by Culinary Adventures with Camilla
Banana “Ice Cream” by Amanda’s Apron
Grilled Strawberry, Brie, Chocolate and Walnut Sandwich by Confessions of an Overworked Mom
Chocolate Coated Mini Donuts by Kokocooks

a Rafflecopter giveaway

Until next time,
LOVE & CONFECTIONS!

Disclosure: I have not been given any monetary compensation for this post or any #BrunchWeek post involving the above sponsors and/or prizes. Samples and bits of promotional material have been given to me, not exceeding a value of $100 total.

Filed Under: #BrunchWeek, Breakfast & Brunch, Pastries & Baked Goods, Uncategorized

Tomato and Mozzarella Quiche #BrunchWeek

May 6, 2013

Don’t forget to visit my Food Blogger Brunch Week Post to see the AMAZING prizes for #BrunchWeek and enter to win these FABULOUS prizes below in the Rafflecopter (ARV $1800)! Yesterday I posted a great Blood Orange Mimosa recipe that you should try too. Happy Brunching!!!

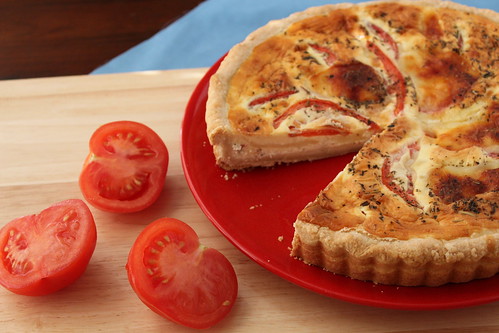
I love Quiche. There isn’t a better vessel for so much Brunch goodness. With so many options for fillings, you can have a different one any day of the week. Quiche are also a great item to prepare in advance when you need to whip up a great Brunch with not a lot of time. I have made and frozen the dough in the tart pan the night before I needed it, pre-cut and pre-mixed all my filling, and put it together the morning of – so simple.

I’m Italian and I love anything to do with tomatoes, mozzarella and ricotta! This quiche is a little different than most, because of the Ricotta mixture on the bottom. It make a great layer of flavor in the quiche and can be used as a base for any other quiche recipe you’re thinking of making.


Tomato Mozzarella Quiche
a Love and Confection original recipe

Tomato Mozzarella Quiche Ingredients:
 – 250 grams All-Purpose Flour
 – 10 grams Granulated Sugar
 – 12 grams Salt
 – 300 grams Butter
 – 112 grams Water
 – 250 grams All-Purpose Flour
 – 150 grams Ricotta
 – 100 grams Shredded Italian Cheese Blend
 – 1/2 teaspoon Italian Seasoning Blend
 – 2 Tomatoes, sliced
 – 250 grams Mozzarella, sliced
 – 100 grams Eggs, roughly 2 large eggs
 – 1/2 teaspoon Salt
 – 1/4 teaspoon Pepper
 – 100 grams Whole Milk
 – 60 grams Heavy Cream
 – 1/2 teaspoon Italian Seasoning Blend

Tomato Mozzarella Quiche Directions:
 – Place first measurement of Flour, Sugar, Salt and Butter in the bowl of a stand mixer, with the paddle attachment, and combine until butter is mixed and looks like pea-size lumps have formed. Add in Water and mix until smooth. Add second measurement of Flour and mix until combined and dough forms a ball.
 – Lightly knead dough on a work surface, if any little pieces of flour and butter have not been incorporated. Shape into a disk, wrap in plastic wrap and refrigerate at least 1 hour. Can be refrigerated overnight. If not using right away, place wrapped disk inside freezer bag, label and store for up to a week. Thaw in refrigerator before use.

 – Preheat oven to 350F.

 – In a small bowl, mix the Ricotta, Shredded Italian Cheese blend and 1/2 teaspoon of Italian Seasoning Blend and set aside. Slice Tomatoes and Mozzarella and set aside.
 – In a medium-size bowl, place Eggs, Salt and Pepper and whisk together. Add Whole Milk and whisk to combine. Add Heavy cream last and stir to incorporate, being careful not to mix too much and incorporate air. Set aside

 – Lightly flour your work surface and roll out dough, using a rolling pin, to about 1/4 inch thickness.
 – Using a 12 inch dinner plate turned upside-down on the dough, cut a circle using a sharp knife.
 – Place the dough circle in the middle of a Removeable-Bottom Tart Pan. Press the dough to the bottom of the pan and up the sides, being careful not to stretch the dough. Fold the extra dough over (towards the outside of the pan) and pinch, but don’t go over the sides, to create a crust that is slightly taller than the tart pan.
 – Spread Ricotta mixture onto the bottom of the quiche shell. Layer Tomatoes and Mozzarella in the quiche shell. Sprinkle with Italian Seasoning Blend. Place Quiche on a Sheet Tray and fill with Egg Mixture, just until it reaches the top.
 – Place in oven and bake for 30-40 minutes, depending on your oven, and rotating 1/2 way in between.
 – Allow to cool for at least 15-20 minutes before taking it out of the tart pan.
 – Enjoy!

Today’s Brunch Recipes from participating #BrunchWeek Food Bloggers

Beverages

Watermelon Rosemary Champagne Cocktail by Vanilla Lemonade
Pear Hibiscus Brunch Cocktail by Rachel Cooks
Strawberry Rose Sangria by The Girl In The Little Red Kitchen
Mocha Frappuccino by Around My Family Table
Pineapple-Basil Tea by The Kitchen Prep


Eggs

Asparagus and Bacon Quicheby Confessions of an Overworked Mom


Meat, Poultry and Fish

Chicken Bacon Ranch Panini by Sweet Remedy
Pancetta Wrapped Chicken by Jane’s Adventures in Dinner


Breads, Grains, Cereals and Pancake-type Yums

Spinach and Goat Cheese Muffins by Culinary Flavors
Overnight Blintz Bake by White Lights on Wednesday
Bananas Foster French Toast by by Cravings of a Lunatic


Desserts

Cinnamon Raisin Bread by Katie’s Cucina
Mrs. Lund’s Fresh Plum Cake by The Vintage Cook
Chocolate Chip Banana Bundt Cake by Take A Bite Out Of Boca
Strawberry Scones by Kokocooks
Strawberry Mascarpone Tart by Kelly Bakes


Fruits and Veggies

Honey-Watermelon Soup by Culinary Adventures with Camilla

a Rafflecopter giveaway

Until next time,
LOVE & CONFECTIONS!

Disclosure: I have not been given any monetary compensation for this post or any #BrunchWeek post involving the above sponsors and/or prizes. Samples and bits of promotional material have been given to me, not exceeding a value of $100 total.

Filed Under: #BrunchWeek, Breakfast & Brunch, Uncategorized

Cinnamon Pecan Coffee Cake (FHC)

April 11, 2011

To say “it has been too long” is an understatement. Work had gotten the best of me, so much so that I had to have surgery to prevent further injury to my hands.

Like any procedure, there are worries and concerns before surgery, but the worst part came after the fact. My scar healed in the normal amount of time and the doctors said my hand looked good, but I had no strength. It wasn’t until I visited a physical therapist, 2 weeks after the surgery, that I was told my strength would not return for a minimum of 6-12 weeks. 3 months?! was all I heard. 3 months until I can function normally. 3 months until I can bake without pain.

I use my hands every day. As a baker, my hands are the best tools I have, and to not have use of them has thrown me for a loop. I am a month into my recovery, doing physical therapy exercises, and icing my hand daily, but I have a long way to go.

Today was the first day, in over a month, that I baked. What an accomplishment! It felt good – even though it hurt – it felt good. To be cliche, that whole saying, “you never know what you have until it’s gone,” is true. I do still have a long way to go, and I still need to have the surgery on the other hand. I am taking things slow, because I know my health is the most important thing, but I have missed baking.

I am going to work at it, like all things in life, and just take it one day at a time. I can see the improvements. I went from needing help for everything – getting dressed, food, etc., to being able to bake for the first time in a month.

I wanted to bake something delicious and comforting; something that would make me feel good and warm and home. A coffee cake sounded just right for the part, and I could cross off another Food Holiday Challenge. You are supposed to wait until the cake is cool to taste it, but I couldn’t wait to have a bite. It was heavenly – I’m not sure if it was just the cake, or that it was my first post-op creation. Either way, it was good. Enjoy!

Cinnamon Pecan Coffee Cake
adapted from Bon Appetit, Nov. ’93 via epicurious.com

Cinnamon Pecan Coffee Cake Ingredients:
Swirl Mix:
– 1 cup firmly packed Brown Sugar
– 1 cup chopped Pecans
– 1 & 1/2 teaspoons ground Cinnamon

Cake:
– 1 & 1/2 cups All-Purpose Flour
– 1 & 1/2 teaspoons Baking Powder
– 1/2 teaspoon Baking Soda
– 1/2 cup (1 stick) Unsalted Butter, room temperature
– 1 & 1/2 cups Sugar
– 3 large Eggs
– 1 cup Vanilla Yogurt
– 1 & 1/2 teaspoons Vanilla Extract

Cinnamon Pecan Coffee Cake Directions:
1. Preheat oven to 350F.
2. Grease a 10-inch tube pan, dust with flour, and tap out the rest.
3. Mix the swirl ingredients in a small bowl and set aside.

4. Sift Flour, Baking Powder and Baking Soda in a bowl and set aside

5. Using an electric mixer, beat Butter and Sugar in a large bowl, until fluffy
6. Add Eggs, 1 at a time, beating just until combined after each addition.
7. Mix in the Yogurt and Vanilla.
8. Add Flour mixture and stir until blended.
9. Spoon half of the batter into the prepared pan.
10. Sprinkle 2/3 of the Swirl Mixture over the batter and swirl gently into it, using a small knife.
11. Spoon the remaining batter into the pan.
12. Sprinkle the remaining Swirl Mixture on top

13. Bake cake 50-60 minutes, or until tester inserted near center comes out clean.
14. Cool cake in pan for 10 minutes, then cut around pan sides to loosen cake.
15. Turn out cake onto rack and cool completely

This cake can be prepared 1 day ahead and wrapped and stored at room temperature.

Until next time,
LOVE & CONFECTIONS!

Filed Under: Breakfast & Brunch, Cakes & Frostings, Uncategorized

Beautiful Blueberries & Jam

July 30, 2010

This blog entry is a special treat with 2 Blueberry recipes!


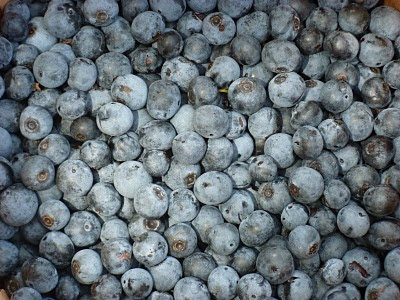
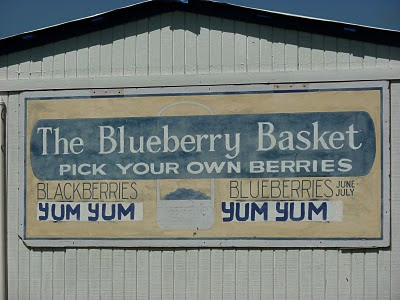
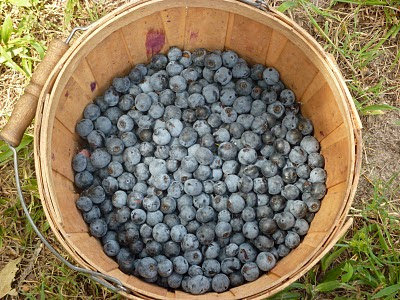
While out in Texas, my two Aunts took me blueberry picking. I had never done this before – only strawberry picking – and was very excited. Even though the day was incredibly hot, and we traveled 2 hours to get the the “Blueberry Basket” – our hunting ground – the trip was well worth it! We each filled baskets of blueberries, all the while, thinking what we would create with our delicious finds.


The workers told us to pick in one specific section, and as usual, Aunt W has a mind of her own, and found us some great rows of blueberries further down the farm. Clusters of blueberries sprang out from the bushes, but we also had to reach far into the bushes to get some of our loot.


The berries were all sizes and colors, from pale green and reddish-purple to the ripe blueish-purple berries. We ate as we picked – which was deliciously fun – and chatted about what we would bake – after all, they had a pastry chef under their roofs for a week. The rows of blueberry plants seemed like they never ended. The warm sun beat down on us, as we sweat in the 95+ degree weather. I can’t honestly tell you how many insects we encountered – my sister would not have like it. Our baskets quickly became full and we finished just before the hottest part of the day – yes, it got even hotter!

I have to admit that I was not a fan of blueberries before this trip. Yes, I have had blueberry muffins and blueberry pancakes before, but never really just ate blueberries. These blueberries tasted different, very different from the ones we usually get in the store. They were sweeter and juicier. I probably won’t eat blueberries from the store, but give me these any day – I even had a bowl of just blueberries, for breakfast one morning in Texas, along with an egg sandwich.

CRUMP-TOP BLUEBERRY MUFFINS

Muffin Batter Ingredients:
– 315 grams All Purpose Flour
– 60 grams Sugar
– 60 grams Light Brown Sugar
– 1 tablespoon Baking Powder
– 1 teaspoon Baking Soda
– 1/4 teaspoon Salt
– 2 large Eggs
– 75 grams Unsalted Butter, melted
– 1 teaspoon Vanilla Extract
– 8 fluid ounces Buttermilk
– 2 cups Blueberries

Crumb-Topping Ingredients:
– 2 & 1/2 tablespoons All Purpose Flour
– 2 tablespoons Sugar
– 2 tablespoons Light Brown Sugar, packed
– 1/2 teaspoon ground Cinnamon
– 2 tablespoons Unsalted Butter, cold

Crumb-Top Blueberry Muffin Directions:
1. Preheat oven to 375F and prepare a muffin tin.
2. To make the topping, in a small bowl, stir together the Flour, Sugars and Cinnamon. Cut the butter into pieces and using a pastry blender, cut it into the dry ingredients until the mixture resembles coarse crumbs.
3. To make the muffins, stir together the Flour, Sugars, Baking Powder, Baking Soda and salt in a bowl.
4. In another bowl, whisk together the Eggs, melted Butter, Vanilla Extract and Buttermilk.
5. Stir the buttermilk mixture into the dry ingredients just until combined. The batter should be lumpy. Fold the blueberries into the batter just until evenly distributed. Scrape down the sides of the bowl.
6. Spoon the batter into each muffin cup, filling it level with the rim of the cup. Sprinkle each muffin with about 1/2 tablespoon crumb topping
7. Bake until golden, dry and springy to the touch, 20-2 minutes. Serve warm.


I have never made jam and was extremely excited – I love learning new things. Our fresh blueberries were perfect for our jam adventure.

BLUEBERRY JAM
from Certo

Blueberry Jam ingredients:
– 1 & 1/2 quart fresh Blueberries, crushed to equal 4 & 1/2 cups
– 2 tablespoons Lemon Juice
– 7 cups Sugar
– 2 pouches Certo Fruit Pectin
– 1 teaspoon Butter
– 12 -8 ounce- Jars or 20 -4 ounce- Jars with lids, sterilized


Blueberry Jam Directions:
1. Prepare Jam Jars by boiling them for 10 minutes
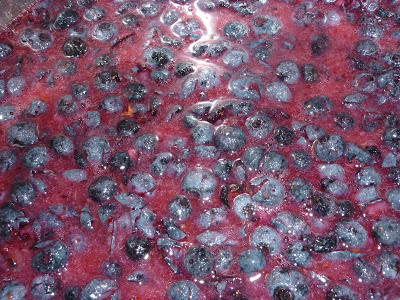
2. Crush Blueberries in large pan on stove.
3. Stir Sugar into Blueberries and mix well.
4. Add Butter to Blueberries and bring to a boil for 5 minutes over high heat while stirring constantly
5. Pour 2 Certo Fruit Pectin pouches into the Blueberries and continue to boil for 1 minute while stirring constantly.
6. Remove from heat and skim off foam.
7. Ladle into Jars and screw on lids. MAKE SURE YOU WIPE THE RIMS BEFORE PUTTING ON LID. EXCESS JAM WILL NOT ALLOW PROPER CANNING.
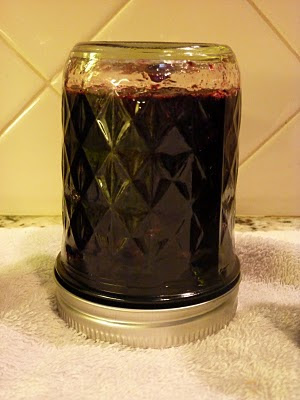
8. Turn jars upside down for 5 minutes, then turn upright. Let set for 1 hour. (Jars are sealed when “pop-top” center of lid is pushed completely down)
9. Refrigerate once opened.

Filed Under: Breakfast & Brunch, Quick Breads-Muffins-Scones, Uncategorized

  • « Go to Previous Page
  • Go to page 1
  • Interim pages omitted …
  • Go to page 3
  • Go to page 4
  • Go to page 5

Primary Sidebar

Meet Terri
founder & pastry chef

Subscribe to Love and Confections

Popular Posts

Pumpkin Pecan Cupcakes with Cinnamon Cream Cheese Frosting
Pumpkin Spice Cinnamon Roll Cake
Oatmeal Cream Pie Layer Cake - oatmeal brown sugar layer cake, marshmallow frosting filling, and vanilla bean buttercream with oatmeal cream pie garnish
Easy Piña Colada Poke Cake - pineapple cake, coconut cream pudding, whipped topping, pineapple chunks and maraschino cherries
Mermaid layer cake
PIneapple cake with pineapple curd, teal frosting and tropical sprinkle mix
Irish Cream chocolate cupcakes topped with white and green buttercream piping and shamrock sprinkle mix

AMAZON AFFILIATE

Love and Confections is a participant in the Amazon Services LLC Associates Program, an affiliate advertising program designed to provide a means for sites to earn advertising fees by advertising and linking to amazon.com.

Copyright © 2018 Love and Confections · Log in