• Skip to primary navigation
  • Skip to main content
  • Skip to primary sidebar
  • Home
  • About
  • Work With Me
  • Media
  • Recipes

Uncategorized

Split Seconds for a Tea Party

October 11, 2011


Everyone has childhood memories about special treats or snacks that make us long to be children again. I remember my grandparents picking my sister, KB, and me up from school and our ice cream afternoon snack. My grandmother, nicknamed Booboop, would buy those little, individual ice cream cups and we would put chocolate syrup and sprinkles on top – most likely where my love of sprinkles started.

Sometimes we had a special treat and she would make tea and cookies. My grandmother loved teapots and cups and saucers. She collected many different styles and displayed them in the dining room and kitchen. The three of us loved our tea parties. Booboop let KB and I each choose our teacup for the party. She made it even more special with little touches like putting milk in a special creamer, using pretty scalloped sugar spoons, and buying and arranging sugar cubes on a plate. KB and I were fascinated by sugar cubes – I still am fascinated by them – so perfect and square.

We also had cookies with our tea. Sometimes she would give us cookies from a special tin she ordered, but the best kind were homemade cookies. My grandmother loved to cook and bake. Her love for food, and making people happy with food, was one of the greatest traditions she has given us.

After my grandmother passed away, I was lucky enough to inherit a few teapots. Those afternoon tea parties were a great treat, and the memories of chatting about our day at school are bittersweet. Days like today, when the smell of cookies fill my apartment, make me wish I was 14 again – to have one more tea party with her, and tell her about my day.

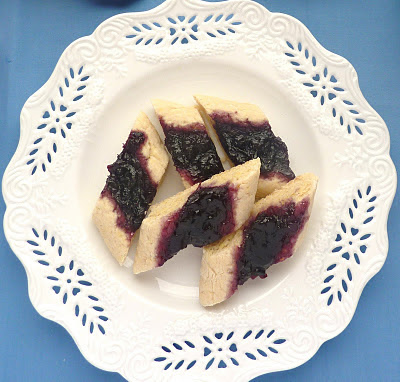
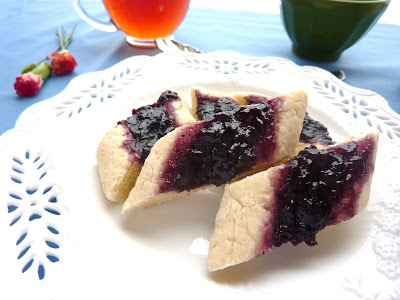
Split Seconds
adapted from Ann Pillsbury (yes, that Pillsbury)
– I doubled the recipe, but you could easily halve it if necessary

Split Seconds Ingredients:
– 1 cup All Purpose Flour
– 6 tablespoons Sugar
– 1/4 teaspoon Salt
– 6 tablespoons Unsalted Butter, softened
– 1 Egg
– 1 teaspoon Vanilla Extract
– Blueberry Jam, or any other flavor you prefer

Split Seconds Directions:
1. Preheat oven to 350F
2. Sift Flour, Sugar and Salt into a mixing bowl
3. Add Butter, Egg and Vanilla. Stir/combine with a spoon – even though the dough will be hard. You can also combine it with your stand mixer, but do not overmix.
4. Sprinkle flour on a work surface and place the dough on the flour. Divide the dough into 8 equal parts (if you are using the doubled recipe stated above).
5. Shape each part into a roll about 6-8 inches long and place on an ungreased cookie sheet or silicone covered baking sheet. Be sure to place rolls at least 3 inches apart and away from the edges of the baking sheet
6. With your fingers, make a small dent, about 1/4 inch deep, down the center of each dough roll. Fell dents with your Jam or jelly.
7. Bake for 12-18 minutes, depending on your oven. Remove from the oven and cut rolls in small pieces while they are still warm.
8. Move pieces to a cooling rack to completely cool before eating.

Until next time,
LOVE & CONFECTIONS!

Filed Under: Cookies, Uncategorized

For Grace – September 16, 2011

September 16, 2011

I have been dreading this post for a while. I was even thinking of not doing anything, but she would tell me, “T.T. Go get it done.” I apologize in advance if this post is “all over the place,” that’s the way my head is right now.


Every year, I hope September 16th will pass me by, that the calendar will forget that day, that I won’t remember. But every year it comes, and I wish I could say it has gotten easier, but for me, it hasn’t. My heart still hurts.

I was seventeen when my grandmother, Grace, passed away.

She was in and out of the hospital for various reasons. The hospital was about 10 minutes from our house, so we were there often. I remember doing homework in the waiting rooms, having snacks or sometimes dinner from the cafeteria, and I remember her wearing the cutest socks with angels embroidered on them, because her feet were always cold. Every time I look at those socks I think of her. She never got her driver’s license and was so proud of me when I got mine. I wish I could have had the chance to drive her around in my first car.

I even took my Junior Prom pictures in the hospital lobby – just so she could see me all dressed up before I went to the dance. She was all smiles and so happy that night, even though she was hooked up to so many machines. She told me I looked beautiful and whispered, “Thank you,” to my best friend who was my date. I will never forget that moment.

A single tear rolled down her cheek right before she went to Heaven.

I couldn’t stand the silence. It wasn’t really silent, because everyone was crying, but there was a deafening silence I had to get away from. I now know it was stupid, but I had to leave the hospital, so I drove to our church. I was numb and needed to go somewhere, anywhere, besides staying at the hospital. My youth group was preparing for their weekly meeting when I showed up. Everyone knew instantly, my best friend hugged me, and then it finally hit me. She was gone. I stayed with them for a few hours while my family took care of things at the hospital, and finally figured where I had run off to. My dad picked me up and we went home – I was in no condition to drive.

This is what I saw when I got home. I don’t know who took it – it might have been my mom – but this is a picture of the sunset on the day my grandmother died. We stood in the driveway just staring at it. It was heartbreaking and beautiful all at the same time.

I can’t tell you the number of tissues I have gone through while attempting to put everything I’m feeling into words. I know she is in a better place, but I wish she was still here, because I’m selfish. I have been selfish every day for the past ten years because I wanted her here. I wanted her here for my high school and college graduations. I wanted her here when I chose to become a pastry chef – I think she would have been proud of my decision. I wanted her here when I got married. She never got to meet my husband – coincidentally, his birthday is the same day as hers – and I think she would have really liked him. There are so many things she has missed, but I know she is still here in spirit and in our hearts.

I don’t know if the hurt will ever go away. It isn’t always this bad. More-so around her birthday, holidays and every September 16th. Supposedly time heals all wounds. Will it heal a hurting heart?

While helping my mom make some funeral arrangements, I came upon this poem. It has helped, a little, to comfort me throughout the years.

He Only Takes the Best
God saw she was getting tired
and a cure was not to be
So he put His arms around her
and whispered, “Come with Me”
With teared filled eyes we watched her
suffer and fade away
Although we love her deeply
we could not make her stay.
A Golden heart stopped beating
Hard working hands put to rest.
God broke our hearts to prove to us
He only takes the best.
~author unknown
She was my hero. She was my inspiration to become a chef. I wanted to cook and bake like her. She shared her love through food. Over the next few blog posts, I will be doing recipes either from, or inspired by, my grandmother. She knows we love her and miss her so much, and one day we’ll see each other again.

Until next time,
LOVE & CONFECTIONS!
Filed Under: Family & Festivities, Uncategorized

Watermelon Mango Margarita

August 3, 2011

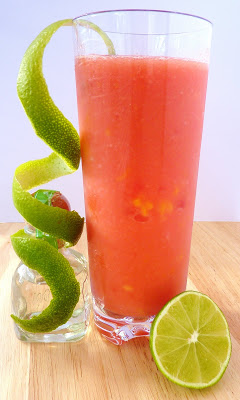
Today is National Watermelon Day and what better way to celebrate than with a few watermelon cocktails. These drinks are a great way to cool down in this hot, Summer month. You can easily play with the ingredients to fit your taste.


I happened to have some mango in the house – which is unusual. The only reason I had it was because it was already cut up and frozen. My Mom is allergic to the mango sap, but she can eat the mango fruit if someone peels it for her. I had the mango because it is a healthy option to blend with yogurt for a morning smoothie.


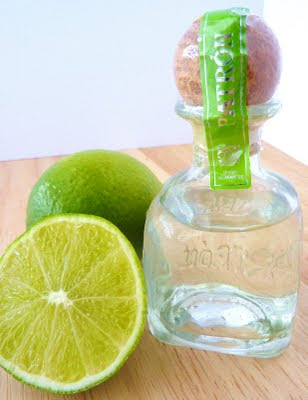
The mangoes needed to be used up, and what better way to combine them with watermelon and alcohol? I had a cute little nip of tequila at home too. It turned out good – for someone who likes both mango and tequila. This recipe is definitely a crowd-pleaser because of the great tropical flavors. I gave it a try, so should you.

Watermelon Mango Margarita
A Love and Confections original recipe

Watermelon Mango Margarita Ingredients:
– 3 cups seedless Watermelon, diced
– 2 cup Mango, diced
– 2 ounces Tequila
– Juice from 1 Lime
– 1/2 cup Agua de Sandia (Watermelon Water)
– Crushed Ice

Watermelon Mango Margarita Directions:
1. Place all ingredients in blender and combine until desired consistency. Pour into glasses and enjoy!

Until next time,
LOVE & CONFECTIONS!
Filed Under: Cocktails, Uncategorized

Simple Syrup

July 29, 2011

A staple in every kitchen should be Simple Syrup, also known as liquid sugar simple syrup or bar syrup. It is made by stirring granulated sugar and water in a sauce pan until the sugar dissolves. The liquid is then cooled and can be kept in an airtight container in the refrigerator. The ratio of sugar to water is 1:1, and sometimes up to 2:1 – I personally use the 1:1 ratio when I make it.

Simple syrup can be used to sweeten drinks – like sweet tea, juices, and alcoholic beverages -, moisten cakes, candying fruits, and many more culinary applications. Simple syrup can also be flavored with ingredients such as vanilla beans, mint, basil, coffee, etc. The flavor possibilities are endless.

Simple Syrup

Simple Syrup Ingredients:
– 16 ounces Sugar
– 16 ounces Water

Simple Syrup Directions:
1. Combine Sugar and Water in sauce pan. Stir and place over medium heat.
2. Stir occasionally while the sugar dissolves in the water.
3. Once the sugar has completely dissolved, remove from heat and let it come to room temperature before using
4. If not using immediately, place in airtight container in the refrigerator. Shake before use.

Until next time,
LOVE & CONFECTIONS!
Filed Under: Beverages, Cocktails, Kitchen Tips, Uncategorized

Watermelon Scented Water

July 28, 2011

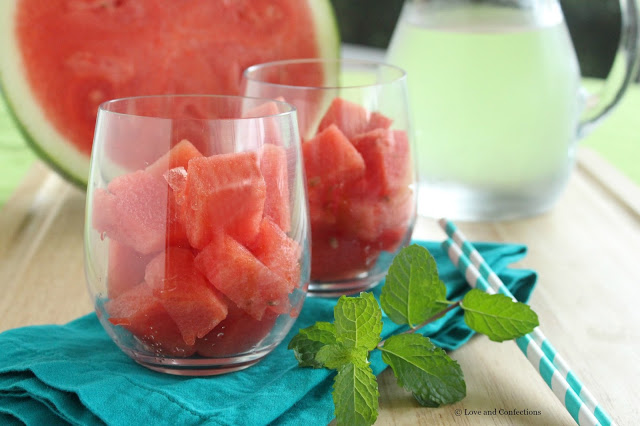
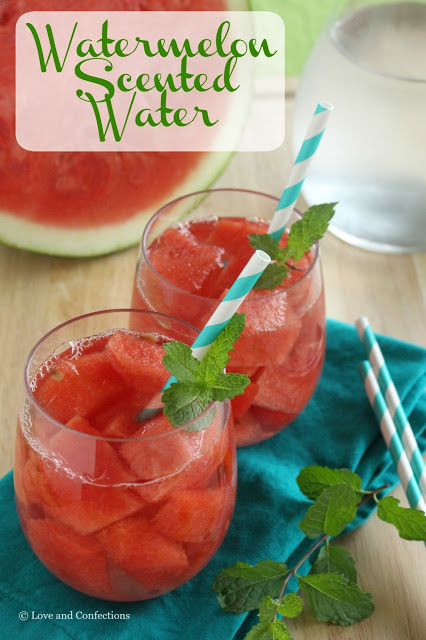
Watermelon and water combine for a refreshing and delicious way to get your daily water requirement!

Watermelon Scented Water from LoveandConfections.com


Summer is here and watermelons are abundant. I can’t recall a backyard barbecue where we didn’t have fresh slices of watermelon. Nowadays, I try to get more than the recommended 8 glasses of water a day, but sometimes I am craving a sweet drink. This Watermelon Scented Water definitely curbs my cravings.

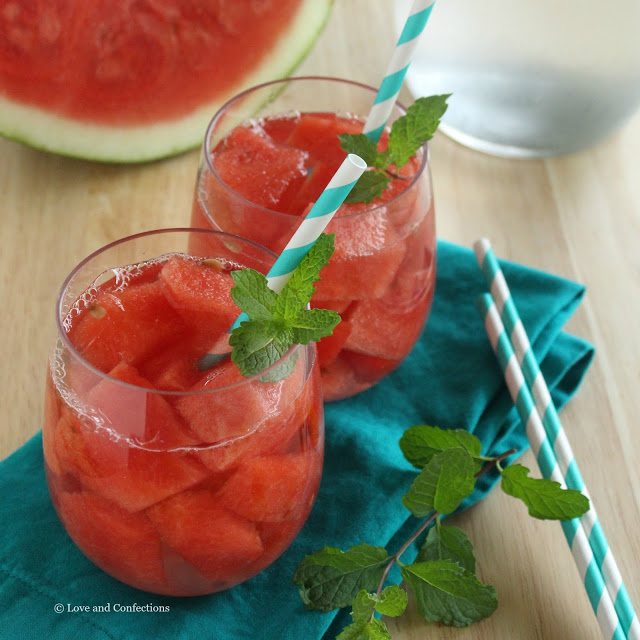
Watermelon Scented Water from LoveandConfections.com

The watermelon infuses the water and gives it a slightly sweet, and glorious Summer taste. It’s so easy to create delicious combinations of flavored water, like my Cucumber Mint Water and Blueberry Lemon Water.

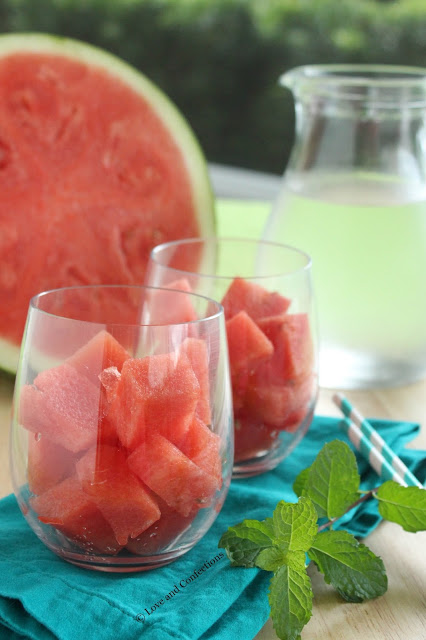
Watermelon Scented Water from LoveandConfections.com

Try and make your own fruit flavored water – it is refreshing and invigoration, especially if you are used to sodas or other types of beverages. I love brightening water up with fresh fruits, vegetables, and herbs. There are hundreds of combinations to try, and they all make drinking water more fun and delicious.

Watermelon Scented Water from LoveandConfections.com

Watermelon Scented Water
from Love & Confections

Watermelon Scented Water Ingredients:
– 2 cups Seedless Watermelon, cubed
– 4 cups Water

Watermelon Scented Water Directions:
1. Place Watermelon in pitcher and cover with Water.
2. Let it sit a few hours in the refrigerator before drinking – so the water gets all the nice watermelon flavor.

Until next time
LOVE & CONFECTIONS!

Filed Under: Beverages, Uncategorized

Chocolate Cupcake Bread Pudding

June 29, 2011

I have not posted in a while, because I have been recovering from my second surgery. The problem with getting surgery on your dominant hand is that it takes a little longer to heal, hence the lack of posts from a lack of baking.

Next week I start a new job at a small French bakery & cafe. I am hoping I will be able to post more with my new and different hours, but we’ll see. The production amount will be less than my last baking job at the university cafeteria (1,500-3,000 people per day, which caused me to have the two surgeries in the first place). I think the experience I am going to gain with the new job will be invaluable. It is a new adventure and I am ready.

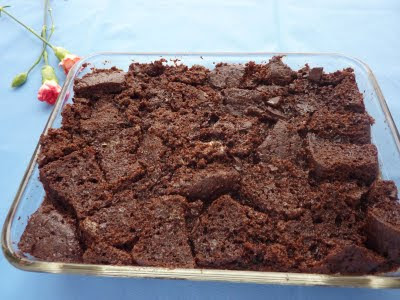
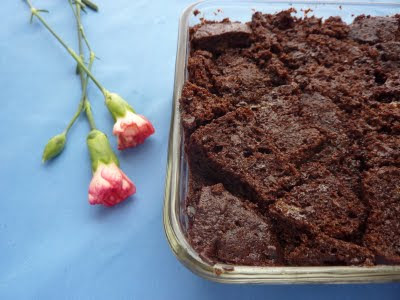
Sometimes you only want a few cupcakes and the recipe or box mix yields more than you need. This is a great way to use up those extra, unfrosted cupcakes.

Chocolate Cupcake Bread Pudding
Love & Confections original recipe

Chocolate Cupcake Bread Pudding Ingredients:
– 8 Chocolate Cupcakes, unfrosted and quartered
– 2 large Eggs
– 1/4 cup granulated Sugar
– 1 cup Milk
– 1 teaspoon Vanilla Extract
– 2 ounces shaved Chocolate or 2 ounces Mini Chocolate Chips

Chocolate Cupcake Bread Pudding Directions:
1. Preheat oven to 350F and spray oven-safe baking dish with cooking spray
2. Quarter Chocolate Cupcakes and place baking dish
3. In the bowl of your stand mixer, or a bowl with electric beaters, combine the Eggs and granulated Sugar. Whip until the eggs thicken and have lightened in color – a lemon-y yellow.
4. Add Milk and Vanilla Extract to Egg mixture and combine carefully.
5. Sprinkle Chocolate pieces over the quartered cupcakes.
6. Pour wet mixture over the cut cupcakes, pressing down to ensure they are all covered with the liquid.
7. Let the cupcakes and liquid sit for 15 minutes, so the cupcakes absorb the mixture.
8. Open the oven, pull out the center rack and place the baking dish inside a larger oven-safe baking dish with sides. Fill the larger baking dish with enough water to go half-way up the sides of the smaller bread pudding dish (you are creating a bain-marie or water bath)
9. Carefully slide the oven rack back in the oven, and bake the bread pudding for 45-60 minutes (depending on your oven) or until you press slightly on the mixture and no liquid bubbles up.
10. When the cupcake bread pudding is done, CAREFULLY remove the larger baking dish and set it on the stove or counter and let it cool BEFORE removing the bread pudding baking dish.

* I used a 5 x 7 baking dish for the bread pudding.
* You can serve this warm or room temperature. To re-warm, place in a warm oven for 15 minutes. I recommend serving this with vanilla bean ice cream and whipped cream. Serves 4. This recipe can easily be doubled to serve more.

Until next time,
LOVE & CONFECTIONS!

Filed Under: Crisps-Crumbles-Bread Puddings, Uncategorized

Spanish Almond Custard Torte

May 22, 2011


A few weeks ago I had the pleasure of going to a Tapeña® Wine and Tapas Party hosted by Katie from Katie’s Cucina. We had all sorts of goodies, including Tapeña® wine. The two wines we tasted were the Garnacha and the Tempranillo. Hopefully I will be able to try the other two Tapeña® wines, Verdejo and Rosé, which were unavailable at our local Total Wine & Beer store.


The tapas that Katie provided were delicious! She had Sweet and Savory Pumpkin Empanadas, Shrimp and Parsley Toasts, Mixed Grilled Vegetables, Barbeque Pork Pinchos and White Chocolate Raspberry Mousse Cups.


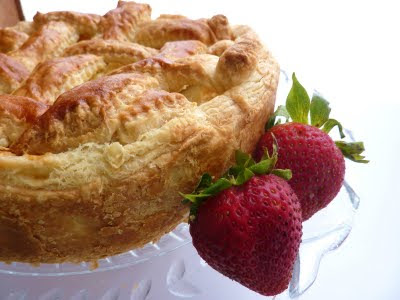
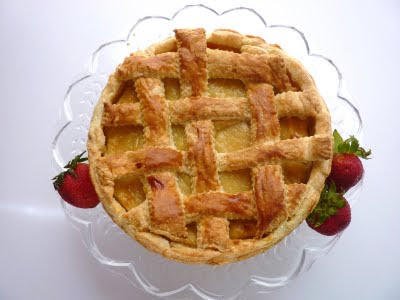
Being a pastry chef, I automatically volunteered to bring dessert. I had so many ideas and the internet is full of recipes, but I wanted something special and different, not just your average flan. I happened upon this Spanish Almond Custard Torte and decided it would be perfect.


I love baked custards more than almost anything. Baked pastry cream is divine! This is a basic pastry cream recipe with almond paste added. Almond paste has such a great, intense flavor – I love using it baked goods.


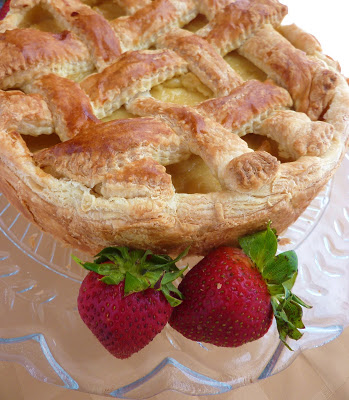
Spanish Almond Custard Torte
from Lisa & Tony Sierra, About.com

Spanish Almond Custard Torte Ingredients:
– Vegetable Shortening to coat pan
– 2 sheets Puff Pastry (1 package 17 ounce frozen puff pastry)
– 2 cups Milk
– 1 Cinnamon Stick
– 3 Egg, separated
– 2/3 cup granulated Sugar
– 1/4 cup Corn Starch
– 1/4 cup All-Purpose Flour
– 8 ounces Almond Paste

Spanish Almond Custard Torte Directions:
1. Remove Puff Pastry sheets from freezer and allow to thaw 10-15 minutes.
2. Using a paper towel, coat an 8-inch cake pan or springform pan with Vegetable Shortening
3. Line the cake pan with puff pastry, trimming edges to fit pan and pressing pastry where the bottom of the pan meets the sides.
4. Prick the bottom with a fork
5. Preheat oven to 350F
6. Pour all but 1/4 cup Milk into a medium-size, heavy bottom sauce pan and add the Cinnamon Stick. Bring milk just to the boiling point, then remove from heat and set aside to cool down.
7. In a large mixing bowl, beat the Egg Yolks and Sugar until the mixture turns light yellow and has a smooth texture. Add the Flour and Corn Starch to the egg mixture and beat with a hand mixer or stand mixer on medium-high speed. Add the reserved 1/4 cup milk and continue to mix until smooth and creamy
8. Remove cinnamon stick from warm milk. While stirring constantly, pour about 1/3 of the warm milk into the egg mixture. Once the milk is mixed in well, continue to stir while pouring in the rest of the milk.
9. Using a hand or stand mixer, add the Almond Paste and mix well
10. Transfer the mixture into the sauce pan and heat on medium, stirring constantly. Bring to a boil for just 30 seconds. Note: be careful while heating that lumps don’t form. If lumps do begin to form in the custard, try using a hand mixer on low to break up the lumps.
11. Remove from the stove and pour into the puff pastry crust.
12. To form the top crust, lay the other puff pastry sheet out on a clean cutting board and cut the sheet into strips and lay across the top.
13. Beat the Egg Whites in a small bowl. Brush beaten egg whites over the top of the crust.
14. Bake in middle rack of oven for 30-35 minutes. Remove and allow to cool for 20 minutes before serving. Refrigerate if the torte will not be eaten within an hour. Note: if using a springform pan, remove the sides and serve. Otherwise, cut and serve the torte from the cake pan

Until next time,
LOVE & CONFECTIONS!

Filed Under: Pies-Tarts-Crostatas, Uncategorized

Fudge Brownies – the best food for a road trip!

May 18, 2011


Yay roadtrips! I am even more excited because I will be trekking north to visit my parents. It isn’t that much of a road trip – only 8-10 hours – but still, what would that be without some great road food.

My sister and I will hopefully leave early enough so we will be home before dark. Even though my husband and I have our own apartment and my sister has hers, wherever our parents are, is where we call Home. I am also extremely excited to meet the newest addition to our family – an adopted 6 month old little boy Yorkie – Hercules!

My mom used to always have amazing food for us when we took family trips. We would have a cooler packed with drinks and a bag of homemade goodies. Most of the time they were her brownies. She didn’t usually make from scratch brownies – but with that one box mix that is our family’s go-to, who would?

I decided to try my hand at some homemade brownies. Lucky for me, brownies freeze well, because I made these about a week ago, a few days before my hand surgery. My hand is doing okay. I can’t do a lot of things, like grip anything, but I’ll get that back.

Baking is on the list of things I will have to work up to, but I am excited to get back to it. Mom even said that while I’m there, we can do some baking – basically I’ll direct and she’ll do all the work, but it will be baking nonetheless.

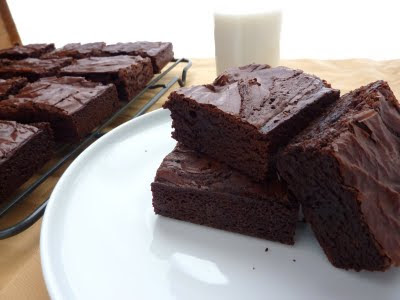
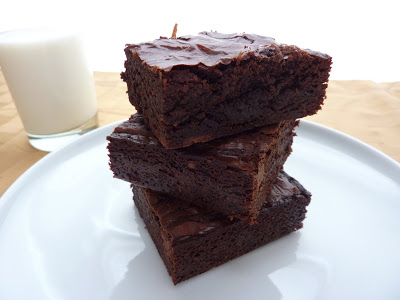
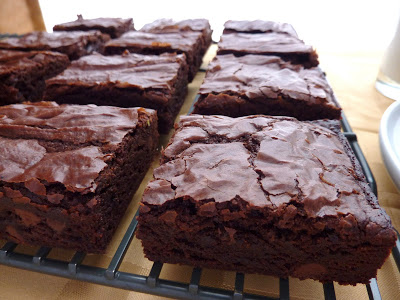
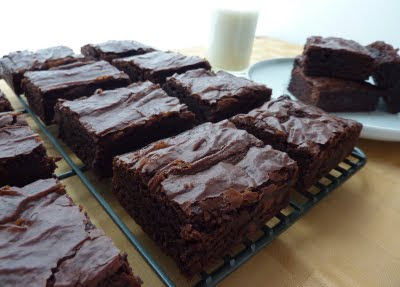
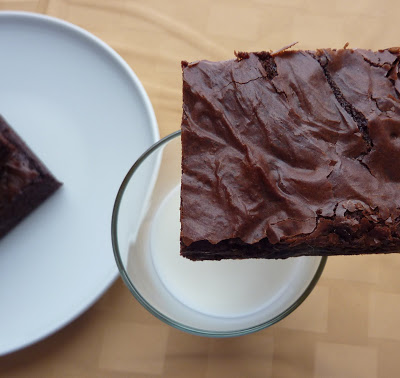
These brownies were relatively easy to make – just a few more steps than the normal tear open a box and measure out some liquid. They’re thick and rich, chewy and cakey, and extremely chocolate-y all at once. You’ll probably want a giant cold glass of milk alongside these dark beauties.


Fudge Brownies
from King Arthur Flour

Brownie Ingredients:
– 2 sticks unsalted Butter
– 15 3/4 ounces granulated Sugar
– 4 large Eggs
– 3 3/4 ounces Dutch-Process Cocoa
– 1 teaspoon Salt
– 1 teaspoon Baking Powder
– 1 teaspoon Espresso Powder
– 1 tablespoon Vanilla Extract
– 6 1/4 ounces All-Purpose Flour
– 12 ounces Chocolate Chips

Brownie Directions:
1. Preheat the oven to 350F. Lightly grease a 9″ x 13″ pan.
2. In a saucepan set over low heat, melt the Butter, then add the Sugar and stir to combine. Return the mixture to the heat briefly, just until it’s hot (about 110F to 120F) but not bubbling. It will become shiny looking as you stir it. Heating this mixture a second time will dissolve more of the sugar, which will yield a shiny top crust on your brownies.
3. While the sugar heats a second time, crack the 4 Eggs into a bowl – or your stand mixing bowl, and beat them with the Cocoa Powder, Salt, Baking Powder, Espresso Powder and Vanilla Extract until smooth.
4. Add the hot butter/sugar mixture, stirring until smooth.
5. Add the Flour and Chocolate Chips, again stirring until smooth. Note: if you want the chips to remain intact in the baked brownies, rather than melting in, let the batter cool in the bowl for about 20 minutes before stirring in the chips
6. Spoon the batter into the lightly greased pan
7. Bake the brownies for 30 minutes, until a cake tester inserted into the center comes out clean, or with just a few moist crumbs clinging to it. The brownies should feel set on the edges, and the center should look very moist, but not uncooked. Remove them from the oven and cool on a rack before cutting and serving.

Until next time,
LOVE & CONFECTIONS!
Filed Under: Brownies & Bars, Uncategorized

Lemon Brown Sugar Meringue Tart for Mother’s Day

May 8, 2011


Door to door, my Mom lives 615 miles away. I get to visit her a few times a year, and she also gets to come her a few times a year, but it is difficult living that far away. I want to be near her and want her around for certain things. Like this past week while I have been sick – no matter how many times I make it, my chicken soup never tastes as good as hers. I think her secret ingredient is Mom’s Love.

Mother’s Day is always a difficult holiday when loved ones are not there. My Mom lives in another state. My paternal Grandmother lives a few hours away in another city. My maternal Grandmother is in Heaven. It’s even more difficult when there are specific things you miss and can will never be able to have again. I miss my Grandmother’s roasted chicken. There was just something about the way she cooked it. We would gather around the table, my Grandfather and I would grab the dark meat while everyone else had white meat, and we would enjoy a great family meal and each others company.


My Mom’s favorite dessert is Lemon Meringue Pie. She requests it whenever it’s her birthday or for any occasion that needs a special dessert. My Grandmother made the best Lemon Meringue Pie. There was none like it. Lemon Meringue Pie and Eggplant Parmesan are what my Mom misses most from my Grandmother’s cooking. I think Grandma had some of that Mother’s Love secret ingredient too!


I know it doesn’t come close to her Lemon Meringue Pie, but I wanted to make something special for my Mom on Mother’s Day – even though I won’t get to see her for a couple of weeks – it’s the thought that counts. I can’t put Mother’s Love in it, but I hope Daughter’s Love will do.

Next mission – to attempt Grandma’s Eggplant Parmesan. Maybe I’ll come close enough to Grandma’s recipe and be able to make Mom smile.

Happy Mother’s Day, Mom! I love you and can’t wait to see you soon <3
p.s. Mom, this tart was pretty good! 🙂

Is there any special dish your Mom makes that you absolutely love? Share it in the comments!

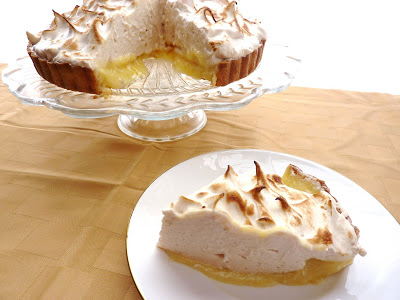
Lemon Brown Sugar Meringue Tart
Lemon Curd – Joyofbaking.com
Brown Sugar Meringue – Me

Tart Crust:
– I used a pre-made pie shell, but you can use whatever recipe you like best.

Tart Crust Directions:
1. Preheat oven to 400F
2. haw Pie Crust by following directions on package
3. Unroll and gently place over tart pan with removable base
4. Gently push the dough into place, without stretching the dough. (It will shrink during baking if you stretch it)
5. Trim any excess dough and dock pie dough with a fork along the bottom
6. Place a piece of parchment paper on the tart – big enough to fit over the whole tart and sides – and then fill with either pie weights or dry beans (re-usable and used only for baking weights).
7. Bake tart for 20-25 minutes
8. Remove parchment paper with beans and save beans for later use

Lemon Curd Ingredients: (I doubled it to have extra)
– 3 large Eggs
– 3/4 cup Granulated Sugar
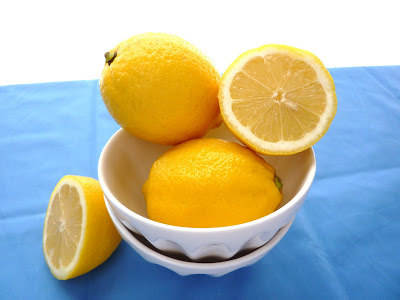
– 1/3 cup fresh Lemon Juice – do not use the bottled juice
– 4 tablespoons unsalted Butter, room temperature
– 1 tablespoon finely shredded Lemon Zest – zest lemons before squeezing for juice

Lemon Curd Directions:
1. Turn oven down to 350F
2. In stainless steel bowl over a pot of simmering water, whisk together Eggs, Sugar and Lemon Juice until blended.
3. Cook, stirring constantly (to prevent it from curdling), until the mixture becomes thick (like sour cream or a hollandaise sauce). Approximately 160F if you have a thermometer. This will take about 10 minutes.
4. Remove from heat and immediately pour through a fine strainer to remove any lumps.
5. Cut the Butter into small pieces and whisk into the mixture until the butter has melted.
6. Add the Lemon Zest, stir, and let cool. The Lemon Curd will continue to thicken as it cools
7. Cover immediately (so a skin doesn’t form) and it can be refrigerated for up to a week.
8. Place Lemon Curd in pie crust and bake at 350F for 10 minutes. Do not let it brown – just cook until set, but still wobbly in the center.

Brown Sugar Meringue Ingredients:
– 6 Egg Whites, room temperature
– 2 cups Brown Sugar
– pinch of Salt

Brown Sugar Meringue Directions:
– For those of you familiar with types of meringue, this is a Swiss Meringue recipe, but unlike regular Swiss Meringue, the Brown Sugar automatically dissolves in the Egg Whites, so you just need to warm it like a regular Swiss Meringue – not having to worry if the sugar is dissolved or not.
1. In a bowl of your stand mixer, add the Egg Whites, Brown Sugar and a pinch of Salt
2. Whisk together while it is placed over a pot of simmering water – same pot used to make the Lemon Curd – while being careful the water does not touch the bottom of the bowl!
3. Continue to whisk until the egg and brown sugar mixture are warm. You can use your fingers to tell the temperature, while making sure you don’t cook the egg whites too much. It should be warmer than room temperature.
4. Place bowl on stand mixer, attach whip and whip it on high.
5. Place a piece of foil completely around the bowl and your mixer. The warmer the egg whites are, the better they whip. The foil keeps them warm.
6. Remove the foil after the whites are whipped perfectly.
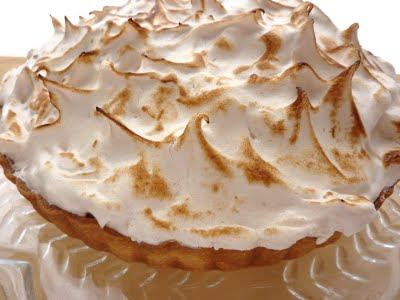
7. Spoon or pipe meringue onto Lemon Curd Tart carefully, making sure to cover the entire surface of the curd. Using a palette knife or spatula, create whatever design you prefer for the top of the meringue tart
8. You can either use a torch – like I did – or place it in the oven for a few minutes, to brown the meringue

Until next time,
LOVE & CONFECTIONS!
Filed Under: Pies-Tarts-Crostatas, Trifles-Parfaits-Mousses-Curds, Uncategorized

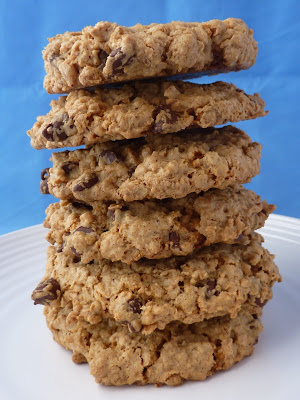
Giant Oatmeal Chocolate Chip Cookies (FHC)

April 30, 2011

A while ago, I bought a few boxes of plain instant oatmeal. When I say, “a few” I mean 4 boxes at bogo. They were on sale, and I thought I would go through them rather quickly. I was wrong. I can only eat oatmeal so much. Don’t get me wrong, I do like it, but even if I add brown sugar or cinnamon, I can’t eat it every morning – especially since I don’t eat breakfast on a regular basis. I know, breakfast is the most important meal of the day, but I choose sleeping in until 5:45am, then leave for work 15 minutes later, over waking up early to eat breakfast – most days. So I have a lot of instant oatmeal packets on my hands.

What else could I do with instant oatmeal? Light bulb… Instant oatmeal cookies! There had to be a recipe for instant oatmeal cookies, and so the search began. The internet is wonderful, isn’t it? I found a few recipes and narrowed it down to this one. Instead of raisins, I added chocolate chips. Chocolate makes everything better.

Oatmeal Chocolate Chip Cookies made with Instant Oatmeal
adapted from ehow.com recipe

Ingredients:
– 1 cup All-Purpose Flour
– 1/4 teaspoon Baking Powder
– 1/2 teaspoon Baking Soda
– 6 packs of Instant Oatmeal
– 1/2 cup Butter
– 1 Egg
– 1/2 cup Granulated Sugar
– 1/2 cup Brown Sugar
– 1 teaspoon Vanilla Extract
– 1 tablespoon Milk
– 1 cup Chocolate Chips

Directions:
1. Preheat oven to 350F
2. Spray cookie sheet with cooking spray, or use silicone non-stick baking mat.
3. Combine the Flour, Baking Soda, Baking Powder and Instant Oatmeal in a bowl. The oatmeal can be any flavor you want, or mixture of flavors. I used plain because I added chocolate chips.
4. Melt the Butter in a small saucepan over medium-high heat.
5. Pour the melted butter into a bowl and crack the Egg into it. Whisk the butter and egg together.
6. Add the Granulated Sugar, Brown Sugar, Vanilla Extract and Milk into the melted butter. Mix together.
7. Add the Chocolate Chips to the mixture.
8. Gradually add the Flour-Oatmeal mixture to the sugar mixture. Add more oats or flour to the cookie dough if necessary to thicken it up.
9. Drop spoonfuls of cookie dough 2 inches apart on the prepared cookie sheet. I used an ice cream scoop, so they were all the same size – my scoop is a bit large, so that is why they are giant cookies.
10. Bake the cookies for about 10 minutes, or until they are light golden brown. Let cool for a few minutes on the pan before removing to a cooling rack.

Until next time,
LOVE & CONFECTIONS!
Filed Under: Cookies, Uncategorized

  • « Go to Previous Page
  • Page 1
  • Interim pages omitted …
  • Page 42
  • Page 43
  • Page 44
  • Page 45
  • Page 46
  • Go to Next Page »

Primary Sidebar

Meet Terri
founder & pastry chef

Subscribe to Love and Confections

Popular Posts

Pumpkin Pecan Cupcakes with Cinnamon Cream Cheese Frosting
Pumpkin Spice Cinnamon Roll Cake
Oatmeal Cream Pie Layer Cake - oatmeal brown sugar layer cake, marshmallow frosting filling, and vanilla bean buttercream with oatmeal cream pie garnish
Easy Piña Colada Poke Cake - pineapple cake, coconut cream pudding, whipped topping, pineapple chunks and maraschino cherries
Mermaid layer cake
PIneapple cake with pineapple curd, teal frosting and tropical sprinkle mix
Irish Cream chocolate cupcakes topped with white and green buttercream piping and shamrock sprinkle mix

AMAZON AFFILIATE

Love and Confections is a participant in the Amazon Services LLC Associates Program, an affiliate advertising program designed to provide a means for sites to earn advertising fees by advertising and linking to amazon.com.

Copyright © 2018 Love and Confections · Log in