• Skip to primary navigation
  • Skip to main content
  • Skip to primary sidebar
  • Home
  • About
  • Work With Me
  • Media
  • Recipes

Uncategorized

Pecan Streusel Coffeecake

November 21, 2014

Pecan Streusel Coffeecake is perfect when you want a slice of cake that isn’t overly sweet. It is perfect for breakfast, an afternoon snack or dessert.


This isn’t like your regular sweet, quick bread coffee cake. With the addition of yeast, this cake is more bread-like in texture and not as sweet. While I do like danishes and traditional coffee cakes as breakfast items, sometimes you want something that isn’t cloyingly sweet, yet still satisfies your sweet tooth. Don’t forget to enter in my Red Star Yeast Bread-Baking Giveaway at the end of the post. Giveaway now closed.

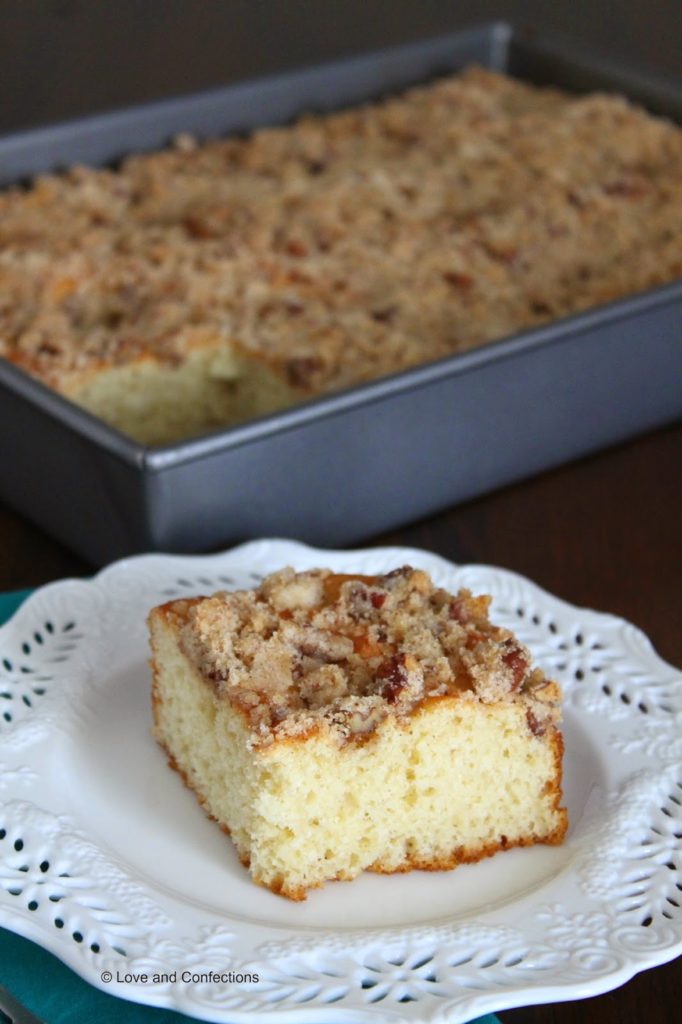
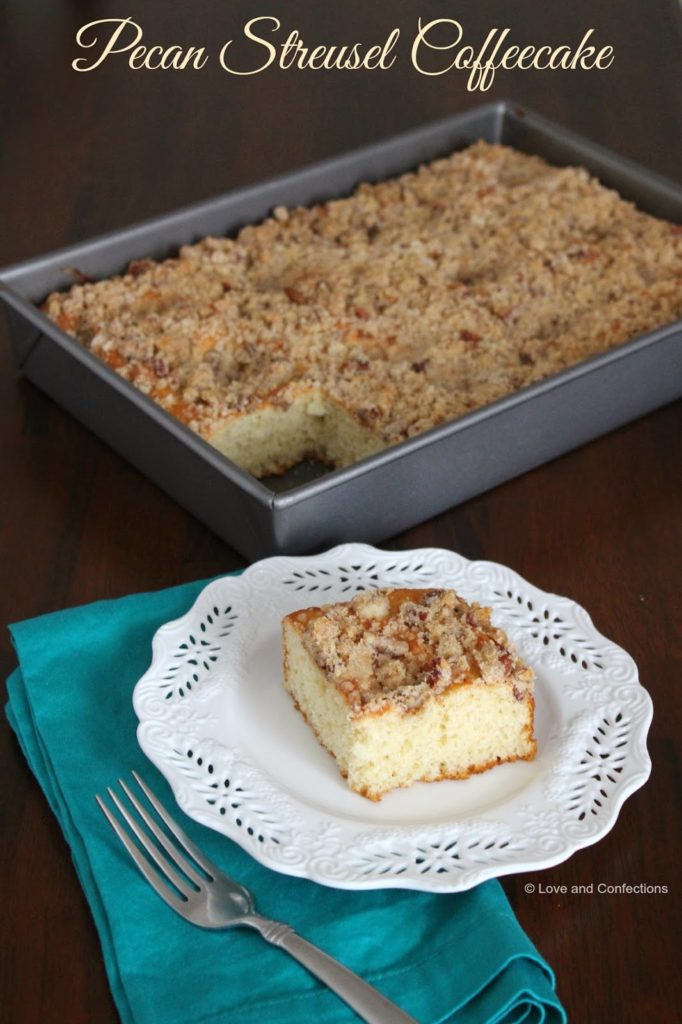
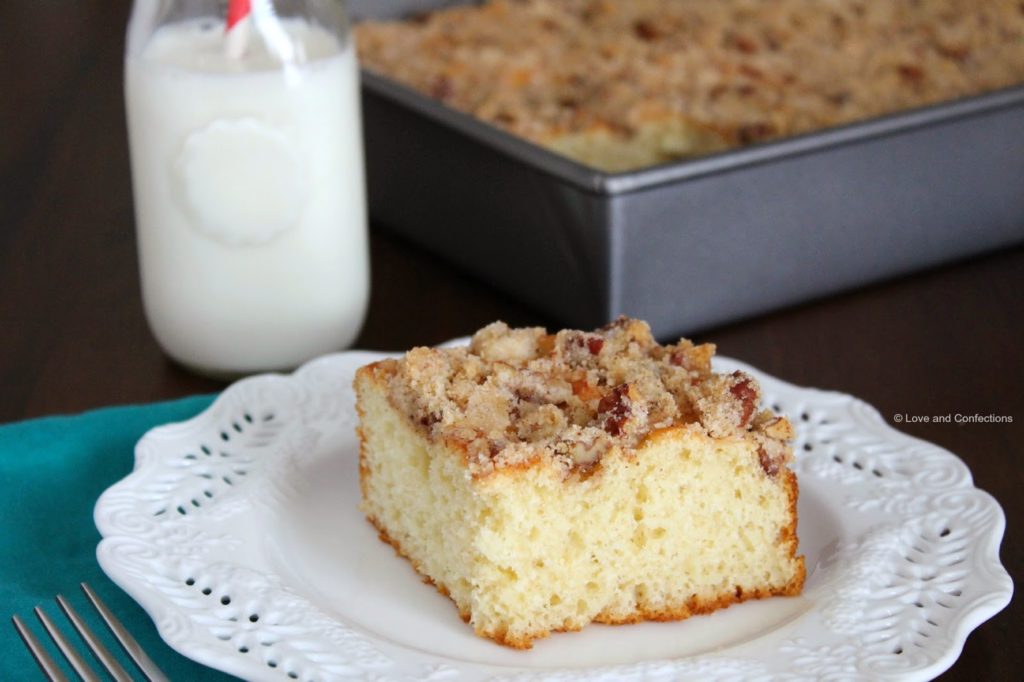
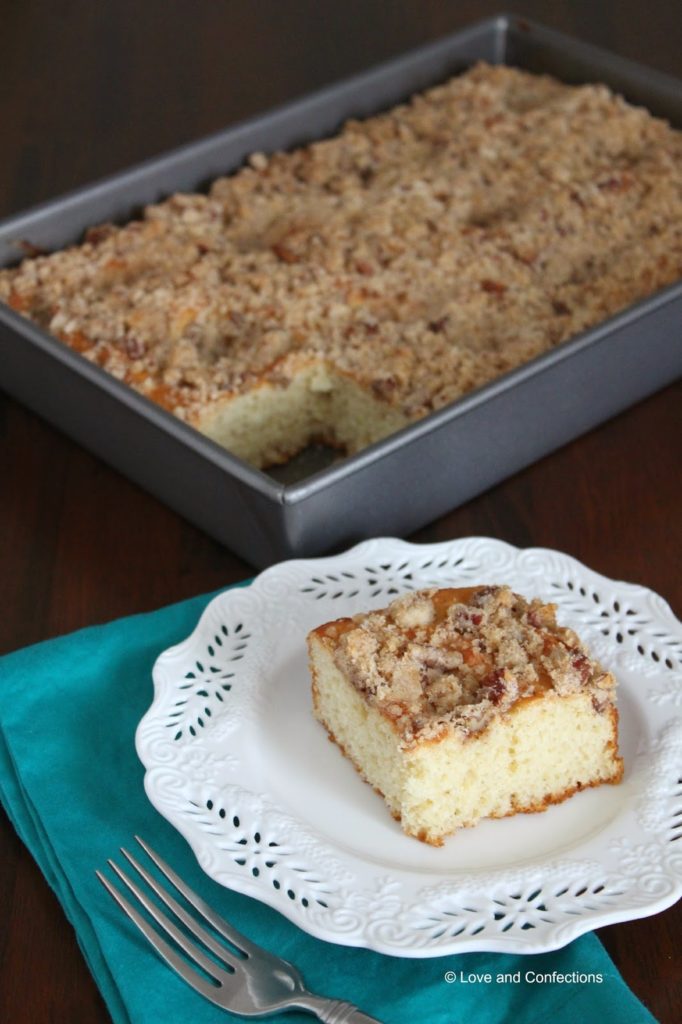
Like most of my baking these days, I made this recipe with Baby L&C was napping. It is very easy to make, especially since it is a no-knead yeast recipe. I decided to add pecans instead of almonds. I love using pecans in baked goods and they went perfectly with this cake. The streusel topping was my favorite part, and the cake smelled like yeasty, cinnamon deliciousness while baking!

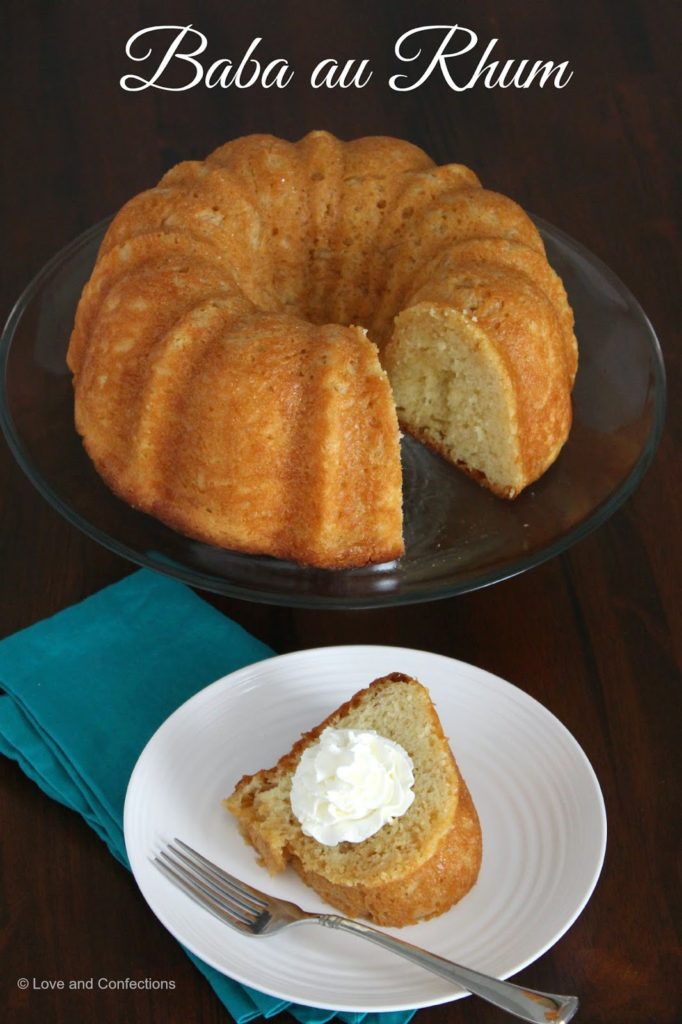
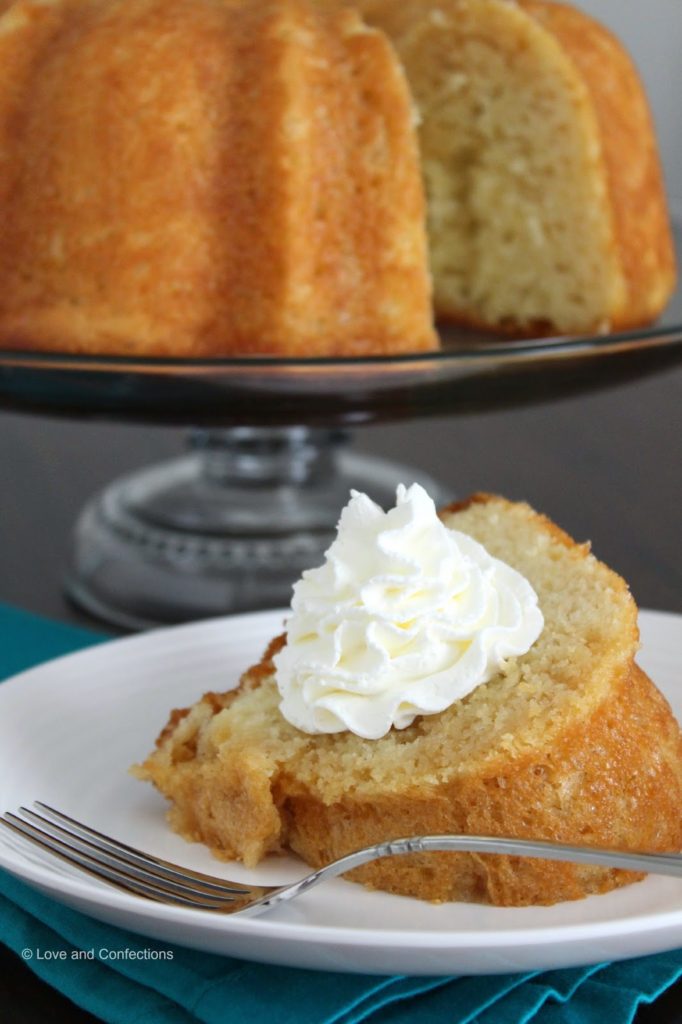
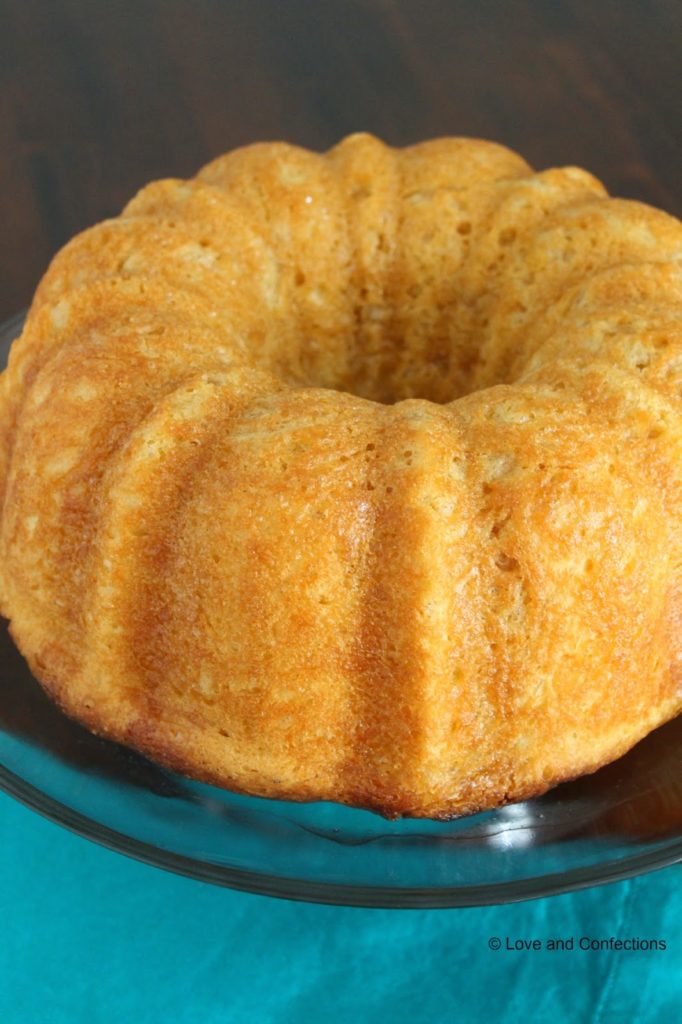
Hopefully you have loved all the yeast baked goods I made this week. My Homemade Pizza Dough and Baba au Rhum are just some of the easy recipes you can make at home with yeast. Also, hopefully my Bread Baking Tips-Working with Yeast gave you a little explanation and better understanding of yeast.

Pecan Streusel Coffeecake
Slightly adapted from Red Star Yeast
Click here for a printable recipe

Pecan Streusel Coffeecake Ingredients:
– 3 cups Unbleached Bread Flour
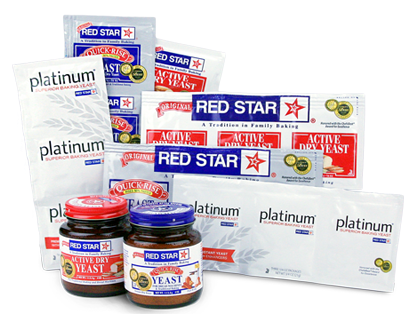
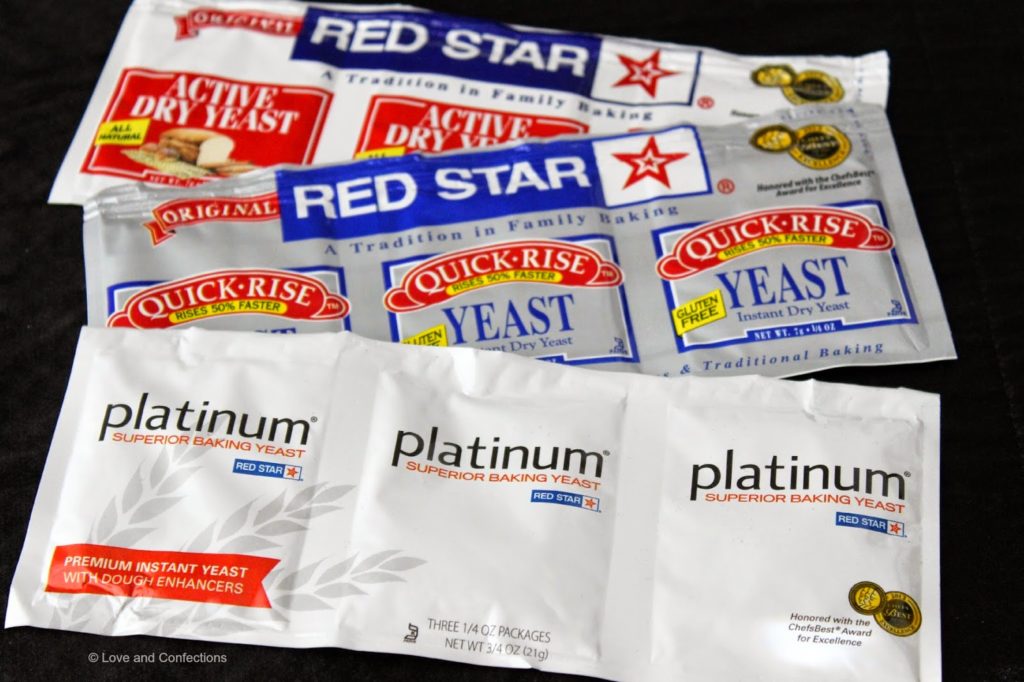
– 2 packets Red Star Active Dry Yeast
– 1/3 cup Granulated Sugar
– 1/2 teaspoon Salt
– 3/4 cup Water
– 1/2 cup Milk
– 1/4 cup Unsalted Butter
– 2 large Eggs

– 1/2 cup Granulated Sugar
– 1/4 cup Brown Sugar
– 1/2 cup Unbleached Bread Flour
– 1/2 cup chopped Pecan Halves
– 1 teaspoon Cinnamon
– 1/4 teaspoon salt
– 1/4 cup Unsalted Butter, melted

Pecan Streusel Coffeecake Directions:
1. In the bowl of your stand mixer fitted with the paddle attachment, place 1 & 1/2 cups Flour, Yeast, Sugar and Salt. Mix to combine.
2. In a medium saucepan, heat the Water, Milk and Butter to 120-130F Please make sure you have a working thermometer that is calibrated. The temperature affects the yeast and too hot could kill it. Add to Flour mixture.
3. Add Eggs, then beat on low for 1 minute, scrape down the sides, then beat on medium for 3 minutes. Add in the rest of the flour and mix by hand to create a stiff dough.
4. Prepare a 9×13 pan with baking spray and spread mixture in evenly. It is very sticky so wet your hands slightly and also use an offset spatula to help spread the dough. Set aside while preparing topping.
5. Mix together the Sugar, Brown Sugar, Flour, chopped Pecans, Cinnamon, Salt and Butter. Sprinkle evenly over the top of the cake. Cover with plastic wrap and let it rise in a warm place for about 45 minutes, or until it has doubled in size.
6. During the last few minutes of rising, heat the oven to 375F. Bake the cake for 25 minutes until it is golden brown. Let it cool slightly before serving. Enjoy!

a Rafflecopter giveaway

Until next time,
LOVE & CONFECTIONS!

Disclaimer: Red Star Yeast provided me with samples of the yeast used in these blog posts. Red Star Yeast is providing the prize package. All opinions are my own.

Filed Under: Uncategorized, Yeast Breads

Baba au Rhum #BundtBakers

November 20, 2014

Baba au Rhum is a delicious, rum-soaked yeast cake full of flavor (and booze!) and great for any occasion or holiday party!


Most people would think of yeast when it comes to cake. Hopefully this cake will change your mind. It is absolutely delicious, and you get a lot of rum! Baba au Rhums are usually made in individual servings, but I decided to make it as my bundt cake this month. Don’t forget to enter in my Red Star Yeast Bread-Baking Giveaway at the end of the post. There are some awesome goodies in the prize package!

Sometimes fruit is added, like currants or rum-soaked raisins. I decided to not add fruit, but instead add vanilla bean paste. Vanilla is one of my favorite flavors and I loved the addition of it in this cake. Seeing all the little flecks of vanilla seeds makes it extra special. Vanilla also pairs great with rum. I used the darkest rum I had, which I think makes all the difference.

When making the syrup, you might think it is too much, but believe me, the cake will soak it up. You can use less syrup if you want, because the rum in this cake definitely gives it a kick. It was quite fun making a yeast cake as opposed to a cake with regular leavening agents. After the first rise, the cake was about halfway up my pan. When I checked on it after the second rise I was so happy because the cake was all the way to the top. It really is fun working with yeast and watching it happen right before your eyes.

Baba au Rhum
Slightly adapted from Red Star Yeast
Click here for a printable recipe

Baba au Rhum Ingredients:
– 3 cups Unbleached Bread Flour
– 2 packets Active Dry Yeast, about 4 & 1/2 teaspoons
– 1/4 cup Water
– 1/2 cup Milk
– 3/4 cup Unsalted Butter, room temperature
– 1/4 cup Granulated Sugar
– 1/2 teaspoon Salt
– 4 large Eggs
– 1/2 teaspoon Almond Extract
– 1 teaspoon Vanilla Bean Paste

– 1 cup Dark Rum
– 1/2 cup Granulated Sugar
– 1 teaspoon Vanilla Extract

Baba au Rhum Directions:
1. In the bowl of your stand mixer fitted with the paddle attachment, add 1 & 3/4 cups of the Flour and all of the Yeast, and blend briefly to incorporate.
2. In a medium saucepan, heat the Water, Milk, Butter, first measure of Sugar and Salt, while continuously stirring, to 120F-130F. The temperature is important so as not to kill the yeast. Please make sure you have a working and calibrated thermometer.
3. Pour the liquid into the flour, then add the 4 Eggs. Mix on low for 30 seconds, scrape down the sides, then mix on high for 3 minutes. Add in the remaining flour and mix on low to combine.
4. Take out the paddle and cover the bowl with plastic wrap. Let it rise about 30-45 minutes or until it has doubled in volume.
5. Use baking spray to grease the insides of a bundt pan. Once the cake has doubled, pour it into the bundt pan, spreading it out evenly, and covering with plastic wrap that has been sprayed with baking spray. Let it rise a second time for about 30-45 minutes or until it has doubles once again in volume.
6. Near the end of the second rise, heat the oven to 350 degrees. One thing to note, make sure you use the lowest rack in your oven so the top of the cake does not burn. Bake the cake for 25-35 minutes or until it is golden brown and a cake tester comes out clean. If you need to, you can cover the top with foil after 20 minutes of baking if it starts to brown too much.
7. During the last few minutes of baking, make the rum simple syrup. In a small saucepan, heat the Rum and Sugar until the sugar completely dissolves, stirring frequently. Pour the syrup into a measuring cup with a spout then add the Vanilla Extract and stir.
8. Poke the bottom of the cake with a skewer, then turn the cake out onto a stand or plate and pike the entire top and sides of the cake also with a skewer. Very slowly, pour the rum syrup over the cake, making sure it soaks in. If the syrup pools, let the cake soak it up before serving.

Don’t forget to check out all of the wonderful Boozy Bundt Cakes this month!

  • Anisette and Orange Bundt Cake by Samantha at Un Mordisco Un Pecado 
  • Apple Bundt Cake with Whiskey Salted Caramel by Lauren at From Gate to Plate 
  • Baba au Rhum by Terri at Love and Confections 
  • Banana Bourbon Bundt Cake by Linda at Brunch with Joy 
  • Champagne Soaked Cranberry Bundt Cake by Teri at The Freshman Cook 
  • Chestnut and Rum Kugelhopf by Jelena at A Kingdom for A Cake 
  • Chocolate Baileys Bundt Cake by Bea and Mara at I Love Bundt Cakes 
  • Chocolate Chambord Mini Bundt Cakes by Tara at Noshing With The Nolands 
  • Chocolate Guinness Bundt by Veronica at My Catholic Kitchen 
  • Chocolate Kahlua Bundt Cake by Lauren at Sew You Think You Can Cook 
  • Chocolate Kahlua Bundt Cake with Kahlua Glaze by Tanya at DessertStalking Blog 
  • Coffee Baileys Bundt Cake by Kathya at Basic N Delicious 
  • Frangelico and Fig Bundt Cake by Victoria at Just One Bite Baking
  • Gin and Tonic Bundt by Jane at Jane’s Adventures in Dinner 
  • Gingerbread Rum Bundt Cake by Laura at Baking in Pyjamas 
  • Grand Marnier and Chocolate Chips Bundt Cake with Seville Orange Sauce by Anna at Media racion doble, Por Favor 
  • Grand Marnier and Tangerine Bundt Cake by Caro at En la Cocina de Caro 
  • Guinness Chocolate Bundt Cake by Patricia at Patty’s Cake 
  • Irish Coffee Bundt Cake by Laura at The Spiced Life 
  • Kentucky Bourbon Cake by Cassie at Cassie’s Kitchen 
  • Lemon Rum Bundt by Catherine at Living the Gourmet 
  • Limoncello Bundt Cake by Natalia at Principiando en la Cocina
  • London Porter Bundt with Lemon Glaze by Stacy at Food Lust People Love 
  • Peach Brandy Pound Cake by Renee at Magnolia Days 
  • Pomegranate and Chocolate with Rum Glaze by Rocio at Kidsandchic 
  • Pumpkin Spice Bundt Cake by Wendy at A Day in the Life on the Farm 
  • Rum Pudding Cake by Rebekah at Making Miracles 
  • Rum Raisin Apple Bundt by Maleka at La Luna en Dulce
  • Southern Sweet Potato, Bourbon, and Pecan Bundt by Margaret at Tea and Scones 
  • Spiced Apple Cider Bundt Cake with Bourbon Glaze by Tux at Brooklyn Homemaker 
  • Tangerine Screwdriver Mini Bundts by Kelly at Passion Kneaded
BundtBakers

Interested in learning more about us?? #BundtBakers is a group of Bundt loving bakers who get together once a month to bake Bundts with a common ingredient or theme. We take turns hosting each month and choosing the theme/ingredient. You can see all our of lovely Bundts by following our Pinterest board right here. Links are also updated after each event on the BundtBaker home page here.

 If you are a food blogger and would like to join us, just send an email with your blog URL to foodlustpeoplelove@gmail.com. If you are just a lover of Bundt baking, you can find all of our recipe links by clicking our badge above or on our group Pinterest board.

a Rafflecopter giveaway


Until next time,
LOVE & CONFECTIONS!

Filed Under: Cakes & Frostings, Uncategorized, Yeast Breads

Bread Baking Tips – Working with Yeast

November 18, 2014

Don’t be afraid of using yeast. This post contains a lot of information, but it is necessary to understand yeast before diving head first into your first bread, or a good refresher for anyone who has worked with yeast before. Don’t forget to scroll all the way down and enter for your chance to win the Bread-Baking Giveaway! Giveaway closed.

Yeast is a one-celled living organism that is practically everywhere. Yeast is on vegetables, fruits and even in the air. It requires specific conditions to grow, including moisture, warmth and sugar. Yeast is sensitive to temperature, so it slows down or speeds up depending on the temperature around it. 

There are a few different types of yeast available. Baker’s Yeast is a commercially grown, laboratory made yeast available to professional bakers. Commercial yeast is more readily available for the home baker: Fresh or Compressed Yeast, Active Dry, Instant Active Dry and Osmotolerant Instant Active Dry. Fresh or Compressed Yeast usually comes in a small cake shape, is light in color and crumbles easily. It does not require the warmer water temperature to dissolve and cannot be killed with cold water. Fresh Yeast lasts about 2 weeks and can be frozen for 3-4 months. 


Active Dry Yeast are tiny granules that have been dried or dehydrated to increase its shelf life, and sold in vacuum-packed jars or packets. If unopened, the Active Dry Yeast usually has a shelf life up to 1 year. Once it is opened, storing in the refrigerator for up to 2 months is recommended. A small percentage of the yeast may die due to the drying process. It is always good to do a yeast test before baking, to make sure your yeast is still good. Yeast becomes dormant when dried until mixed with warm water and re-hydrated. When baking with Active Dry Yeast, it usually needs 4 times its weight in warm water to activate. Cold water can damage or kill it, as can water that is too hot. 


Instant Active Dry Yeast, usually referred to as Instant Yeast or Rapid-Rise Yeast, is similar to the Active Dry by going through a drying process. The Instant Yeast drying process is a little more gentle and usually produces fewer dead yeast cells. Instant Yeast absorbs water more quickly and does not have to wait several minutes to activate. It also makes more carbon dioxide gas per cell than Active Dry Yeast, so a smaller amount can be used to achieve the same results. Instant Yeast doesn’t require proofing and can be sprinkled directly into the dry ingredients or dissolved into a portion of the wet ingredients when baking. Similar to Active Dry, Instant Yeast should not be added into cold water or dough because the temperature can damage or kill it. Instant Yeast usually has a longer shelf life than Active Dry Yeast – unopened at least a year, or stored in the refrigerator for several months. It is best when it is wrapped air-tight and kept in the freezer. 


Osmotolerant Instant Active Dry Yeast is a special yeast used in rich, sweet doughs that contain a higher amount of sugar, eggs and fats. Osmotolerant Yeast is designed to work with the small amounts of moisture in these types of breads, where Active Dry and Instant might have a harder time. This type of yeast is not as common as the Active Dry or Instant, which are more readily available in stores. 

Here are a few good resources for more information on yeast:

  • Red Star Yeast – Yeast Freshness Test
  • Red Star Yeast – What is Yeast?
  • Red Star Yeast – What is Baker’s Yeast
  • Red Star Yeast – Yeast & Baking Lessons
  • Red Star Yeast – The Yeast Library
  • King Arthur Flour – Yeast Dough Tips
  • Roxana’s Home Baking – Bread Baking 101, Baking with Yeast 

Until next time,
LOVE & CONFECTIONS!

Information summarized from Red Star Yeast and “About Professional Baking”.

Filed Under: Kitchen Tips, Uncategorized, Yeast Breads

Homemade Pizza Dough

November 17, 2014

Homemade Pizza Dough is easy to make and tastes delicious! You can even make individual pizzas so everyone can customize just what they want.

Homemade Pizza Dough by Love and Confections - easy to make and perfect for any night of the week


I did a lot of bread baking in culinary school and realized that I have not shared any yeasty goodies on the blog in all my years of blogging. Well, that is about to change. I have a whole week of recipes and tips for working with yeast. A lot of people I have talked to, even some blogger friends, are intimidated by yeast. Using yeast should be the opposite of intimidating, it should be fun. When you make something with your hands, let it rise, shape it and bake it, the finished product is worth it all. There really is nothing like the smell of fresh-baked bread coming out of the oven.

Homemade Pizza Dough by Love and Confections - easy to make and perfect for any night of the week

I love doing pizza parties with friends. Everyone has their own individual pizza and they can customize it with whatever topping and ingredients they want. We usually have a red sauce and a pesto for the base and fresh sliced or shredded mozzarella for cheese. The toppings vary, just like the friends gathered – pepperoni, sausage, meatball, chicken, anchovies, peppers, black olives, mushrooms, artichokes, you name it, we probably have it. My favorite toppings are meatball and mushroom – can’t beat that!

Homemade Pizza Dough by Love and Confections - easy to make and perfect for any night of the week

Homemade pizza dough is easy to make, and double, if you are feeding a crowd. It can be made in advance and frozen, or made the day of to use. This recipe is a versatile dough that can be used for thick or thin crust pizza, depending on how much you use and roll out.

Homemade Pizza Dough by Love and Confections - easy to make and perfect for any night of the week

Red Star Yeast sent me some samples of their yeast so I could try it out for myself. I used the Platinum Yeast in this pizza dough recipe, because I wanted a great pizza dough. The Platinum Yeast strengthens the dough and improves the tolerance to variation in kneading, rising and flour quality. Everyone uses different recipes, has different kneading styles and uses different kinds flour, so the Platinum yeast helps produce a consistent product. Since the Platinum yeast has dough improvers, it helps make a consistent dough that retains its leavening and volume during baking and decreases the risk in the dough collapsing after proofing. We all want a nice light and airy dough and the Platinum Yeast does the job.

If you would like to learn more about Red Star Platinum Yeast and the advantages of the Platinum Yeast you can go click here. Red Star Yeast is also currently partnering with Stop Hunger Now and if you would like a buy one, get one free strip of 3 yeast packets, fill out this form.

Homemade Pizza Dough
slightly adapted from About Professional Baking
yield: 1 large thick crust or 2 medium crust pizzas
Click here for a printable recipe

Pizza Dough Ingredients:
– 3 & 1/4 cups Bread Flour, plus more for dusting your work surface
– 1/4 cup Yellow Cornmeal, plus more for dusting pans
– 1/2 teaspoon Garlic Powder
– 1 & 3/4 teaspoons Red Star Platinum Yeast
– 1 & 1/3 cup Water, warmed to 110F/43C
– 1/4 cup Extra Virgin Olive Oil
– 1 & 1/2 teaspoon Salt
– Cooking spray
– Pizza sauce, cheese and toppings

Pizza Dough Directions:
1. In a large mixing bowl, whisk the Bread Flour, Cornmeal, Garlic Powder and Red Star Platinum Yeast together. Create a well in the middle and add in the warm Water and Olive Oil. With your hands or a spoon, mix until the dough comes together and forms a ball. (it might look a bit ragged). Cover the bowl with a kitchen towel and let the dough rest for 10 minutes.
2. Sprinkle the dough with the Salt and knead it in on a flat surface for 1-2 minutes or until the dough becomes elastic (It should be slightly springy after kneading and not too sticky)
3. Spray the inside of a medium bowl with Cooking Spray. Place the dough in the bowl, then turn it so it faces up and all sided are greased with the spray. Spray a piece of plastic wrap with cooking spray and place it over the bowl, spray side down. Let the dough rise for roughly 1 hour, or until it doubles in volume. (make sure it is in a warm place to rise, do not put it directly under an air conditioning vent)
4. Place the dough on a flat surface that has been lightly dusted with flour. You can make 1 large thick crust pizza or 2 medium crust pizzas. For 2 pizzas, cut the dough into two equal portions. Knead each portion to slightly deflate it and then cover with a damp kitchen towel. Let the dough rest for about 10 minutes. (resting lets the gluten relax and allows for a better shaped pizza)
5. Heat oven to 450F while the dough rests. Prepare 2 pizza pans or sheet pans with sides by sprinkling Cornmeal on the pan to prevent the dough from sticking. Roll each dough ball to your desired thickness and place on the pans. Add sauce, cheese and toppings and bake for 10-15 minutes, or until lightly brown and puffy. Let it cool slightly before cutting. Enjoy

Until next time,
LOVE & CONFECTIONS!

Disclaimer: Red Star Yeast provided me with samples of the yeast used in these blog posts. Red Star Yeast is providing the prize package. All opinions are my own.

Filed Under: Sandwiches-Paninis-Flatbreads-Pizzas, Uncategorized, Yeast Breads

Chocolate Chip Scones

October 27, 2014

Moist, delicious and easy to make, these Chocolate Chip Scones will have you running to the oven!


A few weeks ago, I guest posted for my friend Shaina from Take A Bite Out of Boca. She recently came back from a work trip to Germany and I offered to post this recipe while she recovers from jet-lag and gets her schedule back to normal. I figured a sweet treat to have with a hot cup of tea would be the perfect snack.

Afternoon tea is something I love to do, but don’t always have the time. With a busy schedule and taking care of an infant, the day often passes in a blur. Having a quiet moment, sipping a cup of tea from your favorite mug is relaxing just thinking about it.

Nowadays, the old-fashioned afternoon tea is basically nonexistent, unless you’re planning a bridal shower or other special occasion. I love having a moment in the afternoon for a little snack and a time-out from a busy day. One of my favorite tea parties was Afternoon Tea at The Grand Floridian Garden View Tea Room. The last time I was there was on Baby L&C’s due date (she came 4 days later) and everything was delicious. Don’t hesitate to try the seasonal teas and goodies, they are delicious. If you are ever in the Walt Disney World area and can go, it is a great experience. Reservations are highly recommended.

I love tea parties and all the goodies that go with it. Cookies, tea sandwiches, and scones. These Chocolate Chip Scones are incredibly easy to make. The best part is that you can add whatever mix-ins you want, instead of chocolate chips. I have a list of scones I plan on making with this recipe and can’t wait to try different flavor combinations for the Fall season. Grab a cup of tea and enjoy a relaxing moment with these delicious Chocolate Chip Scones.

Chocolate Chip Scones
Recipe slightly adapted from Betty Crocker
Click here for a printable recipe

Chocolate Chip Scone Ingredients:
– 2 cups Bisquick Mix
– 3/4 cups Semi-Sweet Chocolate Chips
– 1/3 to 1/2 cup Heavy Whipping Cream, depending on consistency of dough
– 1/4 cup Granulated Sugar
– 1 large Egg
– 1 teaspoon Vanilla Extract
– Heavy Whipping Cream for topping
– Granulated Sugar for topping

Chocolate Chip Scone Directions:
1. Heat oven to 425°F. Prepare a cookie sheet with non-stick cooking spray.
2. In a medium bowl, stir together the Bisquick Mix, Chocolate Chips, 1/3 cup of Heavy Whipping Cream, Granulated Sugar, Egg and Vanilla Extract. If the mixture is crumbly, dry and does not form a ball, add more Heavy Whipping Cream, 1 teaspoon at a time. until the mixture comes together but is not too wet or sticky.
3. Place ball of dough onto the cookie sheet and pat it into an 8-inch circle. With a pastry brush, brush the top with Heavy Whipping Cream and sprinkle an even layer of Granulated Sugar for the topping. Using a sharp knife, cut the dough into 8 equal parts, but do not separate the triangles.
4. Bake for 10-14 minutes, depending on your oven, until golden brown. Let the scones sit on the sheet tray for a few minutes to cool, then separate the triangles and either place on a cooling rack or serve immediately. Can be served warm or at room temperature.

Until next time,
LOVE & CONFECTIONS!

Filed Under: Quick Breads-Muffins-Scones, Uncategorized

Pumpkin Pie Dip for #PumpkinWeek

October 25, 2014

Pumpkin Pie Dip is a great alternative to the traditional pumpkin pie. Cool, creamy, and perfect for any gathering of family and friends.


Today is day 6 and the end of #PumpkinWeek. I have loved celebrating all things pumpkin with my Food Blogging friends. Tomorrow is National Pumpkin Day and I hope you have enjoyed all the recipes we have shared this week. In addition to homemade pumpkin puree, pie, and cookies, we have also shared some savory pumpkin dishes like hummus, chili and pumpkin corn chowder. You can also find these great recipes and more on Love and Confections’ #PumpkinWeek Pinterest Board!

If you look through Pinterest, you will see hundreds of versions of this dip. There are so many different ingredients and ways to make this dip, and I wanted to do something different. I decided to add one of my new favorite treats to the mix.

Stonyfield Organic recently introduced a new line of product called Petite Creme. It is similar in texture to Greek yogurt, but is not tangy. Petite Creme is sweet and smooth, just the way I like my yogurt. They have some fabulous flavors and I love them all! The Vive la Vanilla Stonyfield Petite Creme was just what I needed for this dip. The vanilla flavor goes great with the pumpkin pie spice and the smoothness and creaminess of the yogurt helps it not get too firm after refrigeration. All-in-all, I think I created a great, and very easy, recipe and I hope you make it and share it with family and friends.

Pumpkin Pie Dip
a Love and Confections original recipe
Click here for a printable recipe

Pumpkin Pie Dip Instructions:
– 8 ounces Cream Cheese, room temperature
– 4 ounces Powdered Sugar, sifted
– 1 container Stonyfield Vive la Vanilla Petite Creme (5.3 oz)
– 8 ounces Pumpkin Puree
– 2 teaspoons Homemade Pumpkin Pie Spice
– Graham Crackers for dipping

Pumpkin Pie Dip Directions:
1. In the bowl of your stand mixer, combine the Cream Cheese and Powdered Sugar until evenly mixed. Add in the Stonyfield Petite Creme and mix. Scrape down the sides of the bowl to insure everything is incorporated.
2. Add in the Pumpkin Puree and Pumpkin Pie Spice. Mix until combined. Scrape down the sides of the bowl if necessary.
3. Pour into serving bowl, cover with plastic wrap and refrigerate a minimum of 1 hour. Separate Graham Crackers into bite-sized pieces for dipping and arrange on a serving tray around the dip. Enjoy!

Until next time,
LOVE & CONFECTIONS!

Check out all the #PumpkinWeek Bloggers and their recipes:
Pumpkin Pie Dip by Love and Confections
Pumpkin Pye – that’s Pie with a Rye Crust by Culinary Adventures with Camilla
Caramel Pumpkin Torte by Lady Behind The Curtain
Pumpkin Loaf by The Not So Cheesy Kitchen
Pumpkin Pie Martini by A Day in the Life on the Farm
Pumpkin Cheesecake Swirl Brownies by A Kitchen Hoor’s Adventures
Cinnamon Sugar Pumpkin Muffins by Making Miracles

Filed Under: Appetizers-Snacks-Dips, Uncategorized

Pumpkin Pie Chia Granola for #PumpkinWeek

October 24, 2014

The smell of Pumpkin Pie Chia Granola will warm your kitchen and set the mood for the season!


Hi and welcome to day 5 of #PumpkinWeek. We are celebrating our love of the season with a whole week of pumpkin goodies, leading up to National Pumpkin Day. 17 Food Bloggers have come together to share over 65 recipes with you. In addition to homemade pumpkin puree, pie, and cookies, we are also sharing savory pumpkin dishes like hummus, chili and pumpkin corn chowder. Come back every day for #PumpkinWeek recipes. You can also find these great recipes and more on Love and Confections’ #PumpkinWeek Pinterest Board!

The house smelled like what Fall should smell like, when I made this. The aroma of pumpkin spice made me giddy and I longed for cooler Fall weather. We started to get into the spirit of the season this past weekend. I went to a pumpkin patch with Baby L&C so we could pick out a pumpkin for her first Halloween. She won’t remember any of it and it’s more for us grownups, but it was cute and a wonderful tradition I hope to keep every year.

Making Granola is very easy. You can mix and match whichever ingredients you feel like having. Today I made a pumpkin granola with some pecans and chia seeds. It’s a great combination and the adding the chia seeds is a great health benefit. Chia seeds are full of Omega-3 fatty acids, fiber, antioxidants, calcium and protein. I’ve made an Overnight Chocolate Chia Seed Pudding before and definitely like them better in granola. The chia seeds are optional for this granola, but it doesn’t hurt to use them and get all the healthy benefits.

Come back next week when I use this granola in a delicious breakfast dish! Also, I will be giving away these cute little Le Creuset Cocottes in 2 weeks, so be on the lookout for your chance to enter!

Pumpkin Pie Chia Granola
a Love and Confections original recipe
Click here for a printable recipe

Pumpkin Pie Chia Granola Instructions:
– 3 tablespoons Vegetable Oil
– 1/4 teaspoon Salt
– 1/3 cup Maple Syrup
– 1/3 cup Pumpkin Puree
– 1 & 1/2 teaspoons Homemade Pumpkin Pie Spice
– 3 tablespoons Brown Sugar
– 2 teaspoons Vanilla Extract
– 1 cup chopped Pecans
– 2 & 1/2 cups Old Fashioned Rolled Oats
– 1 tablespoon Chia Seeds, optional

Pumpkin Pie Chia Granola Directions:
1. Heat oven to 300F. Line a jellyroll baking tray with parchment paper.
2. In a medium bowl, whisk together the Vegetable Oil, Salt, Maple Syrup, Pumpkin Puree, Pumpkin Pie Spice, Brown Sugar and Vanilla Extract.
3. With a spatula, mix in the chopped Pecans, Oats and Chia Seeds until evenly combined.
4. Spread evenly onto sheet tray and bake for 45 minutes, flipping the oats every 15 minutes so they dry out on all sides. Let it cool completely before storing in an airtight container for up to 2 weeks. Enjoy!

Until next time,
LOVE & CONFECTIONS!

Check out all the #PumpkinWeek Bloggers and their recipes:
Pumpkin Pie Chia Granola by Love and Confections
Meatloaf-Stuffed Mini Pumpkins by Culinary Adventures with Camilla
White Chocolate Reeses Pumpkin Blondies by The Spiffy Cookie
Pumpkin and Corn Chowder by Curious Cuisiniere
Buttermilk Pumpkin Pancakes by Life Tastes Good
Pumpkin Spice Cookie Blossoms by A Day in the Life on the Farm
Curried Roasted Pumpkin Hummus by A Kitchen Hoor’s Adventures
Praline Frosted Pumpkin Brownies by My Catholic Kitchen
Slow Cooker Pumpkin Butter by Making Miracles
Pumpkin Biscotti by The Pajama Chef
White Chocolate Chip Pumpkin Cake by Dizzy Busy and Hungry

Filed Under: Breakfast & Brunch, Uncategorized

Pumpkin Tres Leches for #PumpkinWeek

October 23, 2014

Pumpkin Tres Leches is everything great about the traditional tres leches but with a seasonal twist!


Welcome to day 4 of #PumpkinWeek. We are celebrating our love of the season with a whole week of pumpkin goodies, leading up to National Pumpkin Day. 17 Food Bloggers have come together to share over 65 recipes with you. In addition to homemade pumpkin puree, pie, and cookies, we are also sharing savory pumpkin dishes like hummus, chili and pumpkin corn chowder. Come back every day for #PumpkinWeek recipes. You can also find these great recipes and more on Love and Confections’ #PumpkinWeek Pinterest Board!

I hope you have enjoyed my #PumpkinWeek creations so far. The Pumpkin Loaf, Baked Pumpkin Donut Holes and Pumpkin Pie Cream Cheese Truffles are all delicious, but this Pumpkin Tres Leches is my favorite so far!

I grew up in Miami, where Cuban food was everywhere. Black beans and rice were a delicious side to amazing chicken, beef or pork dishes. Cuban coffee, Cafe con Leches or Cortaditos, were a morning staple and Tres Leches or Flan was the perfect ending to a meal. I decided to do a different take on the Tres Leches using flavors of the season.

Pumpkin Tres Leches is decadent, creamy and oh-so-good. The milk soaks into every nook and cranny of the warm pumpkin cake. It chills overnight, so every flavor can meld and the cake can really get soaked good. The cold, sweet whipped cream is the perfect topping on the rich cake and the hint of cinnamon dusted on top is perfection.


Pumpkin Tres Leches
a Love and Confections original recipe
Click here for a printable recipe

Pumpkin Tres Leches Ingredients:
For the Cake:
– 1/2 cup Unsalted Butter, room temperature
– 1 & 3/4 cups Granulated Sugar
– 4 Large Eggs, room temperature
– 1-15 ounce can of Pumpkin Puree
– 2 teaspoons Vanilla Extract
– 2 cups All-Purpose Flour
– 1 tablespoon Baking Powder
– 2 teaspoons Homemade Pumpkin Pie Spice
– 1/2 teaspoon Salt

For the Milk Mixture:
– 1-12 ounce can Evaporated Milk
– 1-14 ounce can Sweetened Condensed Milk
– 1 cup Half & Half

For the Topping:
– 1 & 1/2 cups Heavy Cream
– 2 cups Powdered Sugar
– 1 teaspoon Vanilla Extract
– Cinnamon to dust

Pumpkin Tres Leches Directions:
1. Heat oven to 350F. Prepare a 9×13 pan with baking spray and set aside.
2. In the bowl of your stand mixer, cream the Butter and Sugar until light and fluffy. While the mixer is on low, add in the Eggs one at a time. Scrape down the sides of the bowl to insure everything is incorporated. Add in the Pumpkin Puree and Vanilla Extract and mix to combine.
3. In a small bowl, whisk together the Flour, Baking Powder, Pumpkin Pie Spice and Salt. Add into the pumpkin mixture a little at a time and mix on medium to incorporate.
4. Pour batter into pan and bake for 30-35 minutes, or until a toothpick inserted into the center comes out clean. Make the Milk Mixture while it cools.
5. In a medium bowl, whisk the Evaporated Milk, Sweetened Condensed Milk and Half & Half together. with one or two skewers, poke holes all over the the cake, making sure you go all the way through to the bottom. With a ladle, spoon the milk mixture over the cake, trying to get as much as possible into the holes. It looks like a lot, but the cake will absorb everything. Cover with plastic wrap and refrigerate a minimum of 4 hours, preferably overnight.
6. 30 minutes before making the topping, place the bowl and whisk attachment from your stand mixer in the freezer.* Whip the Heavy Cream on medium until it starts to thicken and form soft peaks. Slowly add in the Powdered Sugar and Vanilla Extract, then turn the mixer up to high to whip until firm peaks.
7. Remove the cake from the refrigerator and spread the whipped topping on with an offset spatula. Dust the top with Cinnamon and enjoy! The cake needs to remain refrigerated and covered because of the whipped topping. If necessary, use toothpicks on the cake so the plastic wrap does not touch the whipped topping. Serve within 2 days.

* Heavy cream whips better when cold. To insure a good whip, it is best to chill the bowl and whip attachment before it is needed.

Until next time,
LOVE & CONFECTIONS!

Check out all the #PumpkinWeek Bloggers and their recipes:
Pumpkin Tres Leches by Love and Confections
Spiced Pumpkin Butter by Culinary Adventures with Camilla
Pumpkin Palmiers by That Skinny Chick Can Bake
Pumpkin Pecan Oatmeal by The Spiffy Cookie
Mini Healthy Pumpkin Pies by Happy Food Healthy Life
Easy Pumpkin Caramel Sauce by Lady Behind The Curtain
Savory Pumpkin Tart by The Not So Cheesy Kitchen
Pumpkin Custard Pie by A Day in the Life on the Farm
Pumpkin Chocolate Chip Cookies by Making Miracles

Filed Under: Cakes & Frostings, Uncategorized

Pumpkin Pie Cream Cheese Truffles for #PumpkinWeek

October 22, 2014

Pumpkin Pie Cream Cheese Truffles are like delicious, little bite-sized pumpkin cheesecakes coated in chocolate and sprinkles! 


Hi and welcome to day 3 of #PumpkinWeek! We are celebrating our love of the season with a whole week of pumpkin goodies, leading up to National Pumpkin Day. 17 Food Bloggers have come together to share over 65 recipes with you. In addition to homemade pumpkin puree, pie, and cookies, we are also sharing savory pumpkin dishes like hummus, chili and pumpkin corn chowder. Come back every day for #PumpkinWeek recipes. You can also find these great recipes and more on Love and Confections’ #PumpkinWeek Pinterest Board!

I already shared my Pumpkin Loaf and Baked Pumpkin Donut Holes for #PumpkinWeek and couldn’t leave these Pumpkin Pie Cream Cheese Truffles out. They are easy to make and so good. They are the perfect size when you want just one small bite of something sweet.

Scoops, or dishers, are a regularly used tool in my kitchen. I use them on everything from cupcakes to meatballs and truffles. They make portioning out recipes easy, so everything is the same size. I have at least 4 different sizes that I keep handy.

Mr. L&C could not stop eating these. I actually ran out of coating chocolate and they are scrumptious even without the topping. Perfectly pop-able and dangerously good. One thing to note, when making these, the truffles need to be chilled, but not too cold, otherwise the coating chocolate will harden and crack. Make sure you also read the directions on your white chocolate or coating chocolate for heating, it can go from good to bad in a matter of seconds.

Pumpkin Pie Cream Cheese Truffles
a Love and Confections original recipe
Click here for a printable recipe

Pumpkin Pie Cream Cheese Truffles Ingredients:
– 3 ounces Pumpkin Puree

– 4 ounces Cream Cheese, room temperature

– 6 ounces Graham Cracker Crumbs
– 3 tablespoons Confectioners’ Sugar
– 1 teaspoon Homemade Pumpkin Pie Spice
– 5.5 ounces Vanilla Almond Bark, about 3 squares

– 10+ ounces White Chocolate or Vanilla Almond Bark for dipping
– 1-2 tablespoons Shortening for dipping, optional
– Sprinkles, optional

Pumpkin Pie Cream Cheese Truffles Directions:
1. Spread Pumpkin Puree between layered paper towels to get excess moisture out.
2. Place Pumpkin Puree, Cream Cheese, Graham Crackers, Confectioners’ Sugar and Pumpkin Pie Spice in the bowl of your stand mixer with the paddle attachment and mix to combine.
3. Gently melt the Vanilla Almond Bark in the microwave, 20-30 seconds at a time. Once melted, add into the pumpkin mixture. With a spatula, scrape down the sides and bottom of the bowl to insure everything is mixed properly.
4. Cover the mix with plastic wrap and let it chill in the refrigerator for 1-2 hours until firm but still scoop-able. Using a miniature scoop, portion out the truffles, roll into balls, place onto a parchment lines plate or tray and put back in the refrigerator for another 30 minutes.
5. Melt enough White Chocolate or Vanilla Almond Bark for dipping. I used about 10 ounces to start and added from there. I did a double layer, because I wanted them to be very white and not have the truffle show through. If necessary, you can add 1-2 tablespoons Shortening into the white chocolate to help it become a good coating consistency. Use sprinkles while the chocolate is still drying
6. Store in an airtight container in the refrigerator for up to a week or in the freezer for up to 2 weeks. Enjoy!
* Tip for melting chocolate: chop the chocolate into relatively the same size pieces, so they melt at the same time. Avoid overheating, and only heat in increments. Stir after every time, to make sure the chocolate is melting. Avoid getting any liquid into the chocolate or it will seize and have to be thrown away.

Until next time,
LOVE & CONFECTIONS!

Check out all the #PumpkinWeek Bloggers and their recipes:
Pumpkin Pie Cream Cheese Truffles by Love and Confections
Pumpkin-Vanilla Bean Madeleines by Culinary Adventures with Camilla
White Chocolate Drizzled Pumpkin Scones by That Skinny Chick Can Bake
S’mores Pumpkin Pie by The Spiffy Cookie
Homemade Pumpkin Puree by Happy Food Healthy Life
Pumpkin Mole by Curious Cuisiniere
Drunken Pumpkin Seeds by Life Tastes Good
Pumpkin Roll by A Day in the Life on the Farm
Pumpkin Lasagna by My Catholic Kitchen
Cinnamon Pumpkin Bread by Making Miracles
Pumpkin Quinoa Oatmeal Bake by The Pajama Chef
Pumpkin Chocolate Swirl Pancakes by Dizzy Busy and Hungry

Filed Under: Cheesecakes, Uncategorized

Baked Pumpkin Donut Holes #PumpkinWeek

October 21, 2014

Bite-sized Baked Pumpkin Donut Holes are absolutely delicious and perfect for breakfast!


Hi and welcome to day 2 of #PumpkinWeek. We are celebrating our love of the season with a whole week of pumpkin goodies, leading up to National Pumpkin Day. 17 Food Bloggers have come together to share over 65 recipes with you. In addition to homemade pumpkin puree, pie, and cookies, we are also sharing savory pumpkin dishes like hummus, chili and pumpkin corn chowder. Come back every day for #PumpkinWeek recipes. You can also find these great recipes and more on my Love and Confections’ #PumpkinWeek Pinterest Board!

Yesterday I shared my Pumpkin Loaf and today I have one of my new favorite recipes to share with you. If there is one pumpkin dish you need to make soon, it’s these Baked Pumpkin Donut Holes. They are absolutely delicious! The batter is so moist and the spice and sugar coating gives them great flavor.

My Dad, who is a vanilla cake and chocolate brownie kind of guy, usually only likes pumpkin in his pie. He’ll try all the baked goods I make to taste them, but usually goes back to the originals. He couldn’t stop eating these, and neither could I. They are the perfect size for breakfast or an afternoon snack. These babies didn’t last long and they are definitely going to be made many more times this season. I am even planning on making them for my Thanksgiving Day brunch for family.

Baked Pumpkin Donut Holes
adapted from Two Peas and Their Pod
Click here for a printable recipe

Baked Pumpkin Donut Holes Ingredients:
– 1 & 3/4 cups All-Purpose Flour
– 2 teaspoons Baking Powder
– 1/2 teaspoon Salt
– 2 teaspoons Homemade Pumpkin Pie Spice
– 1/3 cup Vegetable Oil
– 1/2 cup Light Brown Sugar
– 1 large Egg
– 1 teaspoon Vanilla Extract
– 3/4 cup Pumpkin Puree
– 1/2 cup Whole Milk

For the Coating
– 6 tablespoons Unsalted Butter, melted
– 2/3 cup Granulated sugar
– 1 tablespoon ground Cinnamon
– 1 tablespoon Homemade Pumpkin Pie Spice

Baked Pumpkin Donut Holes Directions:
1. Heat oven to 350F. Prepare a mini muffin tin with baking spray and set aside.
2. In a medium bowl, whisk the Flour, Baking Powder, Salt and Pumpkin Pie Spice together and set aside. In a large bowl, whisk together the Vegetable Oil, Brown Sugar, Egg, Vanilla Extract, Pumpkin Puree and Milk until combined and smooth. Slowly add the dry ingredients into the wet ingredients and whisk until combined.
3. Using a small scoop, pour the batter into the muffin tray. Bake for 10-13 minutes or until the muffin bounces back when touched and a toothpick inserted into the center comes out clean. Cool in the muffin tin while you prepare the coating.
4. Melt the Unsalted Butter in one bowl. In another bowl, combine the Granulated Sugar, Cinnamon and Pumpkin Pie Spice. Roll each muffin in the butter, shaking off excess, then roll in the cinnamon-spice mixture, shaking off any excess. Can be stored in an airtight container for up to three days, if they don’t get eaten first.

Until next time,
LOVE & CONFECTIONS!

Here are today’s #PumpkinWeek Bloggers and their recipes:
Baked Pumpkin Donut Holes by Love and Confections
How to: Make Your Own Pumpkin Puree by Culinary Adventures with Camilla
Slow Cooker Vegetarian Pumpkin Chili by The Spiffy Cookie
Pumpkin Ravioli with Tarragon by Curious Cuisiniere
Pumpkin Spice Instant Hot Chocolate Mix by Lady Behind The Curtain
Pumpkin Praline Pancakes by A Day in the Life on the Farm
Baked Pumpkin Donuts by Making Miracles

Filed Under: Breakfast & Brunch, Uncategorized

  • « Go to Previous Page
  • Page 1
  • Interim pages omitted …
  • Page 29
  • Page 30
  • Page 31
  • Page 32
  • Page 33
  • Interim pages omitted …
  • Page 46
  • Go to Next Page »

Primary Sidebar

Meet Terri
founder & pastry chef

Subscribe to Love and Confections

Popular Posts

Pumpkin Pecan Cupcakes with Cinnamon Cream Cheese Frosting
Pumpkin Spice Cinnamon Roll Cake
Oatmeal Cream Pie Layer Cake - oatmeal brown sugar layer cake, marshmallow frosting filling, and vanilla bean buttercream with oatmeal cream pie garnish
Easy Piña Colada Poke Cake - pineapple cake, coconut cream pudding, whipped topping, pineapple chunks and maraschino cherries
Mermaid layer cake
PIneapple cake with pineapple curd, teal frosting and tropical sprinkle mix
Irish Cream chocolate cupcakes topped with white and green buttercream piping and shamrock sprinkle mix

AMAZON AFFILIATE

Love and Confections is a participant in the Amazon Services LLC Associates Program, an affiliate advertising program designed to provide a means for sites to earn advertising fees by advertising and linking to amazon.com.

Copyright © 2018 Love and Confections · Log in