• Skip to primary navigation
  • Skip to main content
  • Skip to primary sidebar
  • Home
  • About
  • Work With Me
  • Media
  • Recipes

Uncategorized

Carrot Cake Muffins

April 14, 2014

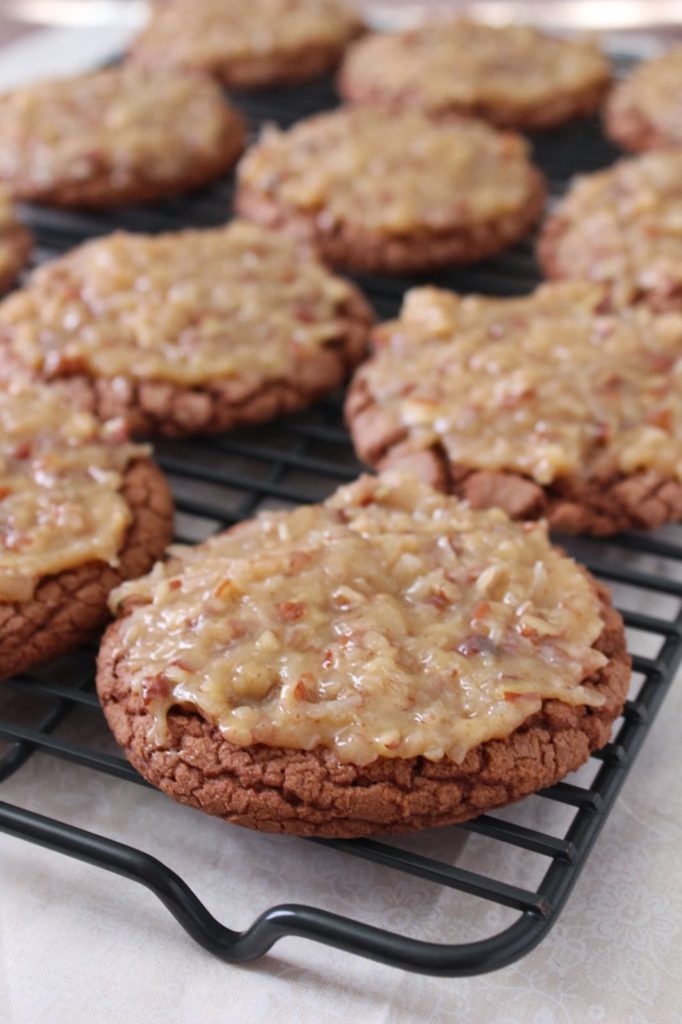
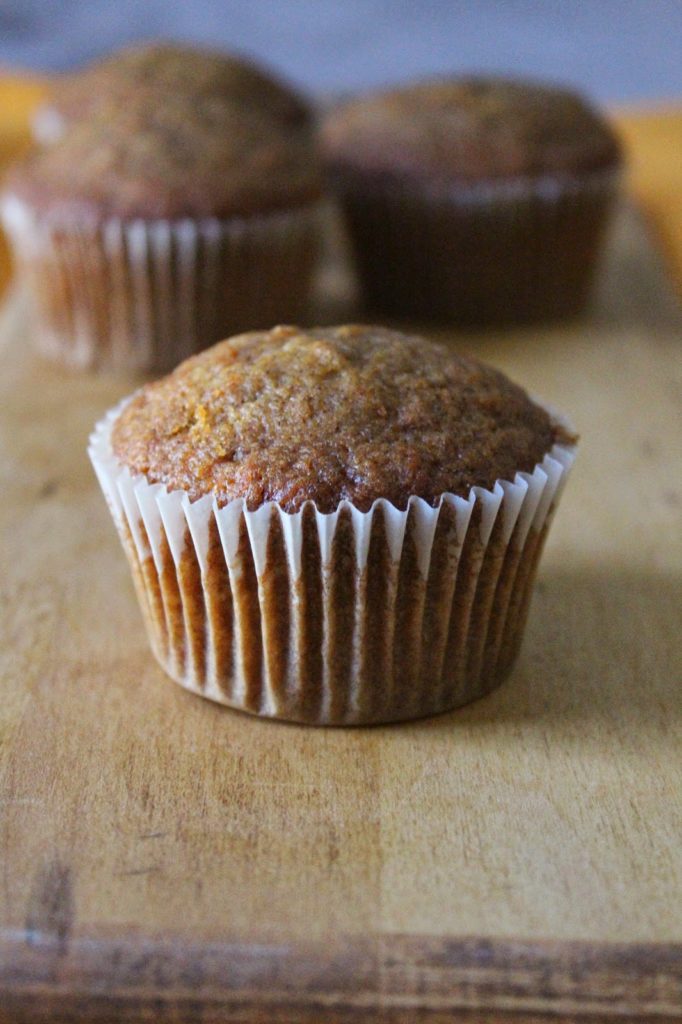
 I don’t know about you, but I L-O-V-E carrot cake. There is something about eating it that just feels right. I love it as a celebration cake – sheet cake, layer cake, loaf, muffins. I can’t think of a way that I don’t like carrot cake – especially when it is topped with a delicious cream cheese frosting.

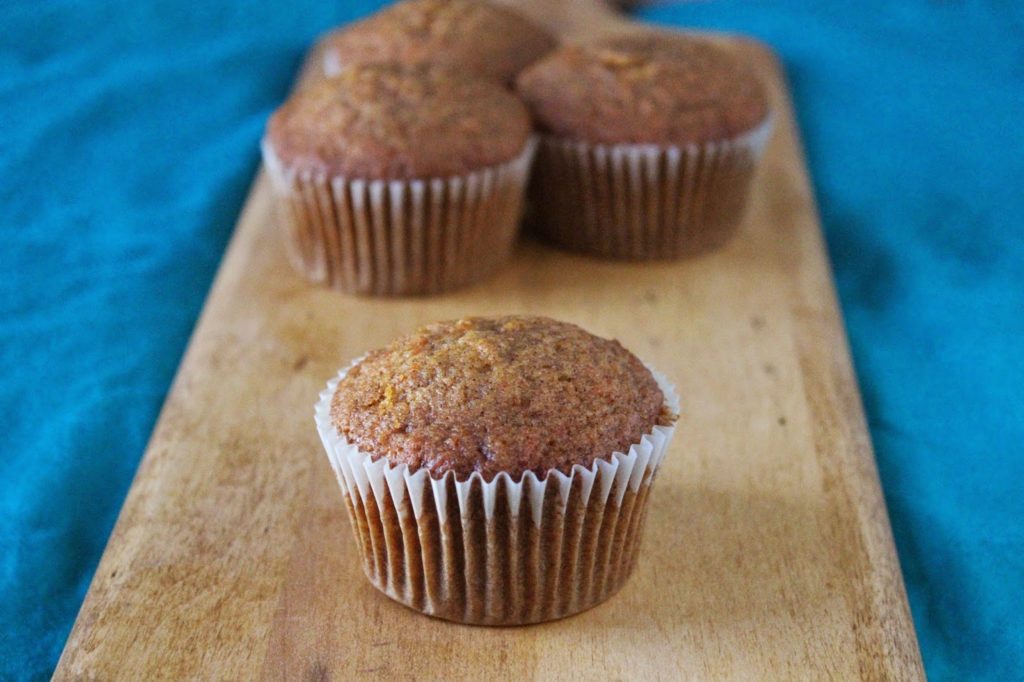
Sometimes I put nuts in my carrot cake. I usually use walnuts, but decided to make a nut-free recipe today. These muffins are great warm, right out of the oven with some butter. I sometimes cut mine in half, put it in the toaster oven, then top it with some whipped cream cheese!


Carrot Cake Muffins
adapted from a culinary school recipe

Carrot Cake Muffin Ingredients:
 – 15 ounces All Purpose flour
 – 2 teaspoons Baking Powder
 – 2.5 teaspoons Baking Soda
 – 2 teaspoons Salt
 – 1 tablespoon ground Cinnamon
 – 2 sticks Unsalted Butter, room temperature
 – 8 ounces Granulated Sugar
 – 8 ounces Brown Sugar
 – 4 large Eggs
 – 2 teaspoons Vanilla Extract
 – 1 pound Carrots, peeled and grated
 – 5 ounces chopped Walnuts (optional)

Carrot Cake Muffin Directions:
 – Heat oven to 325F. Line cupcake tins with wrappers or coat using baking spray.
 – Sift together Flour, Baking Powder, Baking Soda, Salt and Cinnamon and set aside. If using walnuts, add them into the flour mixture now, so they get coated and won’t sink to the bottom of the batter once mixed in.
 – Cream Butter, Granulated Sugar and Brown Sugar in the bowl of your stand mixer.
 – Add Eggs, one at a time, scraping down the sides of the bowl after each addition
 – Add Carrots and mix until incorporated.
 – Slowly add the flour mixture into the batter and mix well.
 – Portion into baking cups using a scoop to have uniform muffins.
 – Bake for 25-30 minutes or until done when a toothpick stuck into the center comes out clean.

Until next time,
LOVE & CONFECTIONS!

Disclaimer: I received some packages of carrots from Gimmway Farms for #Brunchweek. I was not compensated for this post. All opinions are my own.

Filed Under: Quick Breads-Muffins-Scones, Uncategorized

Easy Strawberry Shortcakes

April 7, 2014

Strawberry Shortcakes are the perfect quick dessert that’s not too sweet and highlights those perfect berries!


A lot of people associate strawberry shortcake as angel food cake topped with strawberries, but if you are from the south you know different. This is a true strawberry shortcake. The biscuit is buttery and crumbly and best eaten as soon as it cools off. If you want to give yourself a workout – like I did – hand whip your heavy cream – it’s a lot quieter than turning on the stand mixer, especially when Baby Grace is taking a nap.

I was actually out of milk, so I substituted heavy cream. Next time I will probably try the milk, just to see how it turns out. I recommend a disher or ice cream scoop, so they are uniform in size – I got 8 from this recipe at about 2.75 ounces per shortcake.

Strawberry Shortcake
adapted from Bisquick

Strawberry Shortcake Ingredients:
 – 1 pint Strawberries, hulled and diced
 – 2 & 1/3 cups Bisquick mix
 – 3/4 cup Heavy Cream
 – 3 tablespoons Granulated Sugar
 – 3 tablespoons Unsalted Butter, melted
 – 1/2 cup Heavy Cream, kept well chilled
 – 2 teaspoons Powdered Sugar

Strawberry Shortcake Directions:
 – Heat oven to 425F. Prepare strawberries and set aside.
 – In a medium bowl, combine the Bisquick mix, Heavy Cream, Sugar and Butter until it is combined and a soft, sticky dough is formed.
 – Using an ice cream scoop or disher, drop dough onto an ungreased cookie sheet. Press down slightly so it flattens a bit.
 – Bake for 10-12 minutes, until golden brown, depending on your oven. Let the shortcakes cool while you prepare the whipped cream.
 – Either by hand or using a stand mixer, whip the Heavy Cream and Powdered sugar until soft peaks form.
 – Slice the shortcakes, fill with whipped cream and strawberries. Enjoy!

Until next time,
LOVE & CONFECTIONS!

Filed Under: Quick Breads-Muffins-Scones, Uncategorized

Cream Puffs with Vanilla Bean Pastry Cream

March 28, 2014

My Mom and I gave my sister a bridal shower recently and I made the dessert table. One of the first things I knew I wanted to make was cream puffs or profiteroles. There is nothing else like a homemade cream puff filled with fresh vanilla bean pastry cream. It is truly delicious

Cream puffs are pretty easy to make. The most time consuming thing is waiting for the pastry cream to cool down. I usually make my pastry cream a day ahead, just so it can be nice and cold when I get ready to fill the puffs.

Cream puffs are made with Pate a Choux dough. This dough is different from many batters because it uses steam for leavening, instead of chemical leavening like baking powder or baking soda or natural leavening like yeast. The high initial temperature helps create the steam, then the oven is lowered for the rest of the baking time.

Cream Puffs
adapted from culinary school recipes

Pastry Cream Ingredients:
 – 500 grams Whole Milk
 – 100 grams Granulated Sugar

 – 100 grams Egg Yolks
 – 100 grams Granulated Sugar
 – 40 grams Cornstarch
 – 75 grams Unsalted Butter
 – Seeds from 1 Vanilla Bean or 1 teaspoon Vanilla Bean Paste

Pastry Cream Directions:
 – In a stainless steel pot (not aluminum) heat Milk and first measure of Sugar until sugar is dissolved and the milk is hot but not boiling.
 – In a medium bowl, whisk together the Egg Yolks, Sugar and Cornstarch. Temper* milk mixture into yolk mixture.
 – Pour tempered egg mixture back into the pot and return to a boil, cooking about 2-3 minutes or until nappe**
 – Strain the pastry cream through a fine mesh sieve into the bowl of your stand mixer and beat on the lowest speed. Add in the Butter and Vanilla Bean Seeds or Paste after it has cooled for a few minutes.
 – Pour into a clean medium-sized bowl, cover with plastic wrap and allow it to cool to room temperature before storing in the refrigerator.
 – It is best to make this the day before the Pate a Choux, so it has time to fully chill.

Pate a Choux Ingredients:
 – 240 grams Whole Milk
 – 113 grams Unsalted Butter (1 stick)
 – 2 grams Sugar
 – 2 grams Salt
 – 110 grams All Purpose Flour
 – 225 grams Eggs
 – 1 Egg for egg wash
 – Powdered Sugar (optional)

Pate a Choux Directions:
 – Heat oven to 400F. Prepare sheet pans with parchment or silicone mats.
 – Bring the Milk and Butter to a boil. Add in Flour, Salt and Sugar and cook on medium-high, stirring constantly with a wooden spoon, until a paste is formed. The mixture should form a ball or leave a film on the bottom of the pot.
 – Remove from the heat and place in the bowl of your stand mixer with the paddle attachment. Beat on low for a minute then add in the eggs, one at a time, making sure the previous one is incorporated before adding the next one.
 – Once all the eggs have been added and the mixture is a bit cooler, put in a piping bag fitted with a large circle tip. Pipe small mounds on the sheet pans, trying to not create a point when lifting off. Using a pastry brush, or your fingers, brush the egg wash over the puffs, trying to make sure there is no point sticking up.
 – Bake at 400F for 5 minutes, then turn the oven down to 375F for the remaining time. It should take about 30 more minutes, or until the puffs are dry and golden brown.
 – Let them cool completely before filling. You can dust with Powdered Sugar or use a poured fondant or chocolate frosting. Enjoy

*Tempering: eggs are tempered when a hot liquid, usually milk, is slowly streamed into them, while whisking constantly, to bring the eggs up to a warm temperature without cooking them.
**Nappe: French term referring to a liquid “coating the back of a spoon”. With pastry cream, if you run your finger through the (hot) pastry cream on the back of a wooden spoon, the lines will stay separate.

Until next time,
LOVE & CONFECTIONS!

Filed Under: Pastries & Baked Goods, Uncategorized

Mini Lemon Meringue Tarts

March 26, 2014

I recently hosted a bridal shower for my sister, KB. It was a garden party theme with peonies and pearls. KB loves anything and everything pink, so that was the color scheme Mom and I went with. We had it at a gold club near my place. They did some fantastic food, but they do not provide dessert. I knew I was going to make the desserts for the party anyway, so that didn’t matter. I wanted to do a dessert buffet with a bunch of small desserts that everyone would enjoy.

I planned a total of 5 desserts plus the favor was cake in a jar. I am lucky that I have such great friends to help me out. Denny made the mini tart shells for me, which helped out a lot since my 3-month old has been a bit cranky lately


Mini Lemon Meringue Tarts
a Love and Confections original

Mini Lemon Meringue Tart Ingredients:
 – Tart Shell Recipe
 – Box Mix Lemon Pudding and Whole Milk as directed
 – 100 grams Egg Whites
 – 200 grams Granulated Sugar

Mini Lemon Meringue Tarts Directions:
 – Prepare Tart Shells
 – Prepare Lemon Pudding as directed on box for pie
 – In the bowl of your stand mixer, make a double boiler, heat the Egg Whites and Granulated Sugar, whisking constantly and until the mixture is warm and the sugar has dissolved. Make sure the water does not touch the bottom of the mixing bowl.
 – Place a piece of foil around the opening of the mixing bowl to trap the warm air. Egg whites whip better when warm, hence the double boiler. Using the whip attachment, whip on high until you have stiff peaks.
 – Pipe onto filled tarts using a star tip just before serving. With a blow torch, toast the tops. Enjoy

Until next time,
LOVE & CONFECTIONS!

Filed Under: Pies-Tarts-Crostatas, Uncategorized

Overnight Chocolate Chia Seed Pudding

March 24, 2014

 So I jumped on the Chia bandwagon and am trying it out. They’re all the rage right now and all over the internet – it’s like the new bacon or kale. You can eat it as it, hydrate it or bake with it.

Chia seeds have a bunch of health benefits too. They are full of Omega-3 fatty acids, fiber, antioxidants, calcium, protein and they are being studied to help regulate blood sugar to name a few.

I’m still on the fence about them, though. They don’t have much taste and feel like a toothy tapioca when made into a pudding. I have a whole bag so I’m definitely going to experiment some more.

Overnight Chocolate Chia Seed Pudding
a Love and Confections original, inspired by a bunch of recipes online

Overnight Chocolate Chia Seed Pudding Ingredients:
 – 1/2 cup Whole Milk (you can use Coconut or Almond Milk also)
 – 1 tablespoon Honey
 – 1 teaspoon Vanilla Extract
 – 1.5 tablespoons Chia Seeds
 – 1/2 tablespoon Cocoa Powder

Overnight Chocolate Chia Seed Pudding:
 – Place all ingredients in a jar with a tight fitting lid and whisk together or shake to combine. Refrigerate overnight. Stir before eating. Enjoy

Until next time,
LOVE & CONFECTIONS!

Filed Under: Breakfast & Brunch, Trifles-Parfaits-Mousses-Curds, Uncategorized

Mini Walnut Soda Bread

March 7, 2014

This is a little twist on the traditional Irish Soda Bread. I love the flavor the molasses gives to the bread and the crunch from walnuts is always a great addition. It is slightly sweet from the dark brown sugar and perfect warm, right out of the oven, with some butter and strawberry jam. I bet this would even be great with some cream cheese – tangy, sweet, nutty – I need to try that next!

A bench scraper and bowl scraper are great tools for working with bread. I always keep them handy for scraping dough and batters out of bowls and also for cleaning up my work area. Some doughs, like this one, are very sticky and require more clean-up than others. I definitely recommend getting some if you want to work with dough – they make it easier.

Mini Walnut Soda Bread
adapted from Epicurious

Mini Walnut Soda Bread Ingredients:
 – 3 & 1/4 cups All Purpose Flour, plus more for dusting
 – 1/4 cup Dark Brown Sugar, packed
 – 1 teaspoon Baking Soda
 – 1 teaspoon Salt
 – 1/4 cup Unsalted Butter, chilled and cut into small pieces
 – 1 cup Walnuts, toasted and chopped
 – 1 cup Buttermilk, chilled
 – 1 large Egg
 – 2 tablespoons Molasses

Mini Walnut Soda Bread Directions:
 – Heat oven to 375F and lightly flour a half sheet pan. Toast Walnuts for about 5 minutes in the oven while it is almost to temp.
 – In a large bowl, whisk together the Flour, Dark Brown Sugar, Baking Soda and Salt.
 – Using a pastry blender, knife or your hands, cut the butter into the flour mixture until it resembles a coarse meal. Mix in toasted Walnuts.
 – Whisk together Buttermilk, Egg and Molasses in a measuring cup, then slowly add it into the flour mixture while stirring until it comes together to form a medium-to-firm dough.
 – The dough will be soft and sticky. Turn it out onto a floured surface and knead the dough until it comes together, adding a bit of flour if it is too sticky. Flatten the dough into a small disk and cut it into 4 to 6 equal parts.
 – Take each piece, roll into a ball, place on the half sheet, flatten and using a sharp knife cut a cross into the top of each mini loaf.
 – Bake for about 25-30 minutes, until golden brown and a tester inserted comes out clean. Cool on a wire rack. Serve warm or room temperature. Enjoy!

Until next time,
LOVE & CONFECTIONS!

Filed Under: Holiday, Quick Breads-Muffins-Scones, Uncategorized

Lemon Yogurt Mardi Gras Cake

March 2, 2014

Mardi Gras is just around the corner. I didn’t have time to make a king cake this year. Baby L&C doesn’t nap long enough for me to work with yeast breads right now. Quick breads, on the other hand, are perfect. I saw this recipe on TV the other day and knew I wanted to make it, but with my own twist.

I love anything lemon – just like my Mom. Lemons are so bright and refreshing and my favorite, second to the Key Lime, of course. This cake can easily be adapted to all kinds of citrus: Key Limes, Oranges, Grapefruit.

Lemon Yogurt Mardi Gras Cake
adapted from Ina Garten

Lemon Yogurt Cake Ingredients:
 – 1 & 1/2 cups All-Purpose Flour
 – 2 teaspoons Baking Powder
 – 1/2 teaspoon Salt
 – 1 cup Greek Lemon Yogurt (I used Stonyfield Organic)
 – 1 cup Granulated Sugar
 – 3 large Eggs
 – 2 teaspoons Lemon Zest (from one large Lemon)
 – 1/2 teaspoon Vanilla Extract
 – 1/2 cup Vegetable Oil

Lemon Glaze:
 – 1/3 cup granulated Sugar
 – 1/3 cup freshly squeezed Lemon Juice (from one large Lemon)

Lemon Mardi Gras Frosting:
 – 1 cup Powdered Sugar
 – 2-3 tablespoons freshly squeezed Lemon Juice
 – Green, Yellow and Purple Food Coloring

Lemon Yogurt Cake Directions:
 – Heat oven to 350F. Line an 8.5 inch loaf pan with parchment paper, then grease it with baking spray or butter/shortening and flour.
 – In a medium bowl, sift together the Flour, Baking Powder and Salt.
 – In another medium bowl, whisk together the Yogurt, Sugar, Eggs, Lemon Zest and Vanilla. While whisking, slowly add the dry ingredients into to wet mixture.
 – Using a spatula, stir/fold the oil into the batter.
 – Pour into prepared pan and bake for 50 minutes, or until a toothpick comes out clean.

For the Lemon Glaze: 
 – Cook the second measure of Sugar and the Lemon Juice in a small saucepan on the stove, until the sugar dissolves. Set aside

 – When the cake is done, let it cool in its pan for 10 minutes, then place on a cooling rack over a parchment lined baking sheet. Poke some small holes into the cake and pour the Glaze over the warm cake. Let the cake cool completely

For the Lemon Mardi Gras Frosting: 
 – Combine the Powdered Sugar and Lemon Juice in a bowl. Separate into three small bowls and add Food Coloring. Drizzle over cooled cake. Enjoy

Until next time,
LOVE & CONFECTIONS!

Disclaimer: I was not compensated for using any products mentioned. All opinions are my own.

Filed Under: Holiday, Quick Breads-Muffins-Scones, Uncategorized

Coconut Macaroons

February 28, 2014

With all the coconut baking in my kitchen, it might as well be coconut week. This is one of those recipes that I have made hundreds of times, yet have never actually posted it. Why? Because they get eaten before I can actually get a good picture. I don’t like when that happens, but it means these are really good!

As a bonus, this recipe is really easy and fast (yay for nap-time baking!) With only three ingredients, there is no reason you can’t whip up a batch yourself. This recipe varies from traditional coconut macaroons because I don’t use sweetened condensed milk. Sometimes it makes the macaroons too runny and gloppy – I prefer a thicker and sturdier cookie.

Coconut Macaroons

a Love and Confections original recipe
yield approx. 18 cookies
Coconut Macaroon Ingredients:
 – 400 grams sweetened flaked Coconut (1 bag)
 – 250 grams Granulated Sugar
 – 90 grams Egg Whites (3 egg whites)
 – 50 grams Whole Egg (1 whole egg)
Coconut Macaroon Directions:
 – Heat oven to 325F. Line 2 half-sheet pans with parchment paper.
 – In medium bowl, combine the Coconut and Sugar. Mix together to ensure there are no clumps. 
 – In a separate small bowl, whisk together the Egg Whites and the Whole Egg. Pour into the coconut and sugar mixture
 – Using your hands, I usually wear gloves because it gets sticky, mix the eggs and coconut together. 
 – With a medium scoop, I use a black #30 disher that is about 1.25 ounces, scoop onto cookie sheet and bake for 20 minutes, rotating halfway through. 
 – Let cool and eat immediately or store in an airtight container for 3 days.
Until next time,
LOVE & CONFECTIONS!

Filed Under: Cookies, Uncategorized

German Chocolate Cookies

February 20, 2014

German Chocolate Cookies are sure to be a hit in your house. The cookie is topped with a homemade Coconut-Pecan Frosting that is amazing!

I don’t really like coconut, but I have bags of it in my apartment. Why? because both Mr. L&C and my Dad love the stuff. I prefer it fried on top of shrimp. That’s really the only way I eat it. Once in a blue moon I get a craving for German Chocolate Cake. Not so much for the cake part, but for the rich, gooey Coconut-Pecan Frosting.

I didn’t feel like making a whole cake, and with a 2 month old my baking time in the kitchen has greatly diminished. This recipe is fast and easy that anyone can do it – especially during nap-time! The cookies have a great texture, because I used a box mix cake. If you happen to be one of those people who will inevitably judge me for using cake mix, then stop reading now.

I love box mixes. They make life a little easier. I only use Duncan Hines and honestly think it’s the best one out there. As a pastry chef, who made tons of scratch items at work, sometimes you just want a box mix at home. I know many professionals who use box mixes at home, even an executive pastry chef of a high end hotel. It’s consistent and delicious, and you can do so much with a mix, like make these cookies.

German Chocolate Cookies
Frosting adapted from a culinary school recipe
makes approx. 18 large cookies

German Chocolate Cookie Ingredients:
– 1 box German Chocolate Cake Mix
– 2 large eggs, room temperature
– 1/4 cup vegetable oil

German Chocolate Cookie Directions:
1. heat oven to 350F.
2. Combine all ingredients in a medium-sized mixing bowl. Using a medium cookie scoop, place on a baking mat lined cookie sheet, flatten slightly and bake for 10-14 minutes. Cookies will spread so do not put more than 12 per baking sheet. These make rather large cookies, so you can use a smaller scoop and bake for slightly less time.
3. Allow to cool on a wire rack before frosting.

Coconut-Pecan Frosting Ingredients:
– 240 grams Evaporated Milk
– 240 grams Granulated Sugar
– 60 grams Egg Yolks (about 4 large yolks)
– 113 grams Unsalted Butter (one stick)
– 5 milliliters Vanilla Extract (one teaspoon)
– 125 grams Coconut, flaked
– 125 grams Pecans, Chopped

Coconut-Pecan Frosting Directions:
1. Combine Milk, Sugar, Egg Yolks and Butter in saucepan on medium heat
2. Cook until it thickens, stirring/whisking constantly, about 10 minutes or until it reaches 210F.
3. Strain through a sieve into the bowl of your stand mixer, to make sure there are no scrambled egg pieces in the frosting.
4. Once in stand mixer, add Vanilla Extract, Coconut and Pecans
5. Beat until cool and spreadable. Best when used immediately, or you can store in the refrigerator for up to three days. Enjoy!

Until next time,
LOVE & CONFECTIONS!

Disclaimer: I was neither compensated nor asked to write about products mentioned. All opinions are my own.

Filed Under: Cookies, Uncategorized

Happy 4th Blogiversary to Me!

February 6, 2014

I can’t believe I have been blogging for 4 years! A lot has happened since I started the blog. I graduated from culinary school, worked in a few bakeries, attended a few blogging conferences and had a baby. My photography has improved – and I am always working on taking better photos. With a newborn, it is difficult to do some baking, and of course, this day snuck up on me, so I thought I would share some of my favorite recipes from the past 4 years. Enjoy!

Almond Croissants

Berry Parfaits

Melt-In-Your-Mouth Pumpkin Cookies

Blueberry Squares

Key Lime Cupcakes

Raspberry Crumb Bars
Until next time,
LOVE & CONFECTIONS!

Filed Under: Uncategorized

  • « Go to Previous Page
  • Page 1
  • Interim pages omitted …
  • Page 35
  • Page 36
  • Page 37
  • Page 38
  • Page 39
  • Interim pages omitted …
  • Page 46
  • Go to Next Page »

Primary Sidebar

Meet Terri
founder & pastry chef

Subscribe to Love and Confections

Popular Posts

Pumpkin Pecan Cupcakes with Cinnamon Cream Cheese Frosting
Pumpkin Spice Cinnamon Roll Cake
Oatmeal Cream Pie Layer Cake - oatmeal brown sugar layer cake, marshmallow frosting filling, and vanilla bean buttercream with oatmeal cream pie garnish
Easy Piña Colada Poke Cake - pineapple cake, coconut cream pudding, whipped topping, pineapple chunks and maraschino cherries
Mermaid layer cake
PIneapple cake with pineapple curd, teal frosting and tropical sprinkle mix
Irish Cream chocolate cupcakes topped with white and green buttercream piping and shamrock sprinkle mix

AMAZON AFFILIATE

Love and Confections is a participant in the Amazon Services LLC Associates Program, an affiliate advertising program designed to provide a means for sites to earn advertising fees by advertising and linking to amazon.com.

Copyright © 2018 Love and Confections · Log in